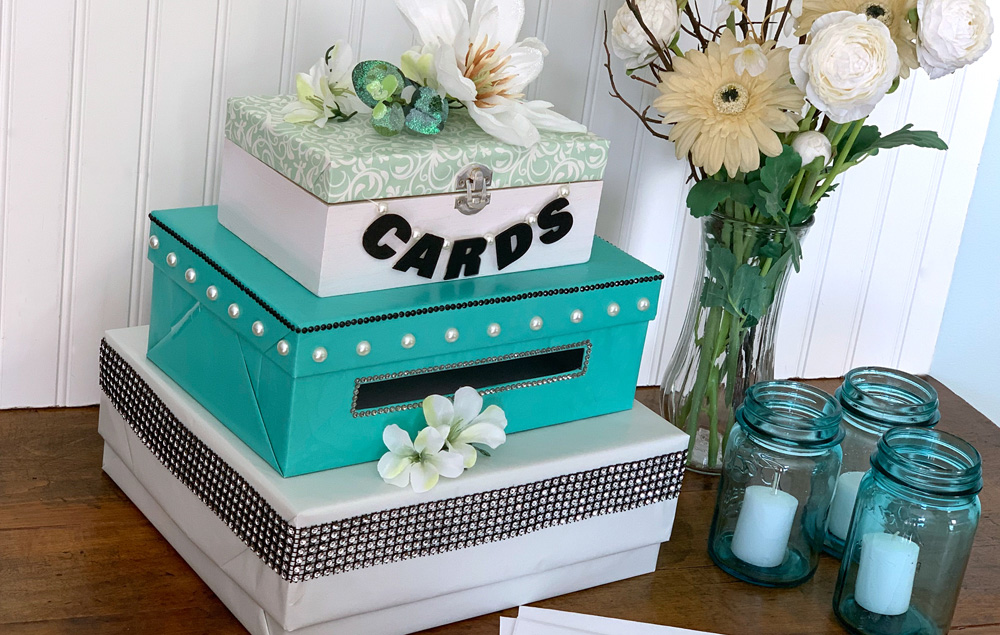
This DIY wedding card box will elegantly fit with your wedding décor. Follow these tips with your own wedding color palette!
Step 1:
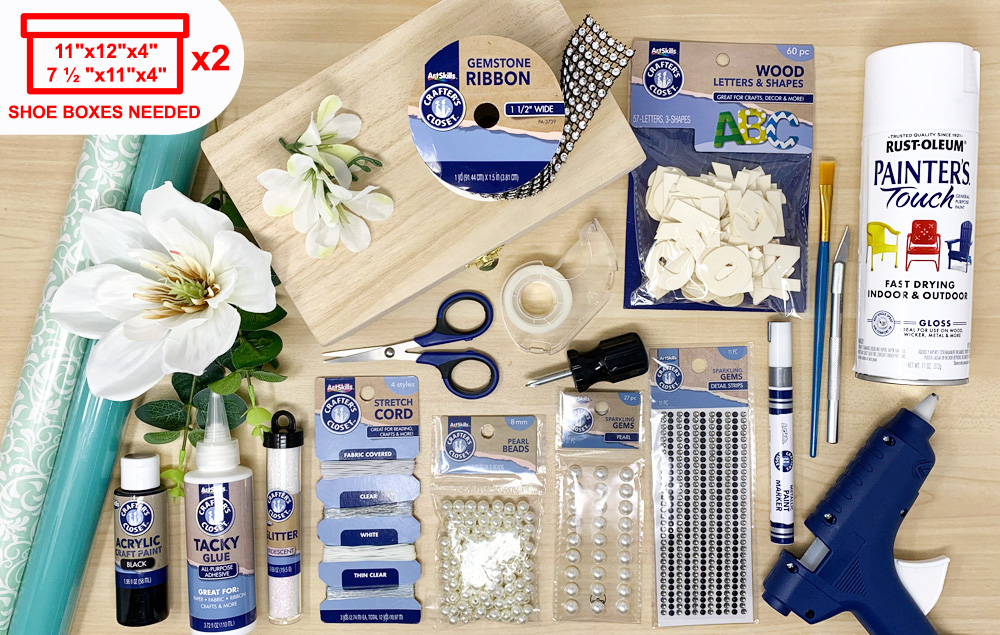
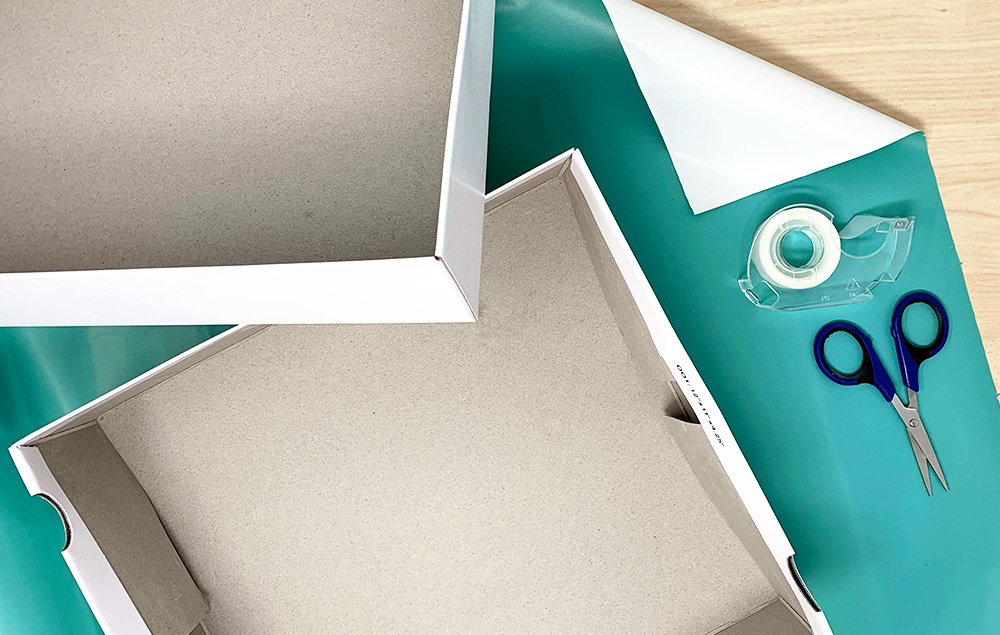
A) Repurpose a shoe box for the biggest bottom box. The box used in this example is 11"x12"x4". Take the wrapping paper and flip it over so the white is facing outward. Tip: Change the color paper to match your wedding décor.
Step 2:
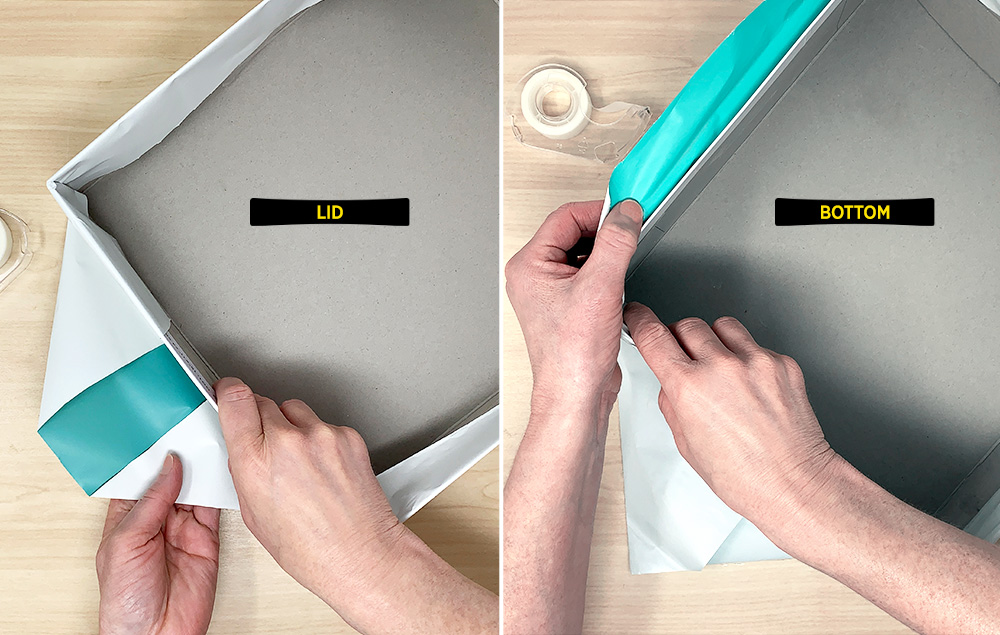
A) Wrap the top half of the shoe box. Fold in the paper flaps on the sides of the box and tape inside the box.
B) Repeat for the bottom half of the shoe box.
Step 3:
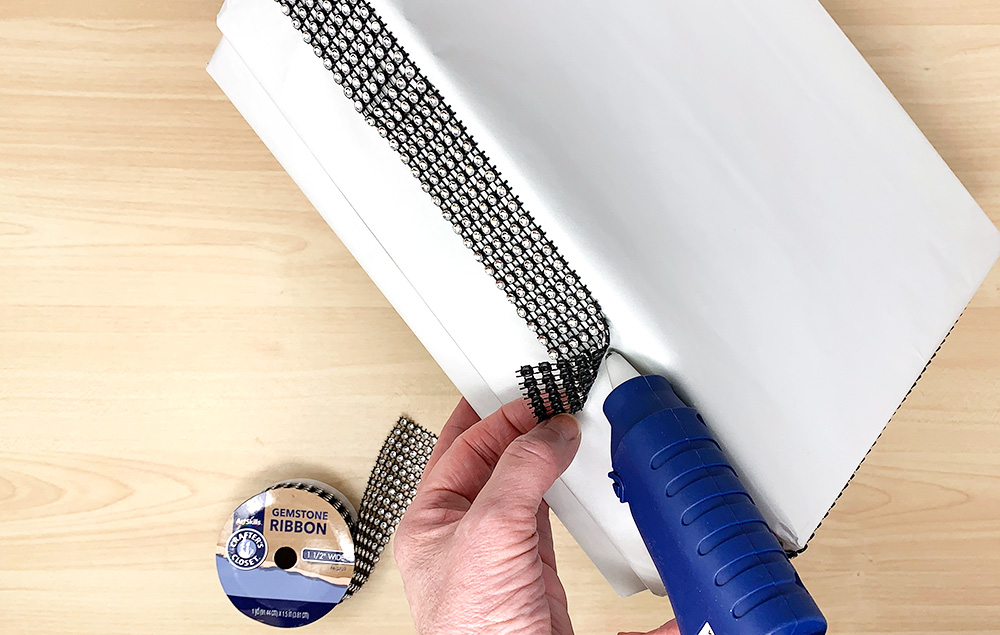
A) Place the lid on the box. Hot glue the gemstone ribbon to the upper edge of the box lid, wrapping it around all four sides.
Step 1:
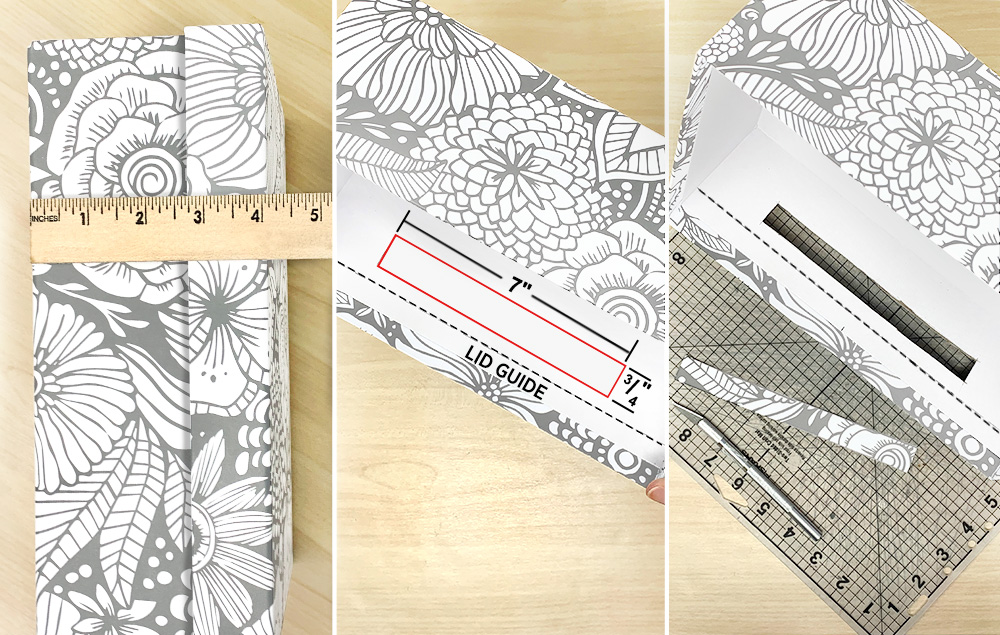
A) Use a medium-sized box for the middle section of the tower. The box used in this craft is 7 ½"x11"x4". Measure the depth of lid. Make note of where the bottom of the lid ends, you will need this measurement for the next step.
B) Remove the lid and turn the box on its side. Mark where the bottom of the lid meets the box (this is the measurement taken in the last step). Draw a line as a guide. Draw a rectangle measuring 7" wide by ¾" high about ½” below your lid guideline. This will be your slot opening.
C) Cut out the slot with a project knife.
Step 2:
A) Wrap the lid of the middle box with wrapping paper, color facing out this time.
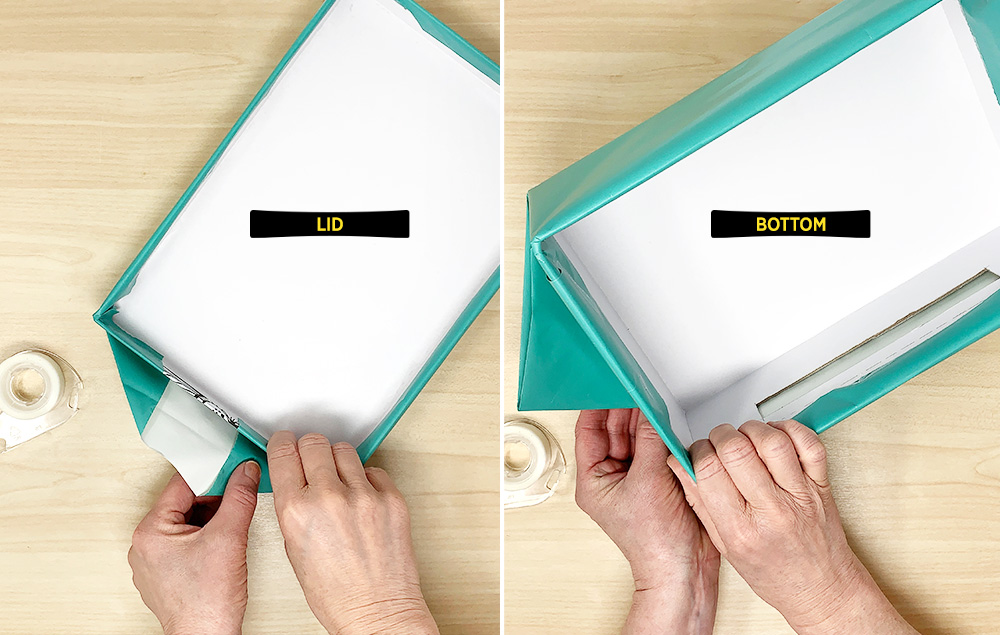
B) Wrap the bottom of the middle box with colored wrapping paper, covering the slot.
Step 3:
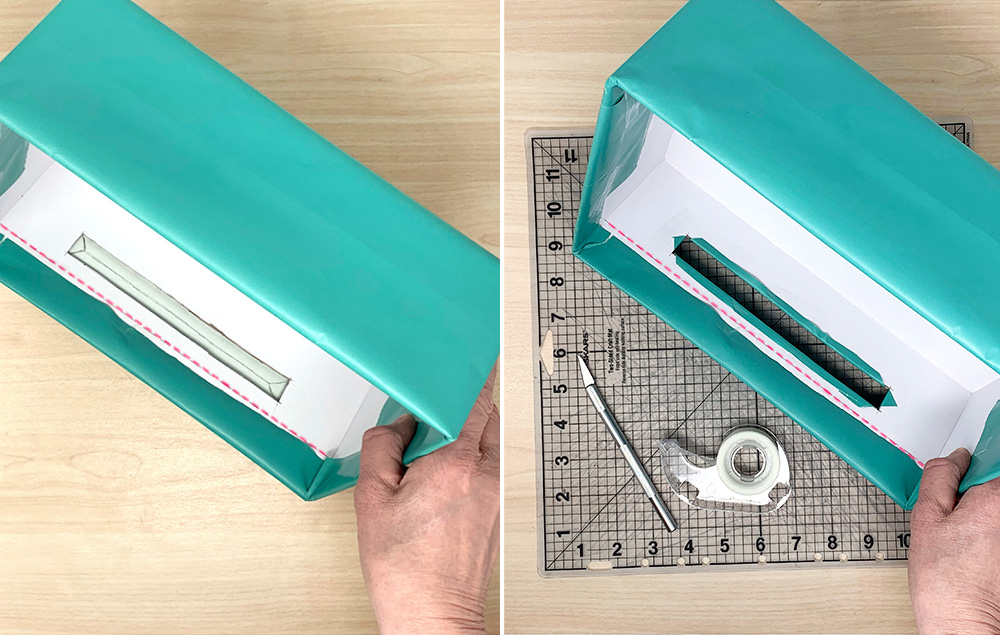
A) From the inside of the box, draw two triangles and a connecting line (will act as guides for step B) on the wrapping paper that is exposed in the slot. This will help you fold in the wrapping paper when cut.
B) Use a project knife and cut the wrapping paper along your guides from step A, fold them in, and tape them to the inside of the box.
Step 4:
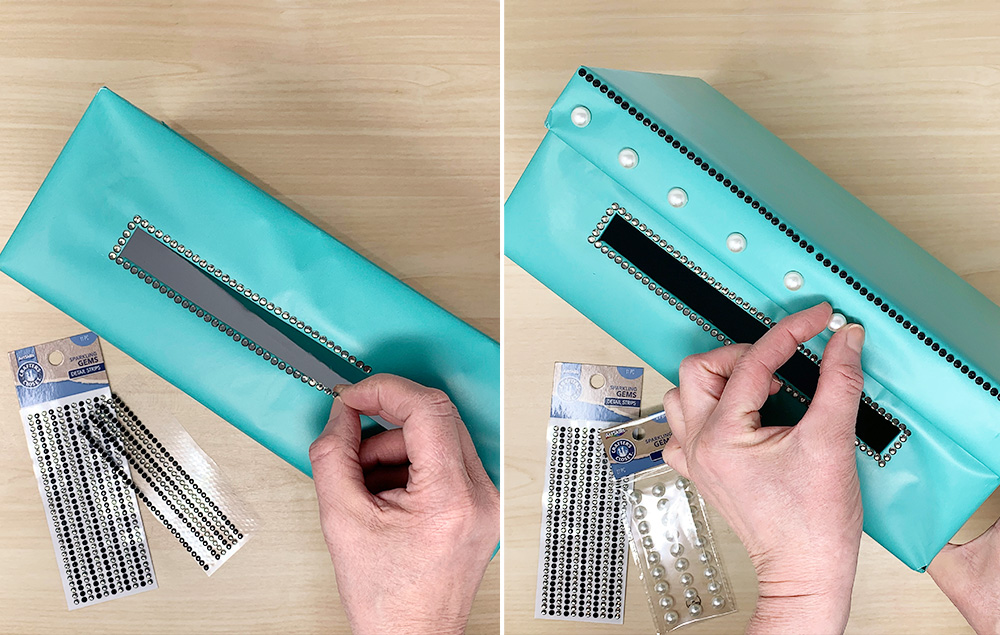
A) Let’s decorate! Use the gemstone detail strips to line the edge of the slot.
B) Decorate the lid with gem pearls along the center and gemstone detail strips along the top edge.
Step 1:
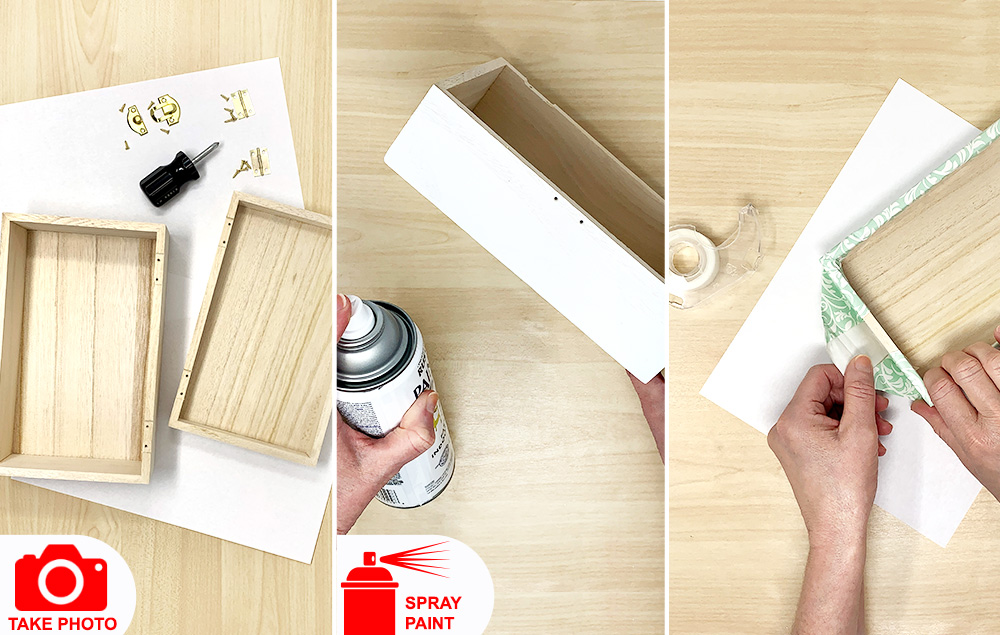
A) For the top box, use the Crafter’s Closet Wood Box. Disassemble the box hinges and latch. Tip: Take a photo of the box before disassembling to use as a guide when reassembling it.
B) Spray paint the bottom of the box.
C) Wrap the lid of the box with wrapping paper. Fold in paper flaps and tape on the inside of the lid.
Step 2:
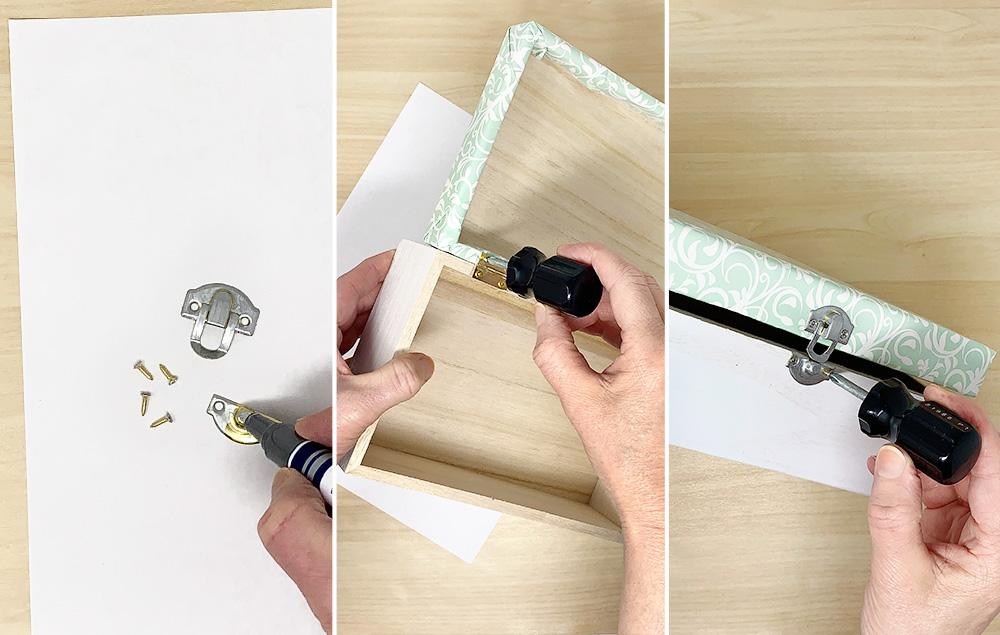
A) To accent your box for a consistent color palette, paint the gold latch with a metallic silver paint marker. Let dry.
B) Reassemble the box by screwing on the hinges to reattach the lid, screwing right through the applied wrapping paper.
C) Reattach the latch on the front of the box, again screwing right through the applied wrapping paper.
Step 3:
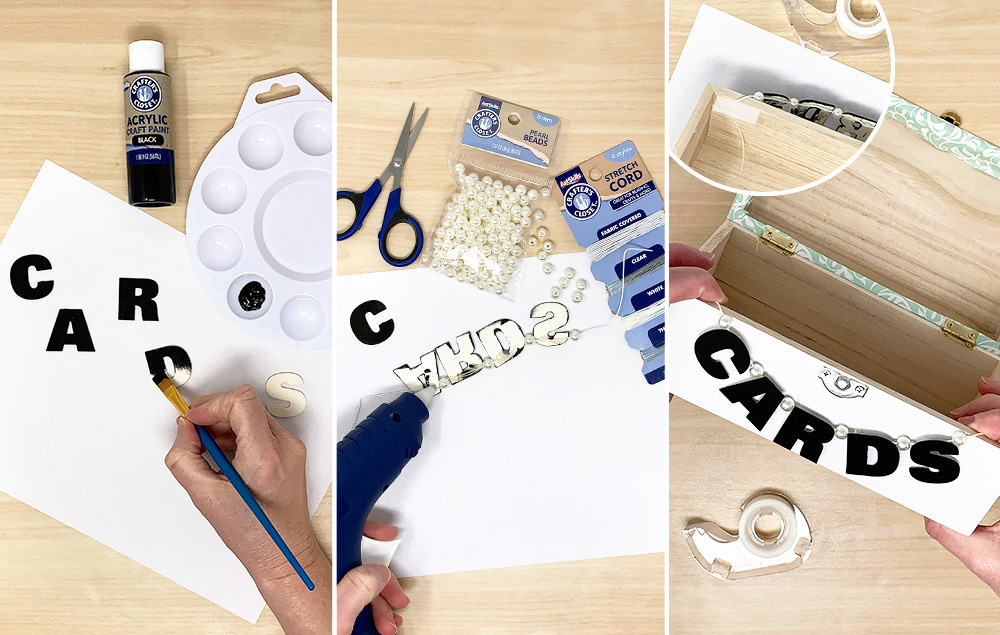
A) Let’s decorate some more! Use wooden letters that spell out the word “cards”. Paint these with black acrylic paint. Let dry.
B) Flip the letters over. String 5 pearl beads onto a clear cord. Lay the beaded cord along the back of the letters, adjusting the spacing of the beads so that one falls before and after each letter. Hot glue the cord onto the backs of the letters.
C) Hang the string of letters on the front of the box. Tape the cords to the inside of the box.
Step 4:
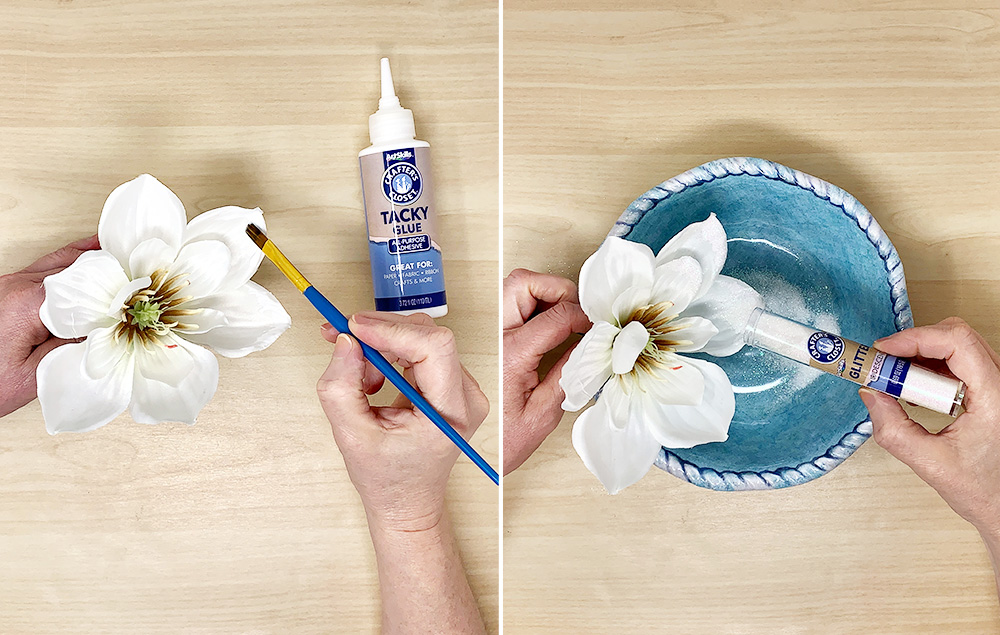
A) Use faux flowers to add some elegance! Tacky glue the edges of the flower.
B) Sprinkle glitter over the glued areas for some extra sparkle. Let dry. Repeat with greenery from the flowers, if desired. This will give the leaves a matching blue hue!
Step 5:
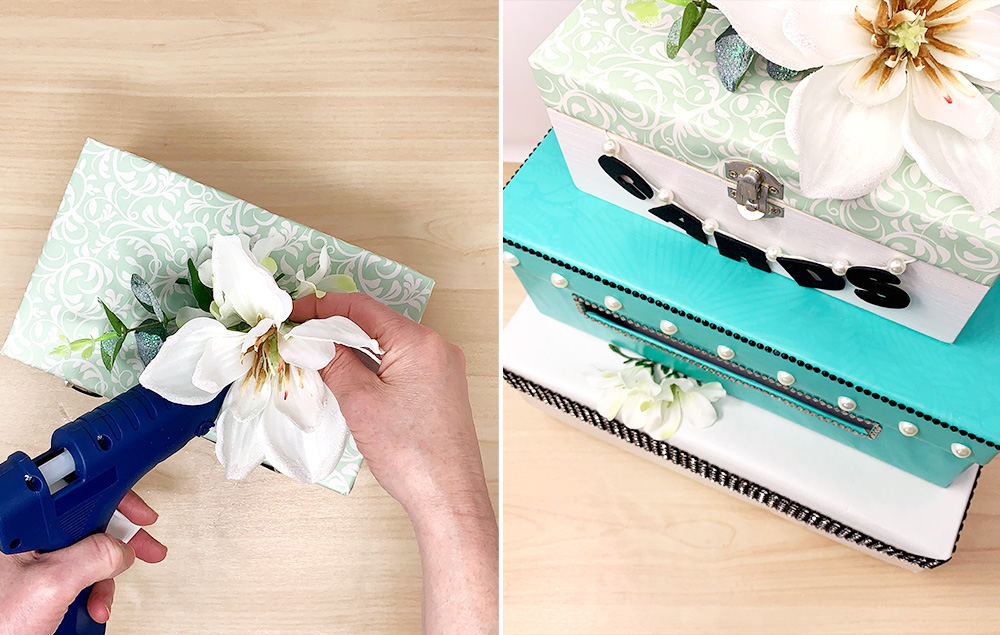
A) Hot glue the greenery and flower to the top of the box.
B) Accent the bottom box with other smaller flowers.
