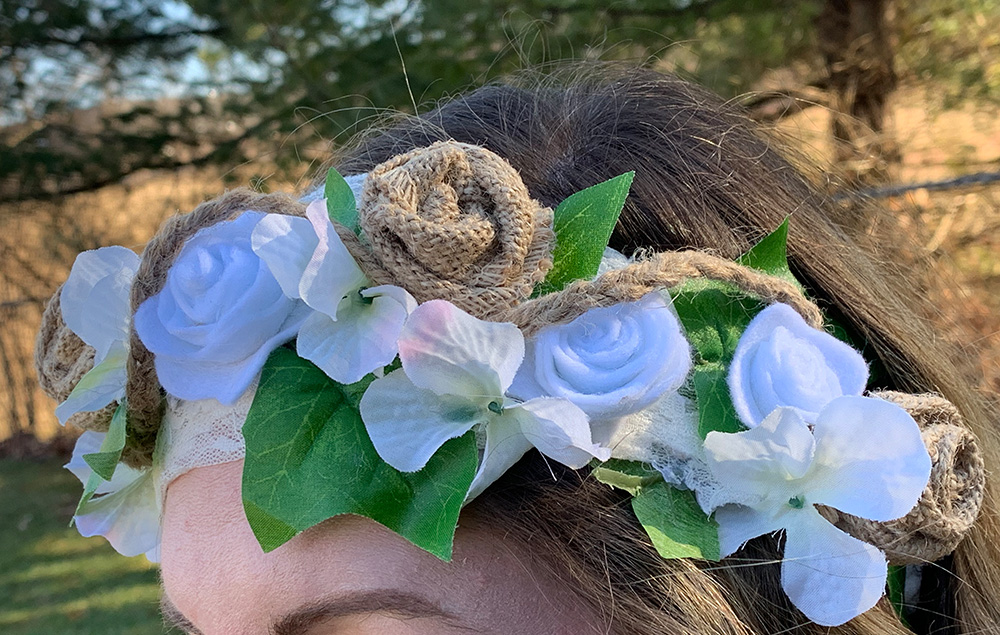
This rustic floral headband gets you ready for the spring weather!
Step 1:
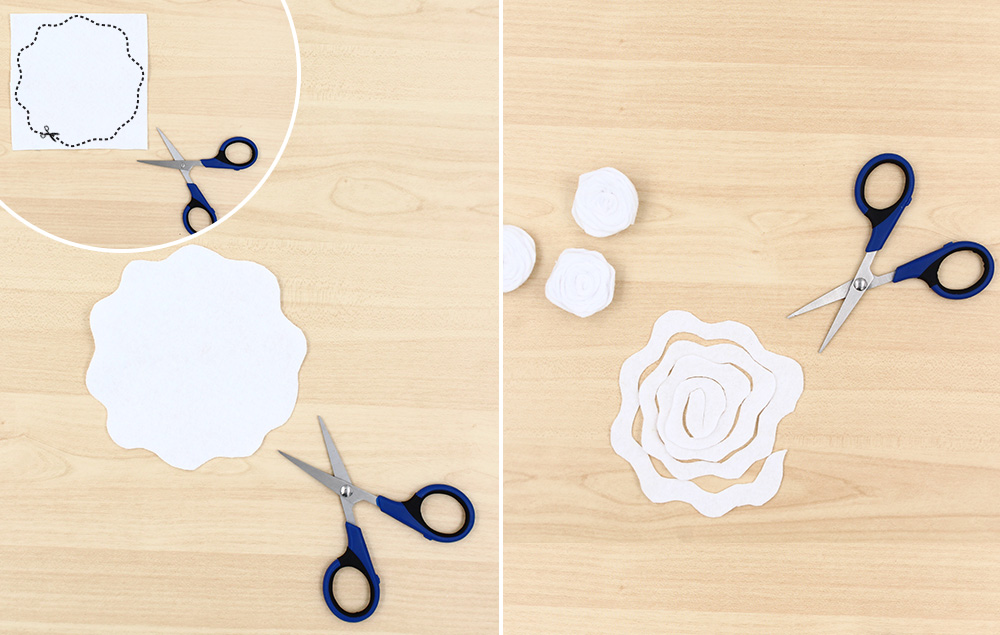
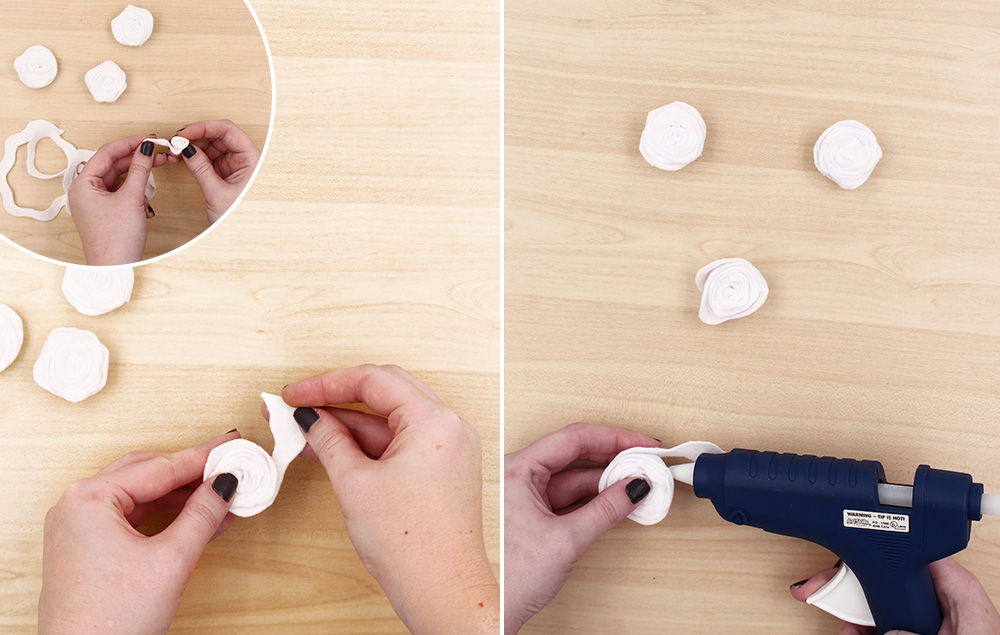
A) To make the felt flowers: Cut five white felt squares ranging from 3" to 5".
B) Cut a wavy line around the outside of the squares.
Step 2:
A) Cut a wavy path spiraling in on each felt piece until you reach the center, making a long strip.
B) Starting at the inside, roll the strips towards the outside to create the flower shape. The edge will be uneven, but that gives the flowers dimension.
C) When you get to the end, save a small section for the base of the flower.
D) Apply hot glue to the felt base and adhere it to the bottom of the flower to hold the flower together.
Step 3:
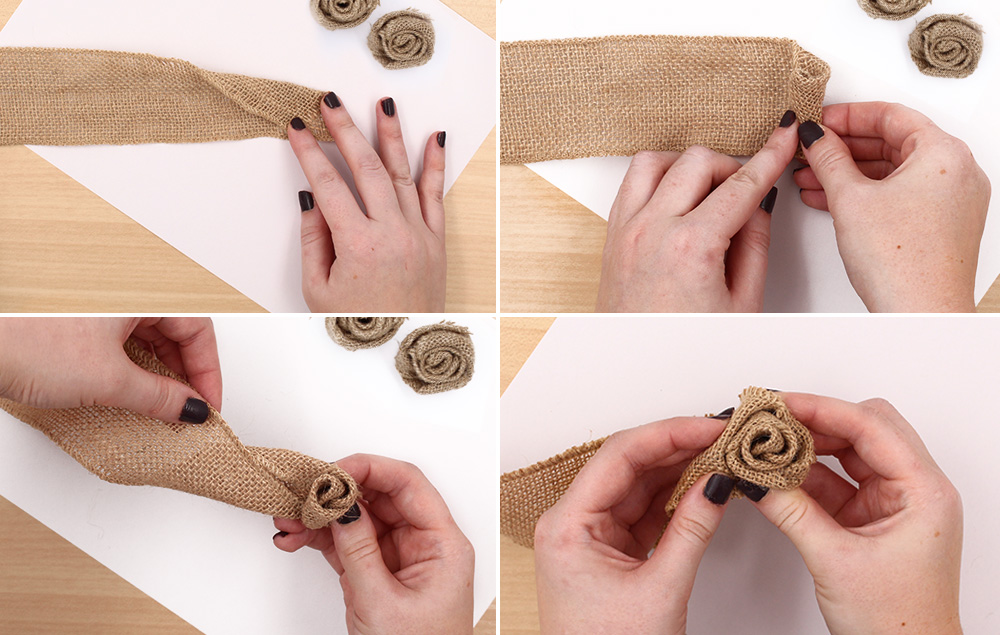
A) To make the burlap flowers: Fold the top of the burlap strip down at an angle to meet the bottom.
B) Start rolling the burlap inward to make the center of the flower.
C) After passing the original angled fold, start twisting the burlap away from yourself as you roll.
D) Continue twisting and rolling until you reach the size of the flower that you want. Cut, and then hot glue the loose end to the flower to hold the shape together.
Step 4:
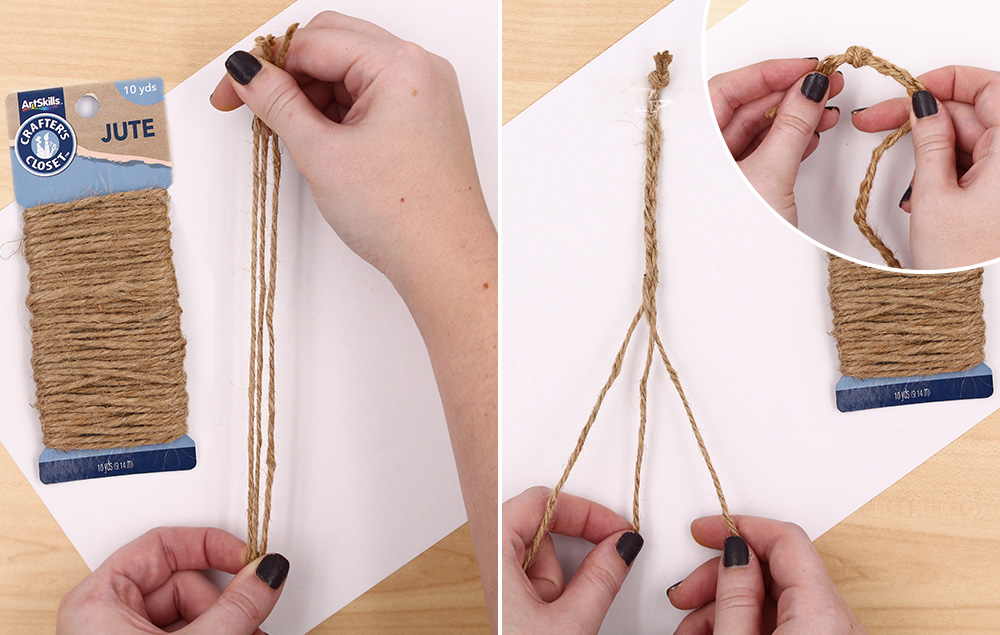
A) To make jute braid: Cut three 12" strands of jute.
B) Tie a knot, then begin to braid the jute. Knot again at the end. Tip: Tape the jute to a table to make it easier to braid.
Step 5:
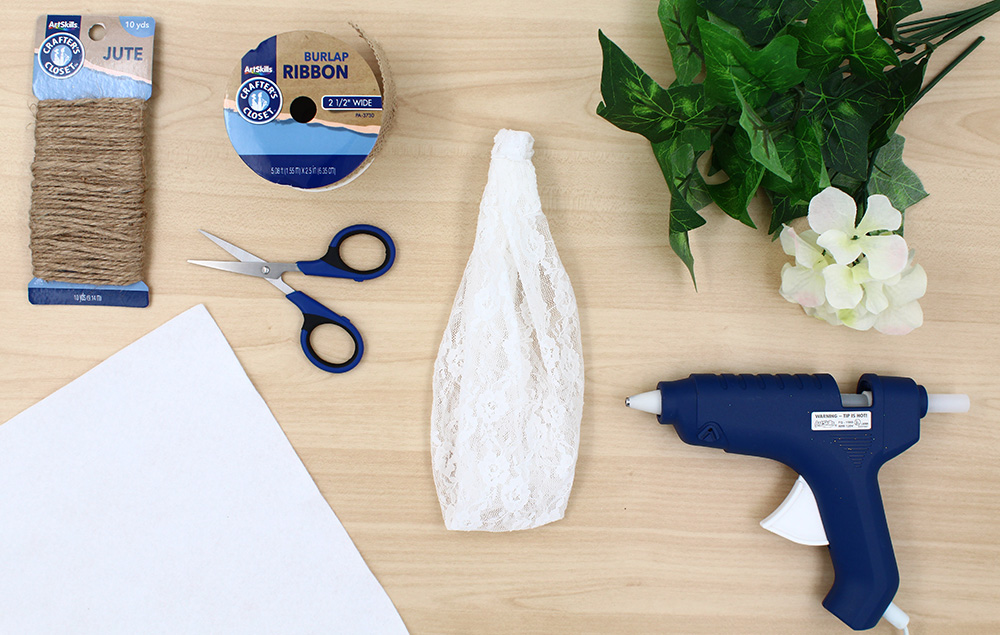
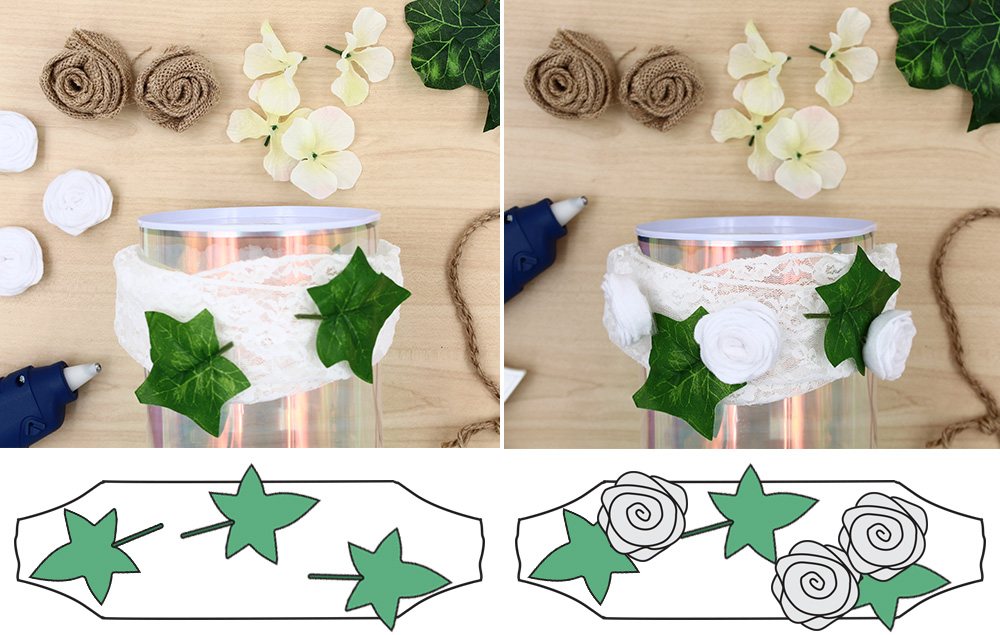
Complete the headband by adding the white felt flowers, the burlap flowers, and some additional silk flowers and leaves to the existing headband. Weave the jute braid throughout the flowers and adhere where it tucks under the flowers. Tip: Place the headband on a larger can during assembly. This will help hold the rounded shape and make it easier to attach the flowers.
