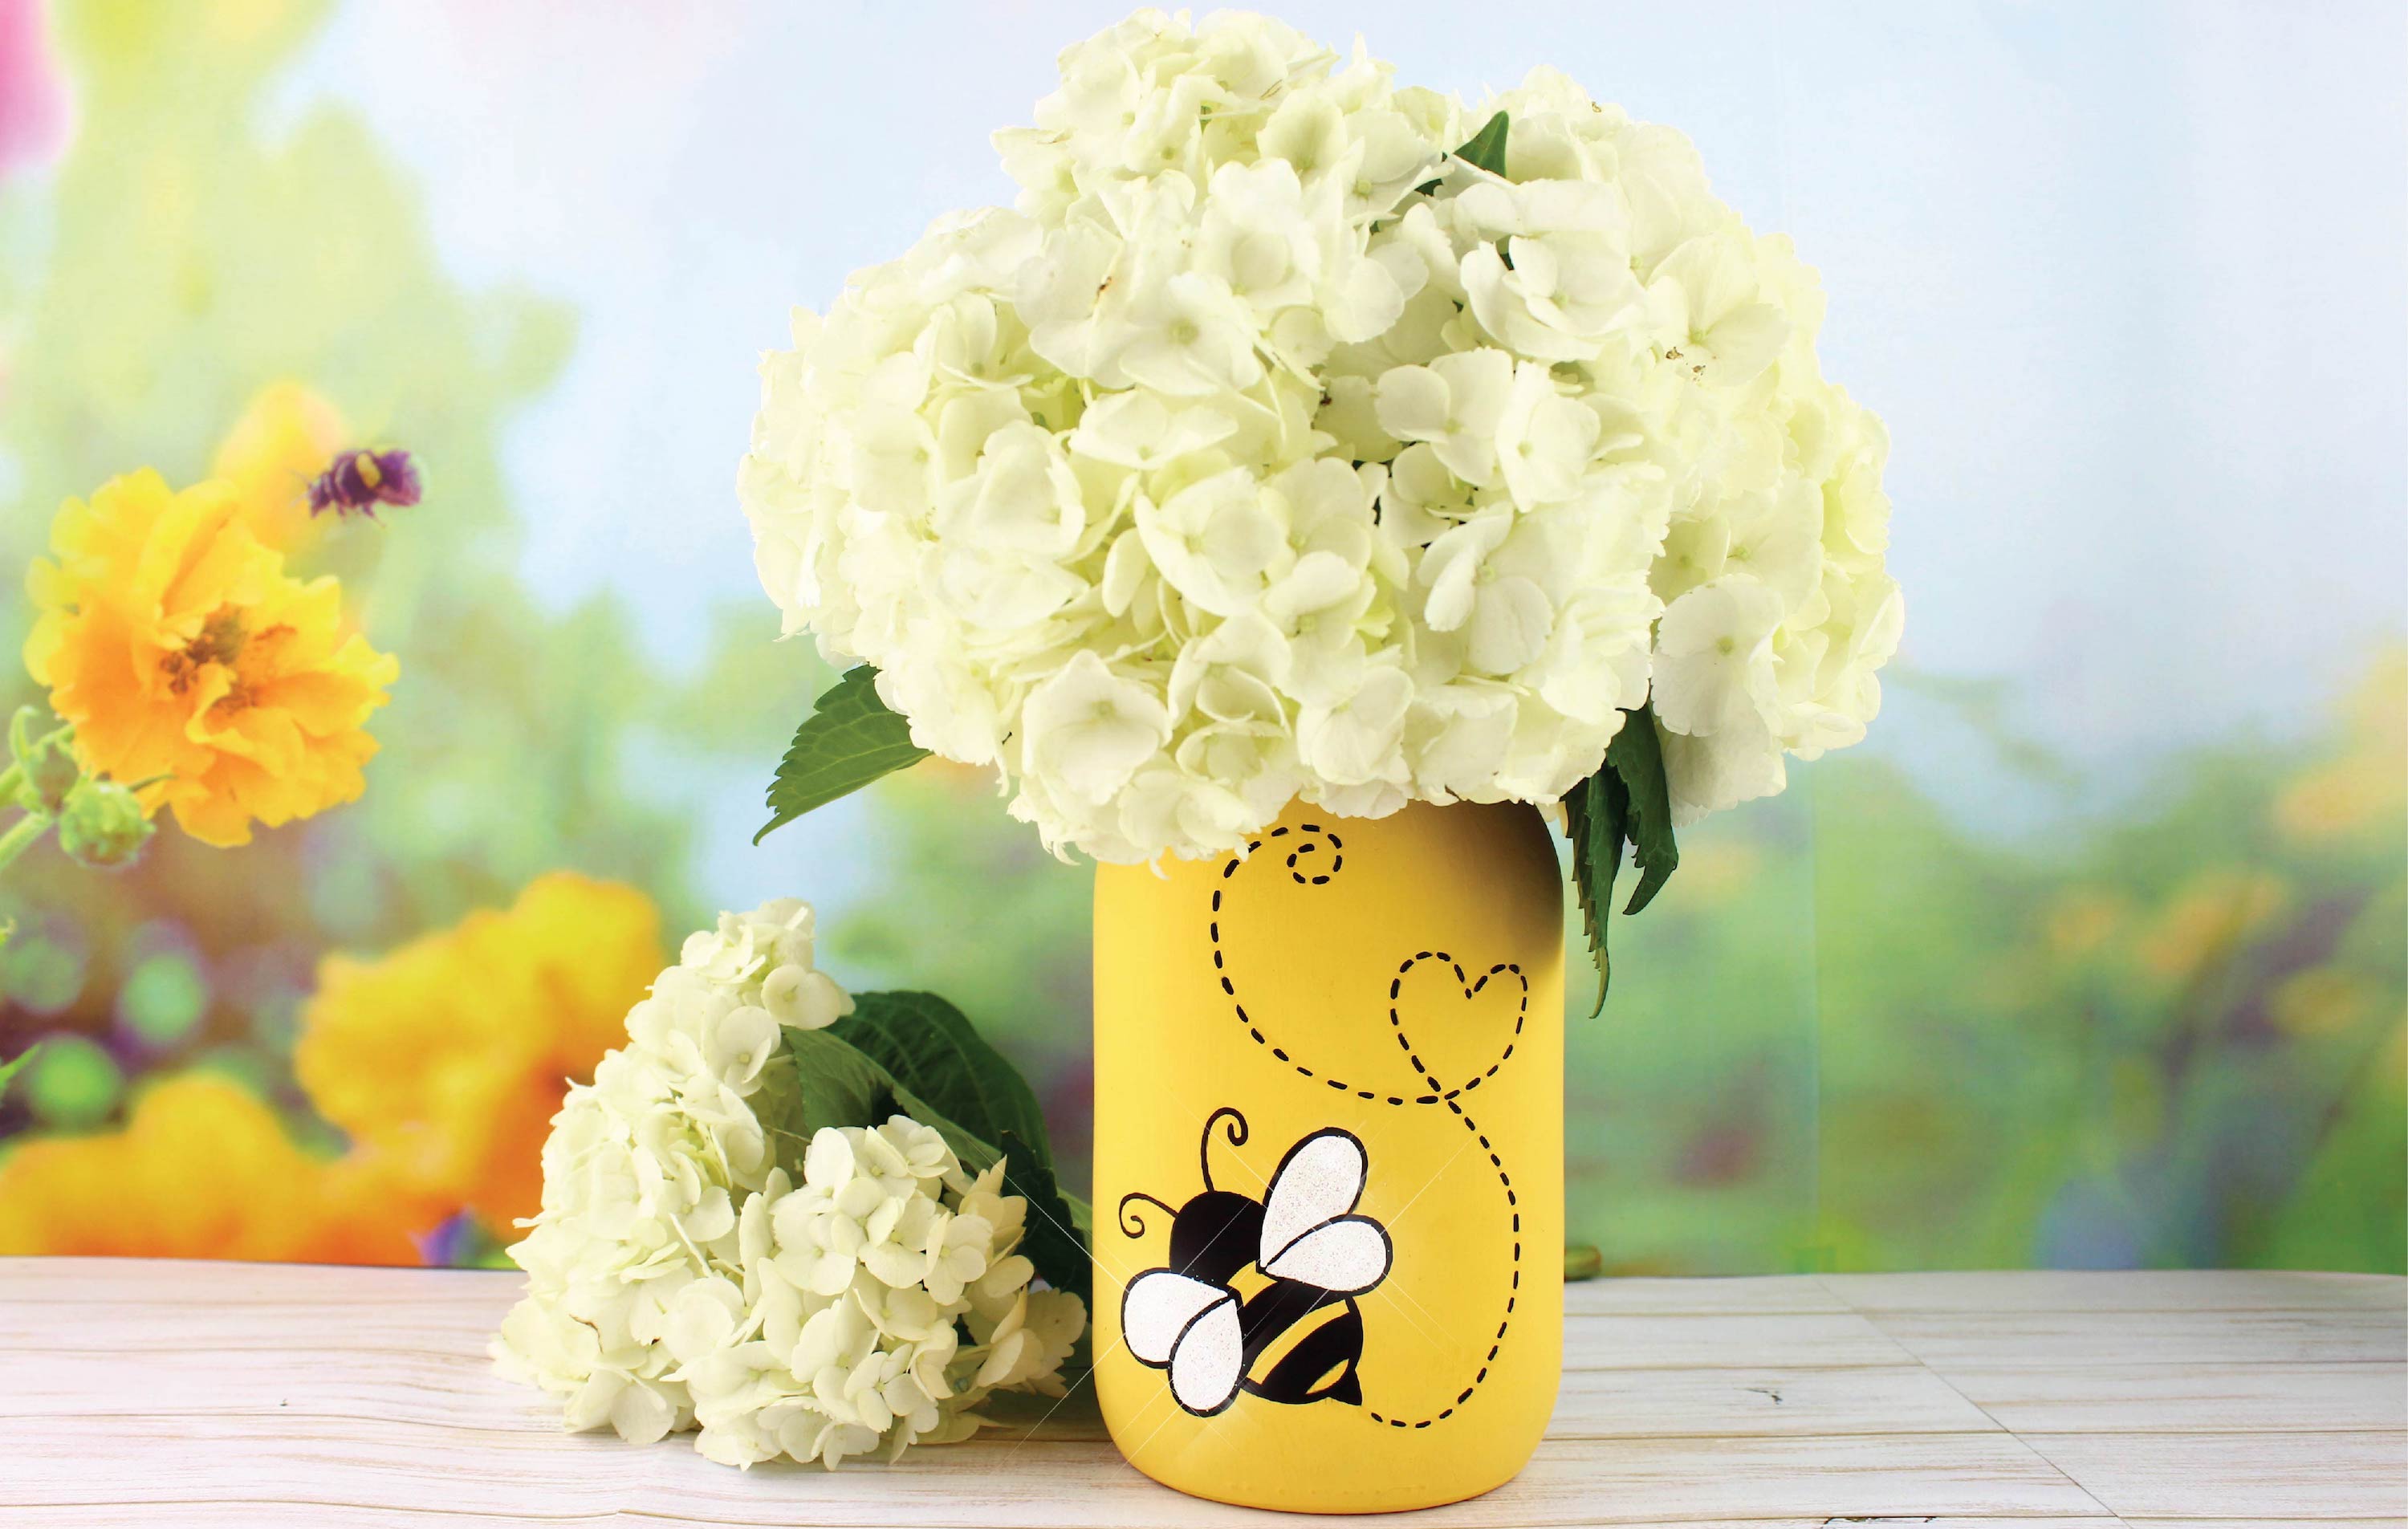
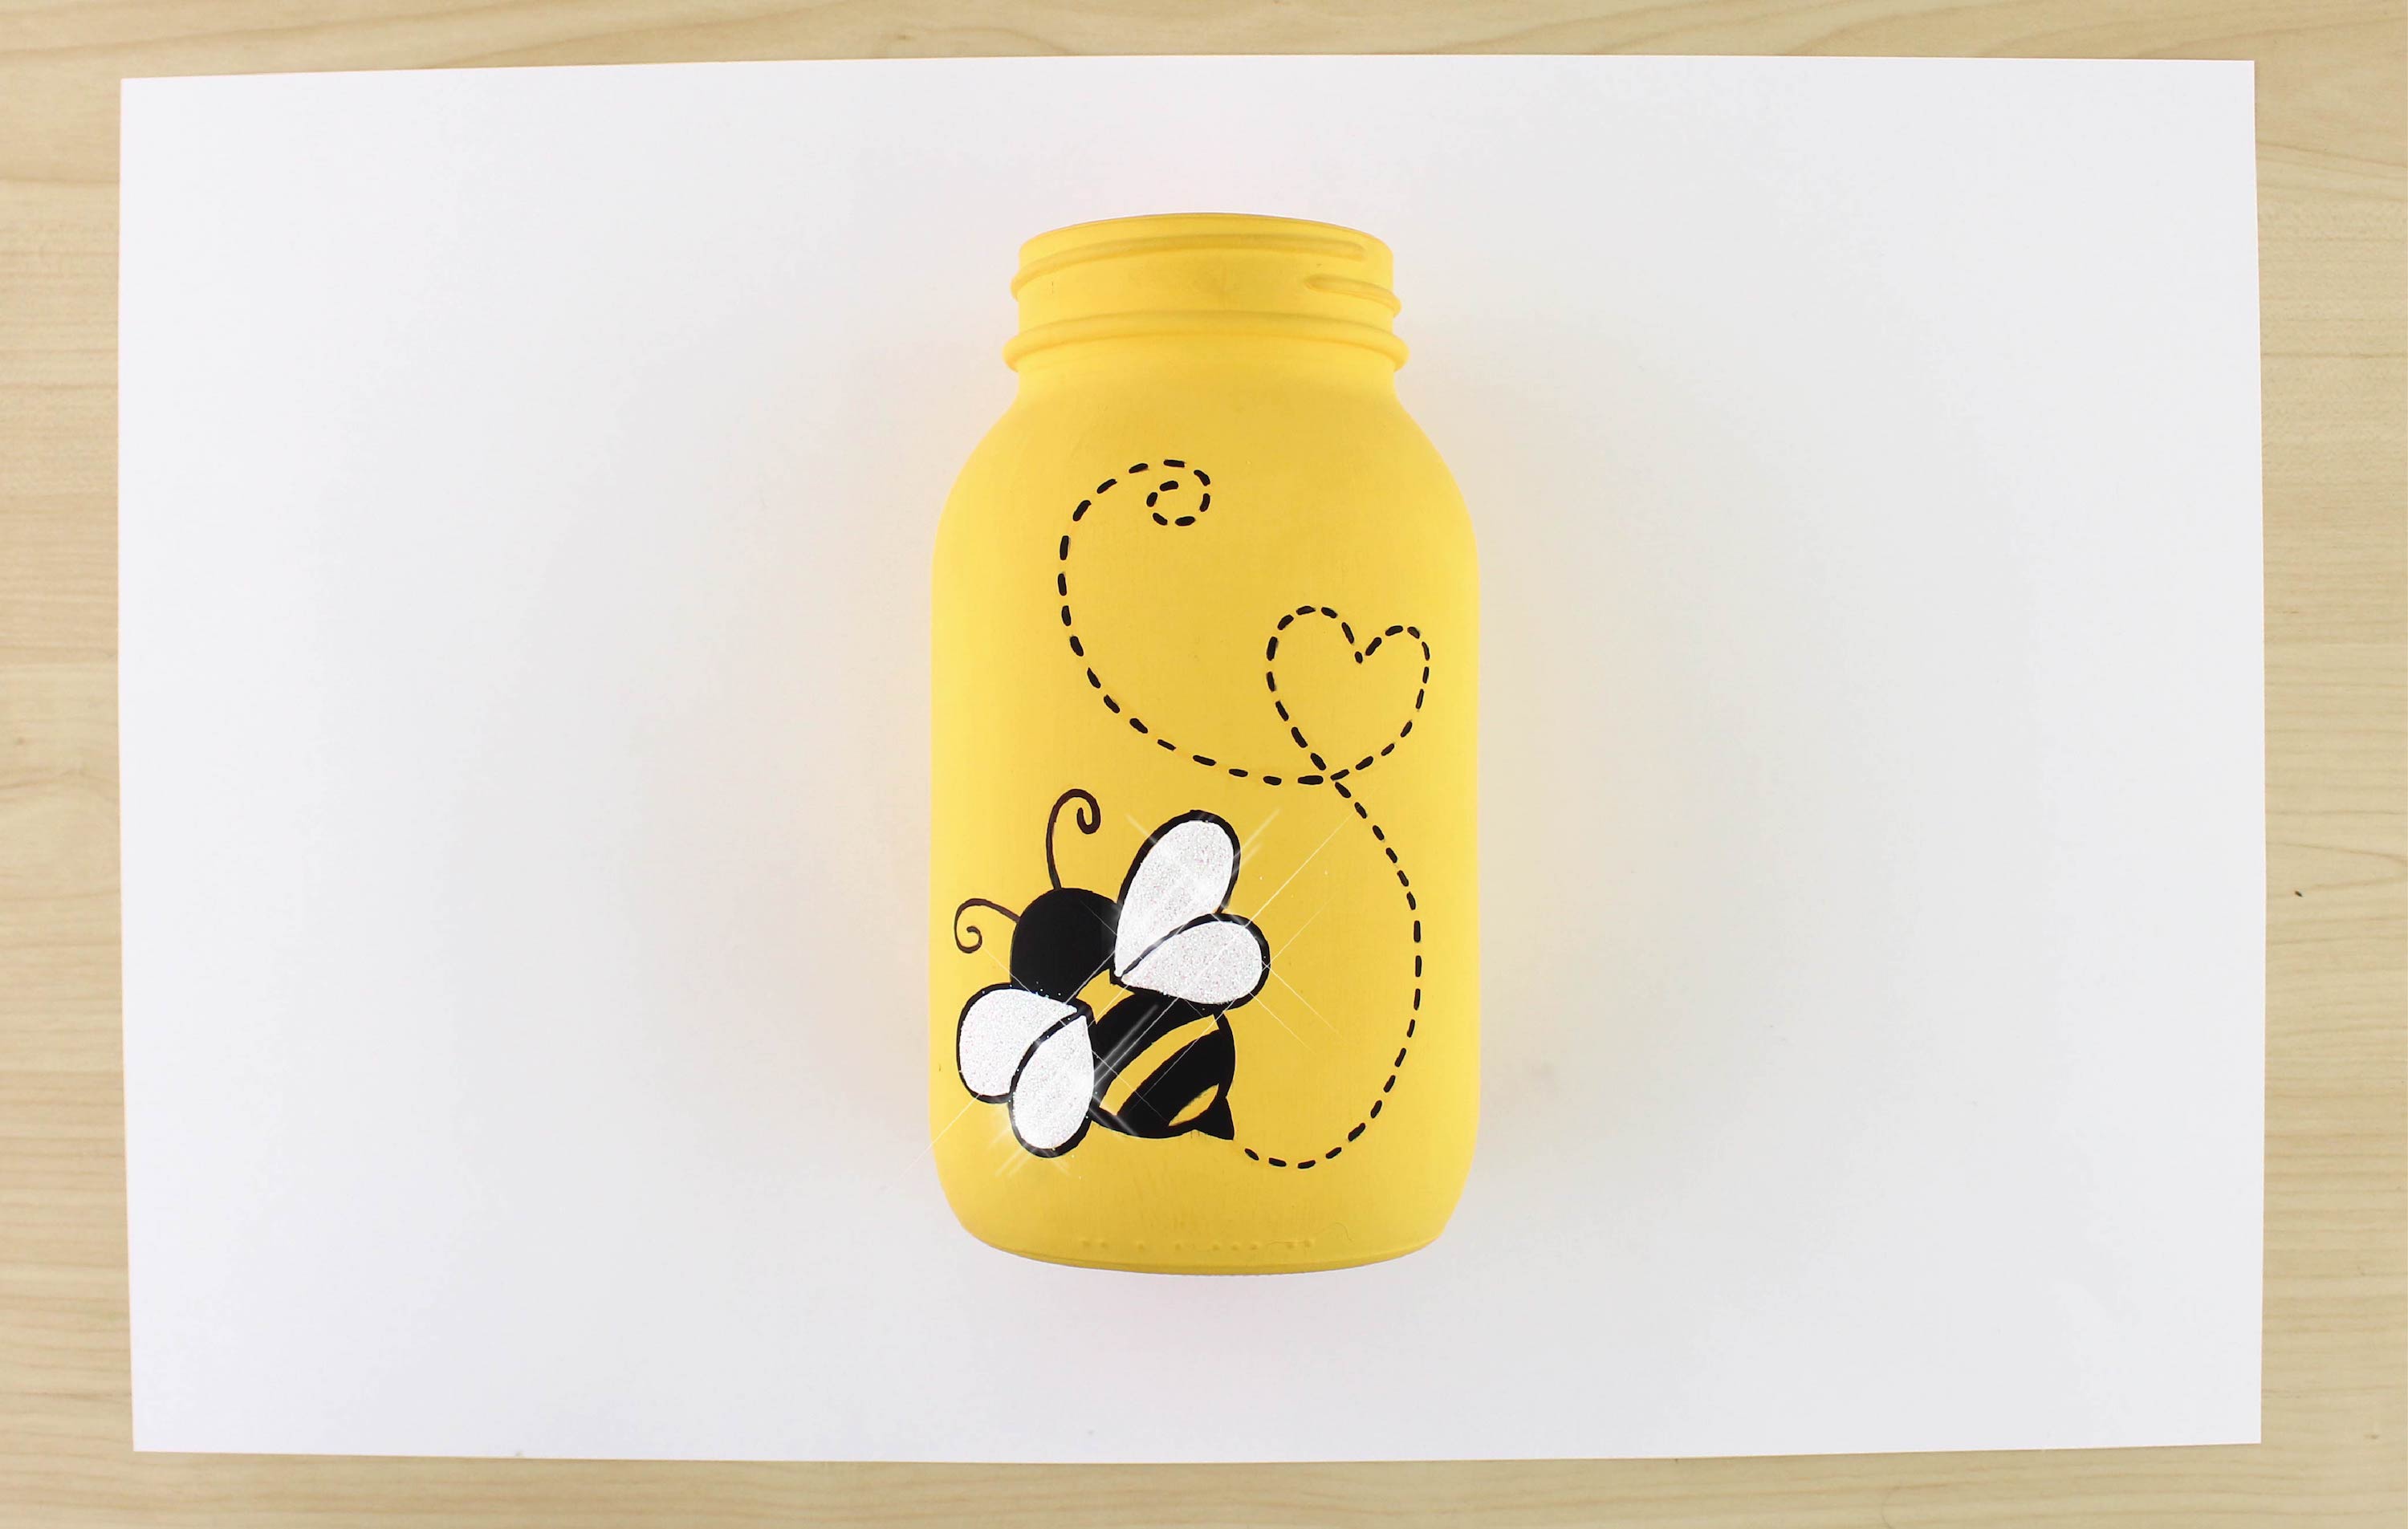
Leave those winter blues outside and bring in the bright color of yellow! Why? Just BEE-cause!
Step 1:
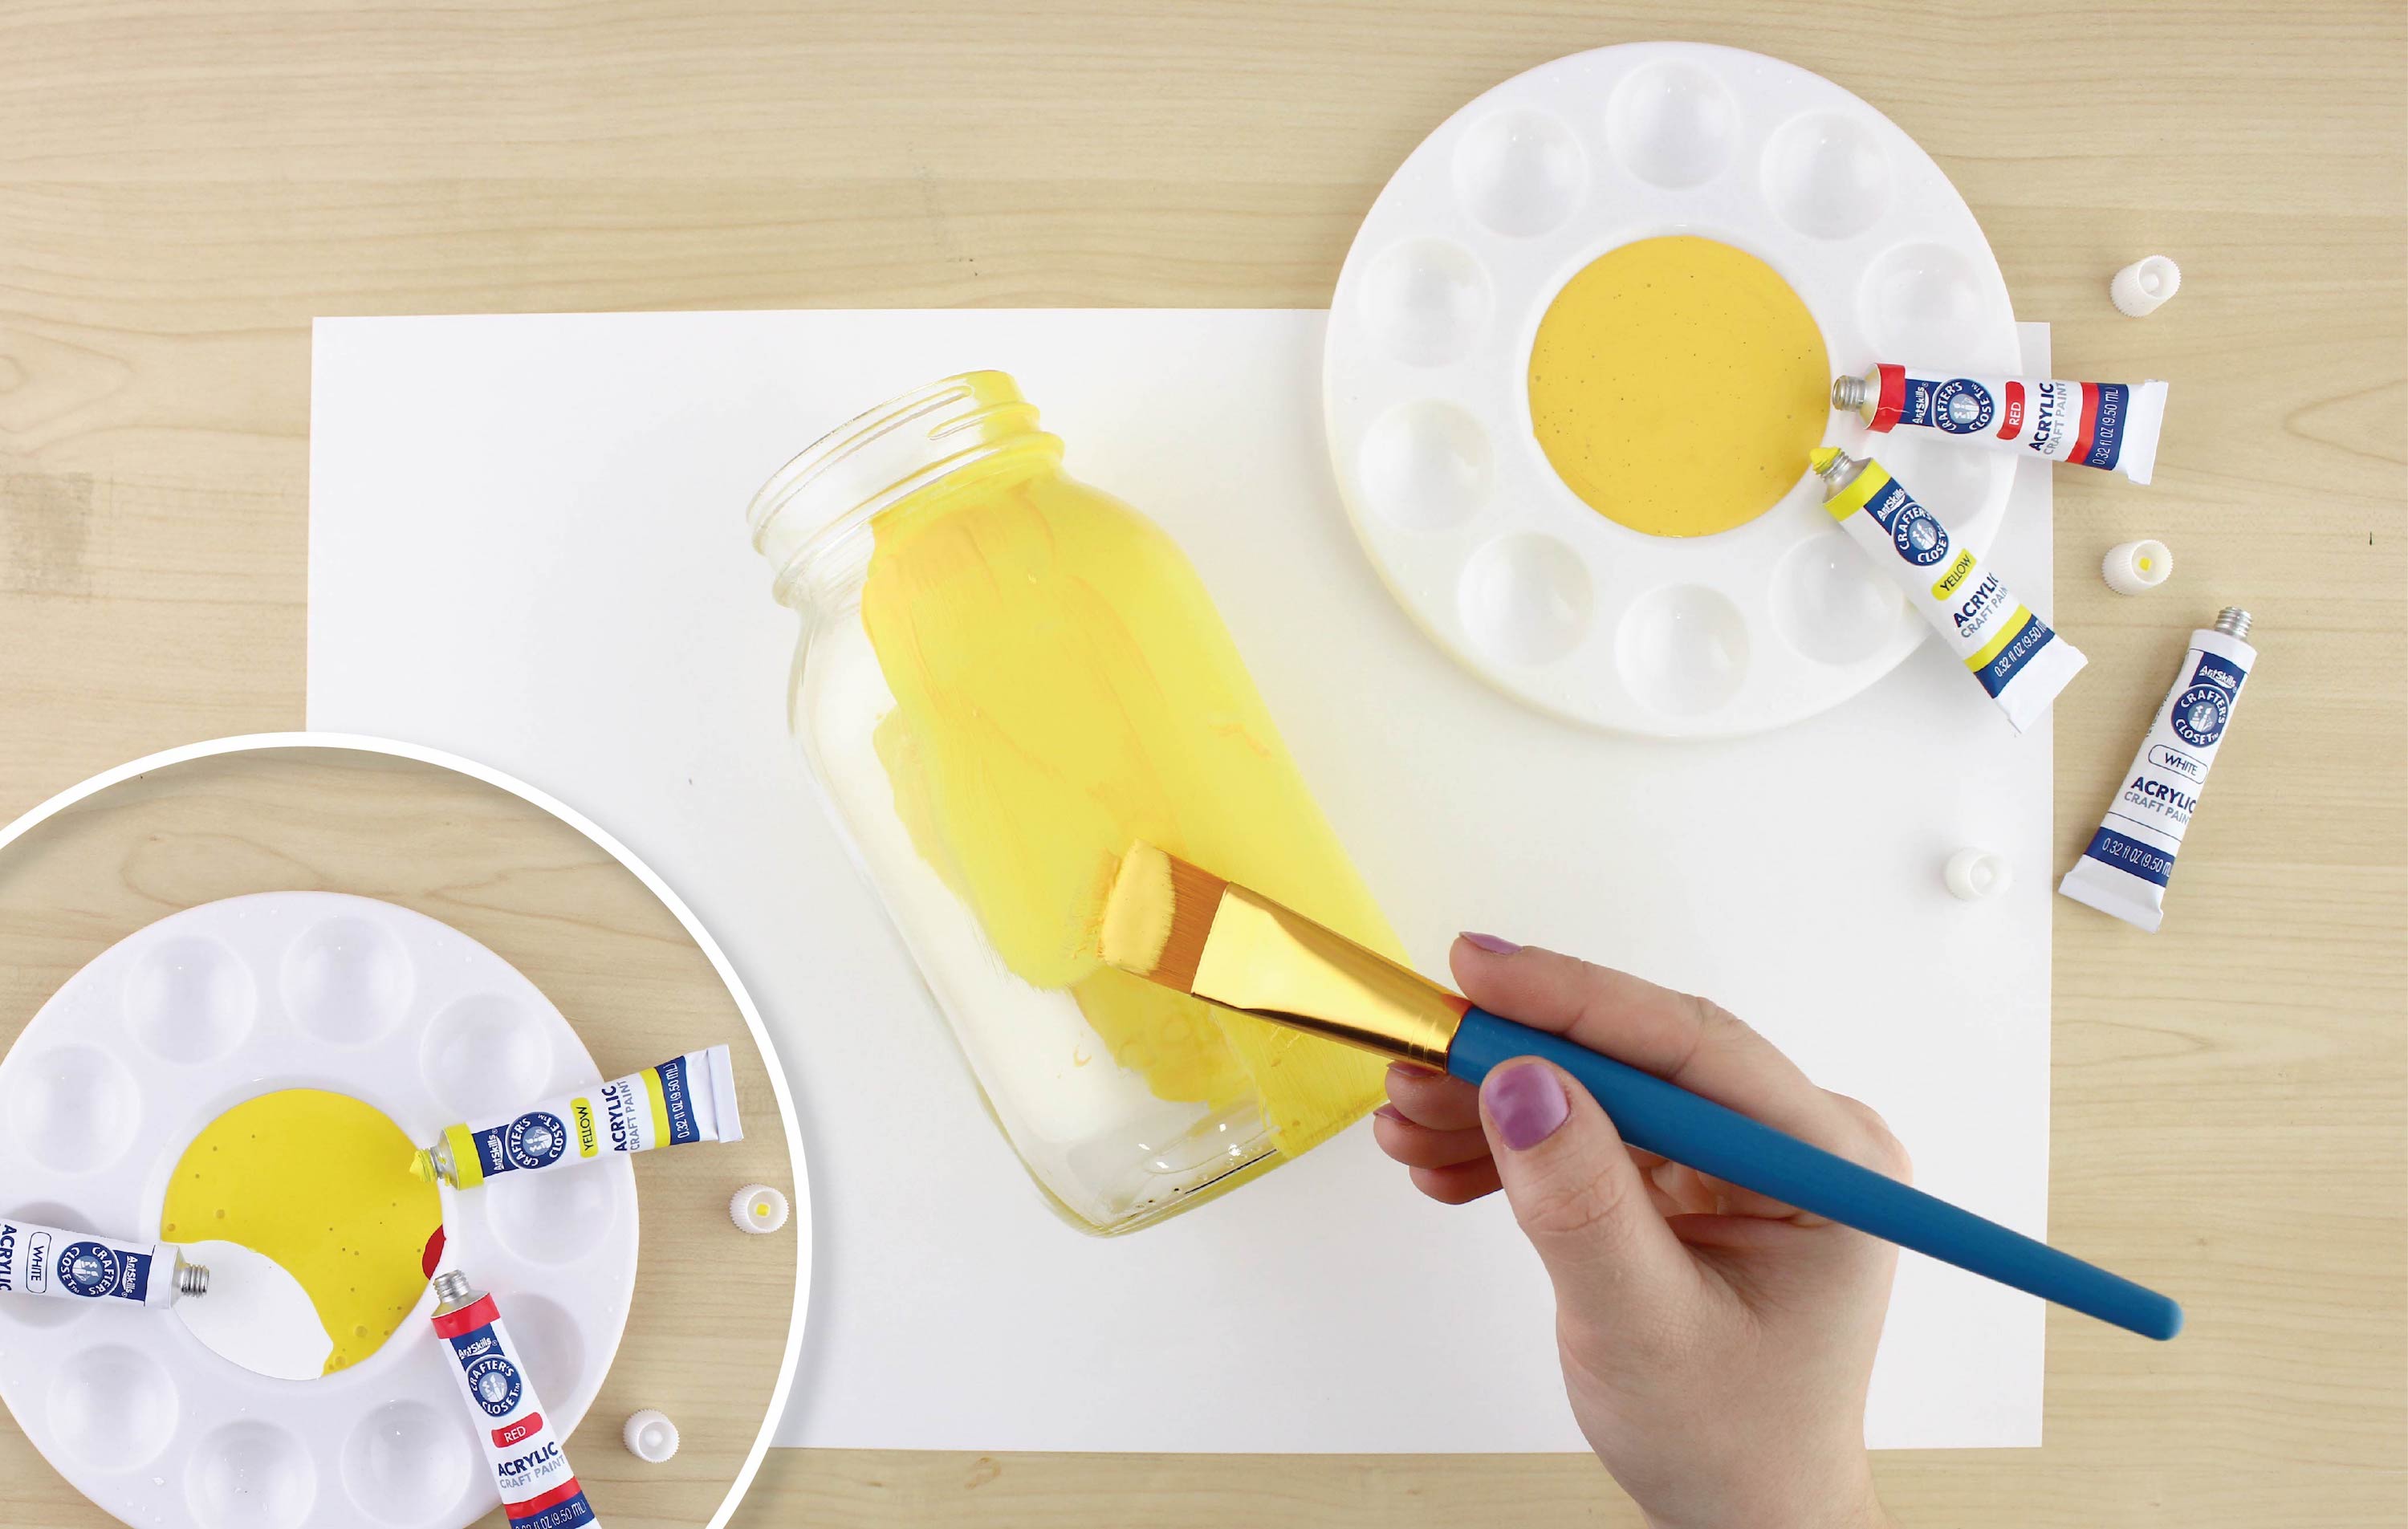
Mix together yellow, white, and a tiny amount red to get a slight orangey-yellow. Remember that red goes a long way so be sure to add the tiniest amount to start with, you can always add more later. Let dry.
Step 2:
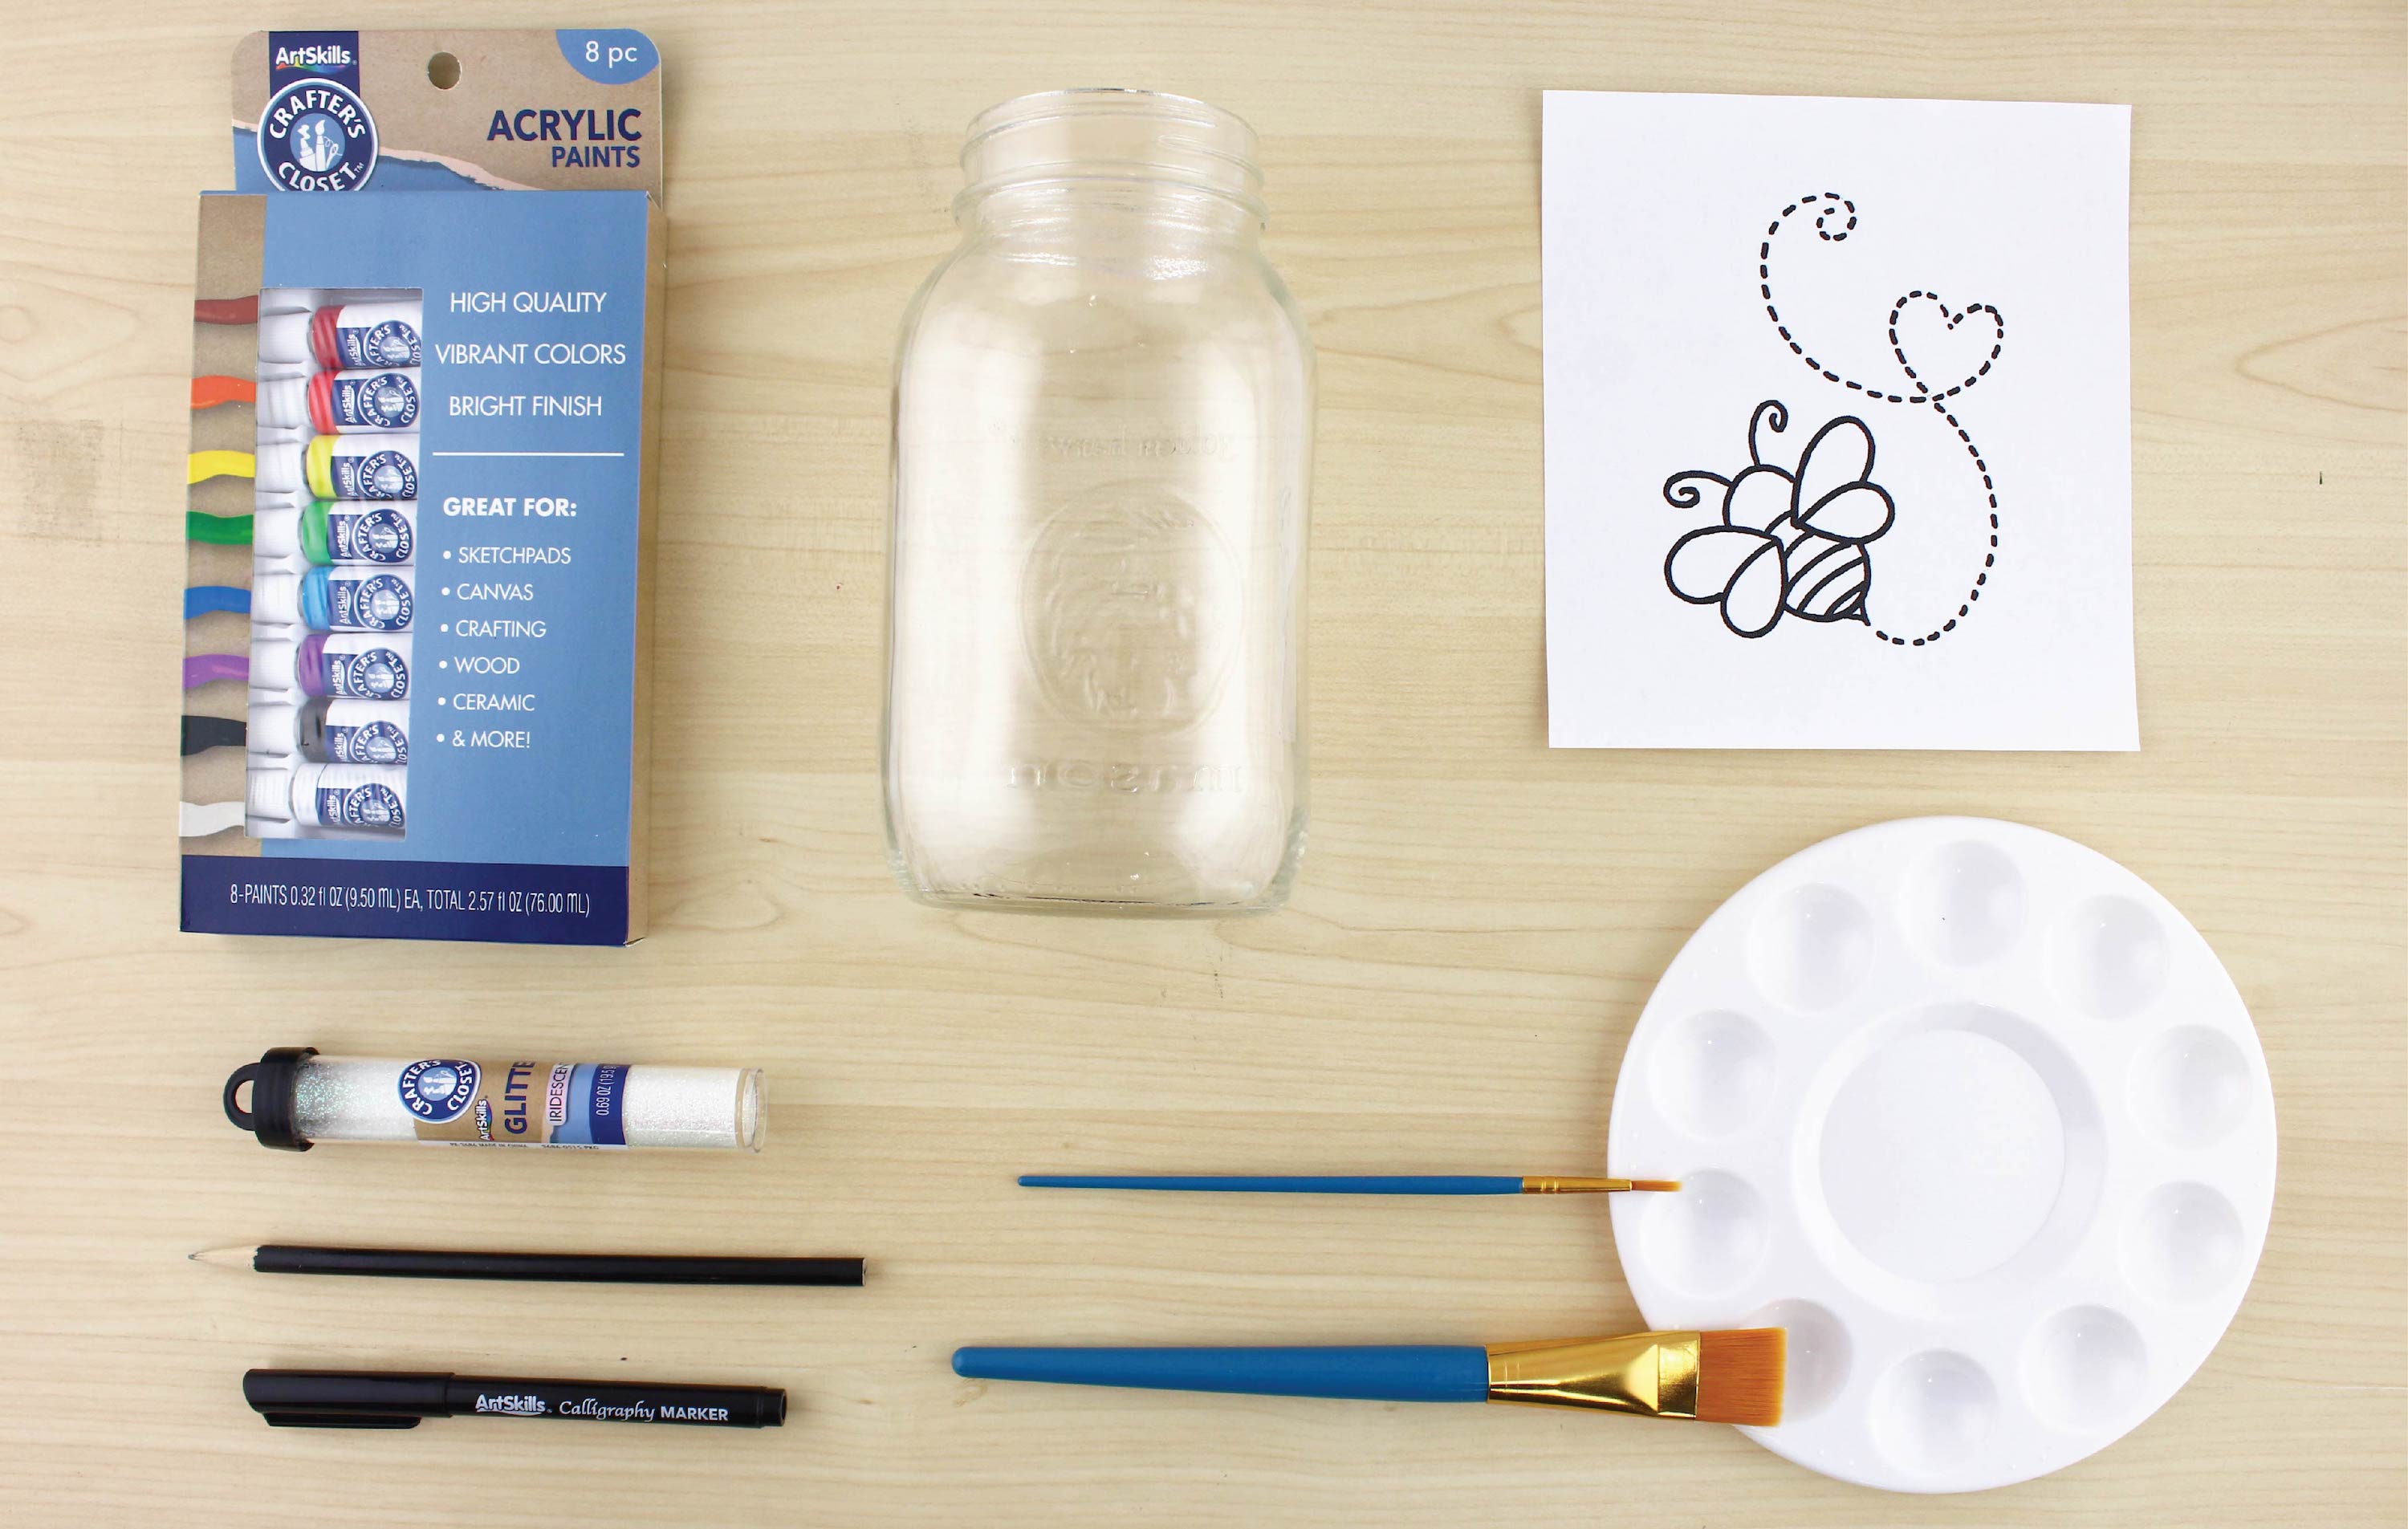
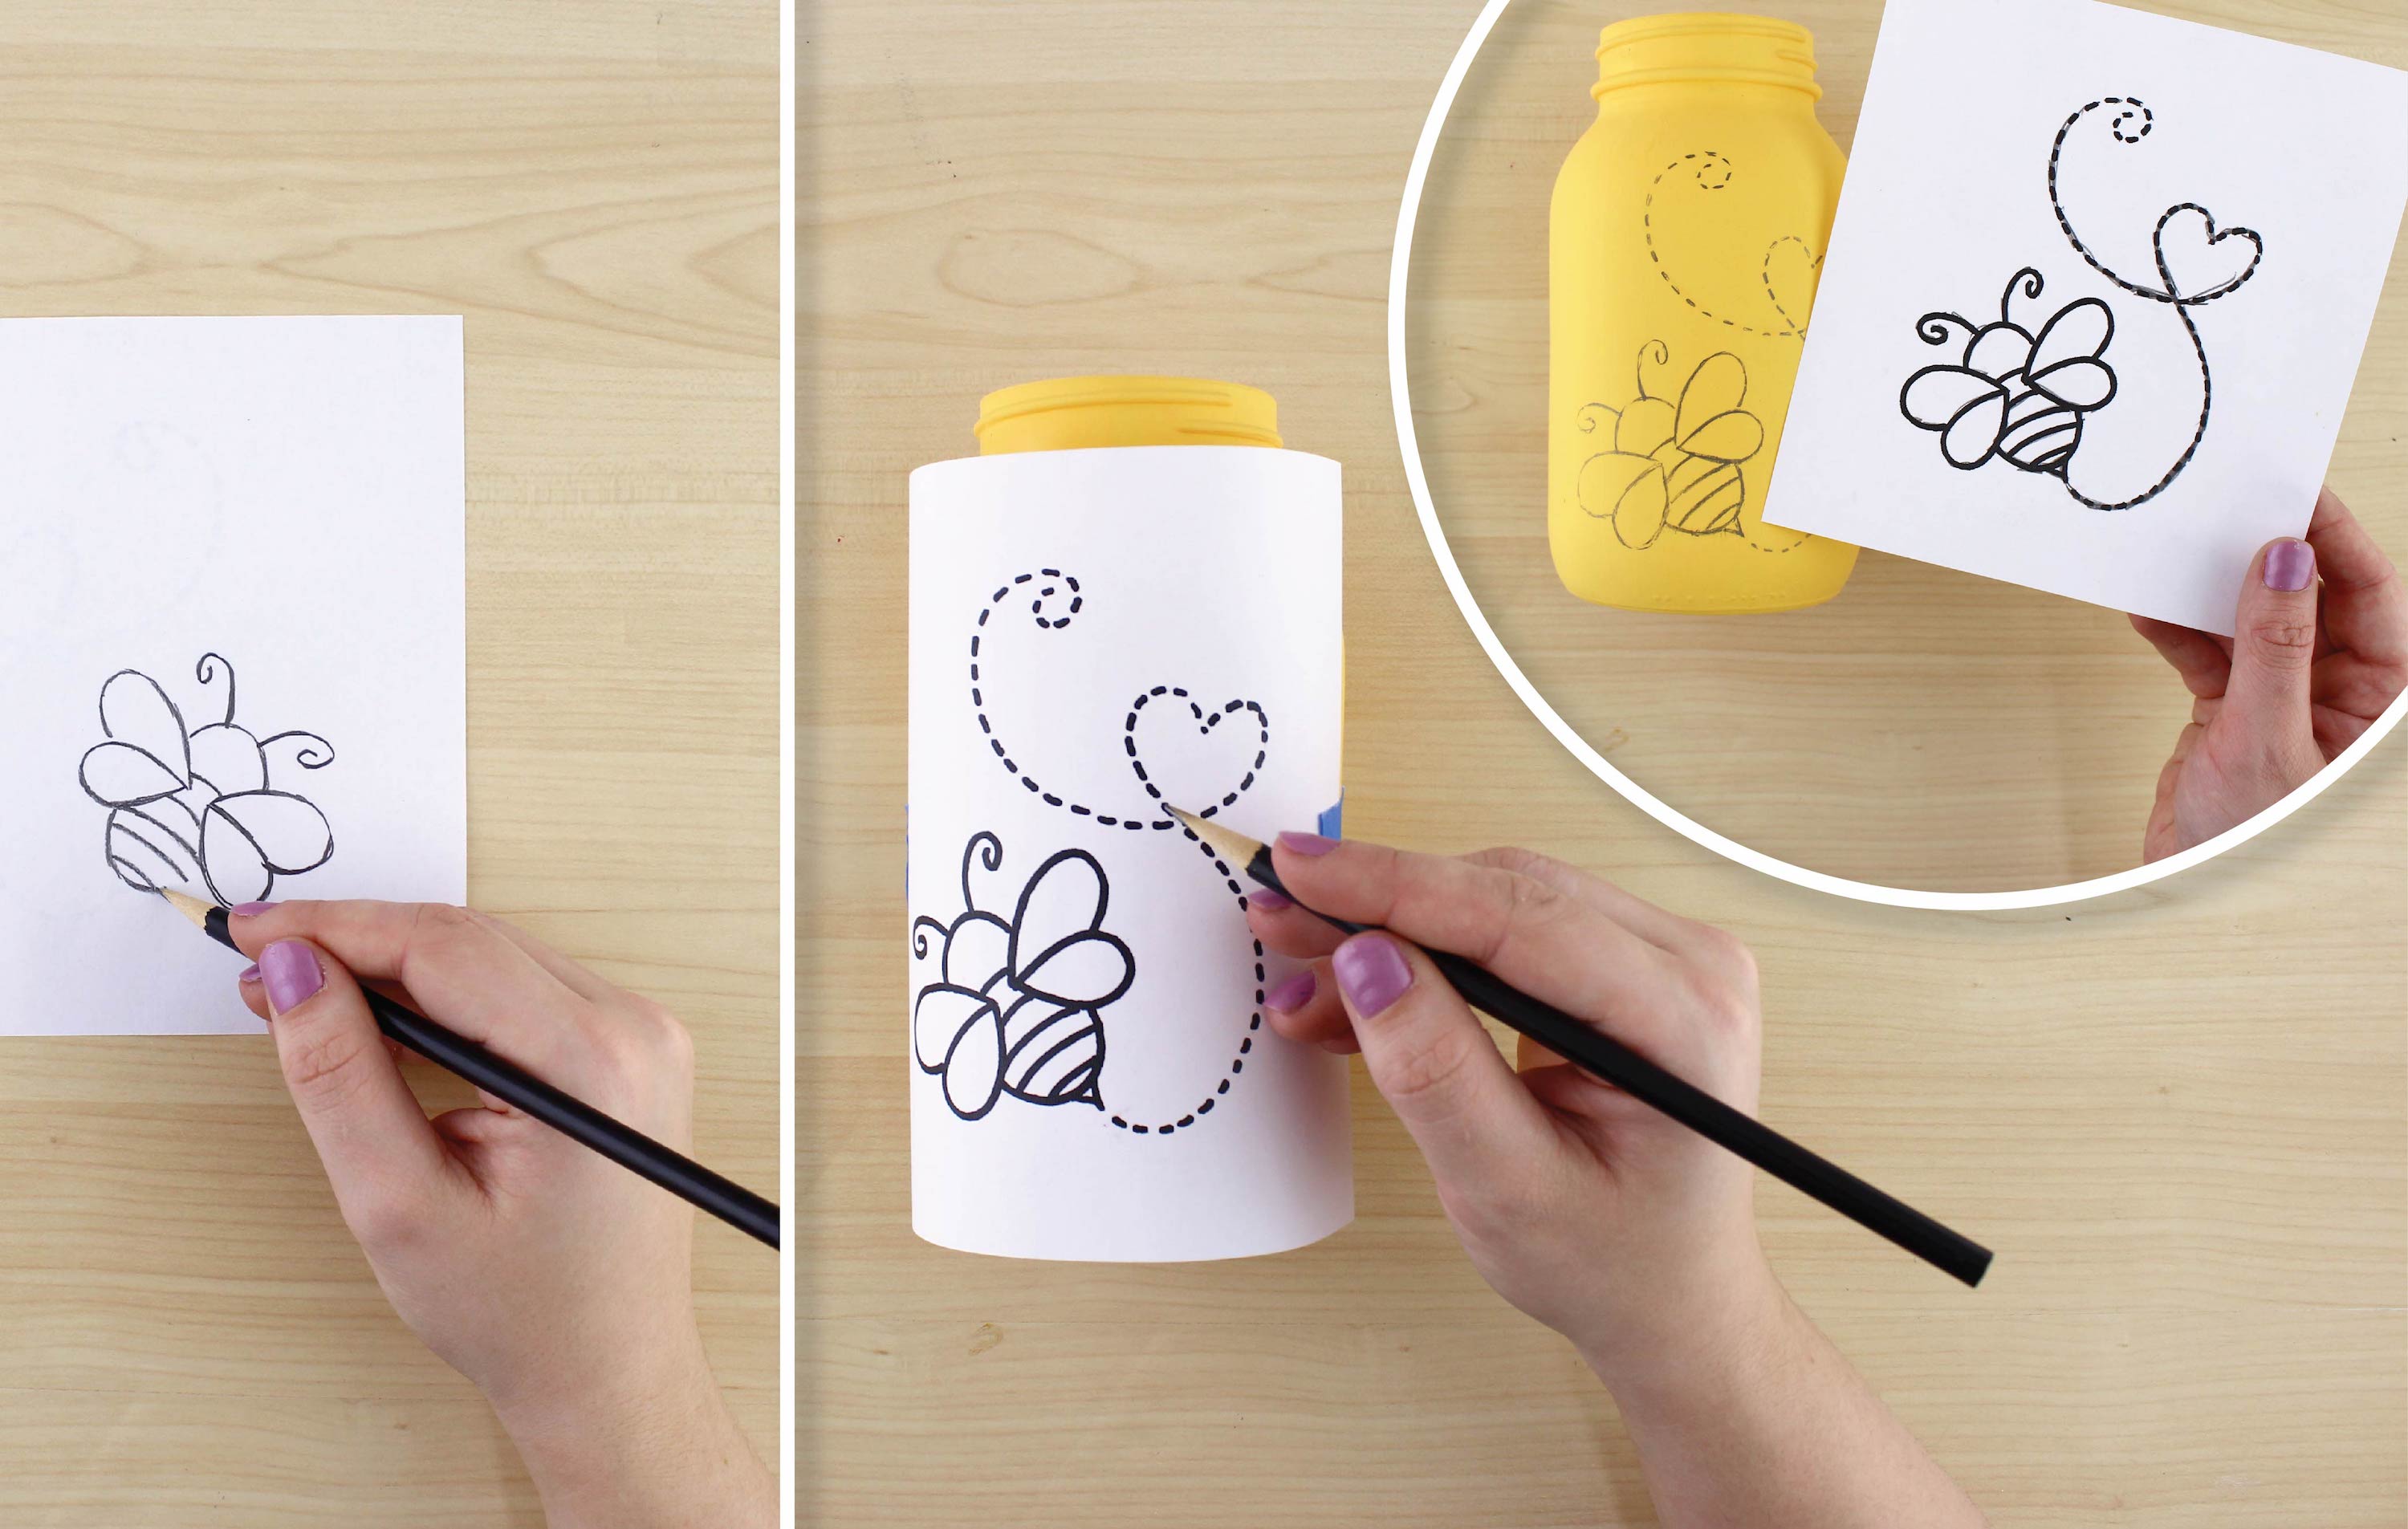
A) Download and print the supplied Bee Template and trace the back with a pencil. TIP: Hold the paper up to the window, with the printed image facing away from you.
B) When you have the entire image traced on the back, position on the jar facing up and tape down if needed. Trace the image, on the front side this time, and then remove the template to reveal you transferred image!
Step 3:
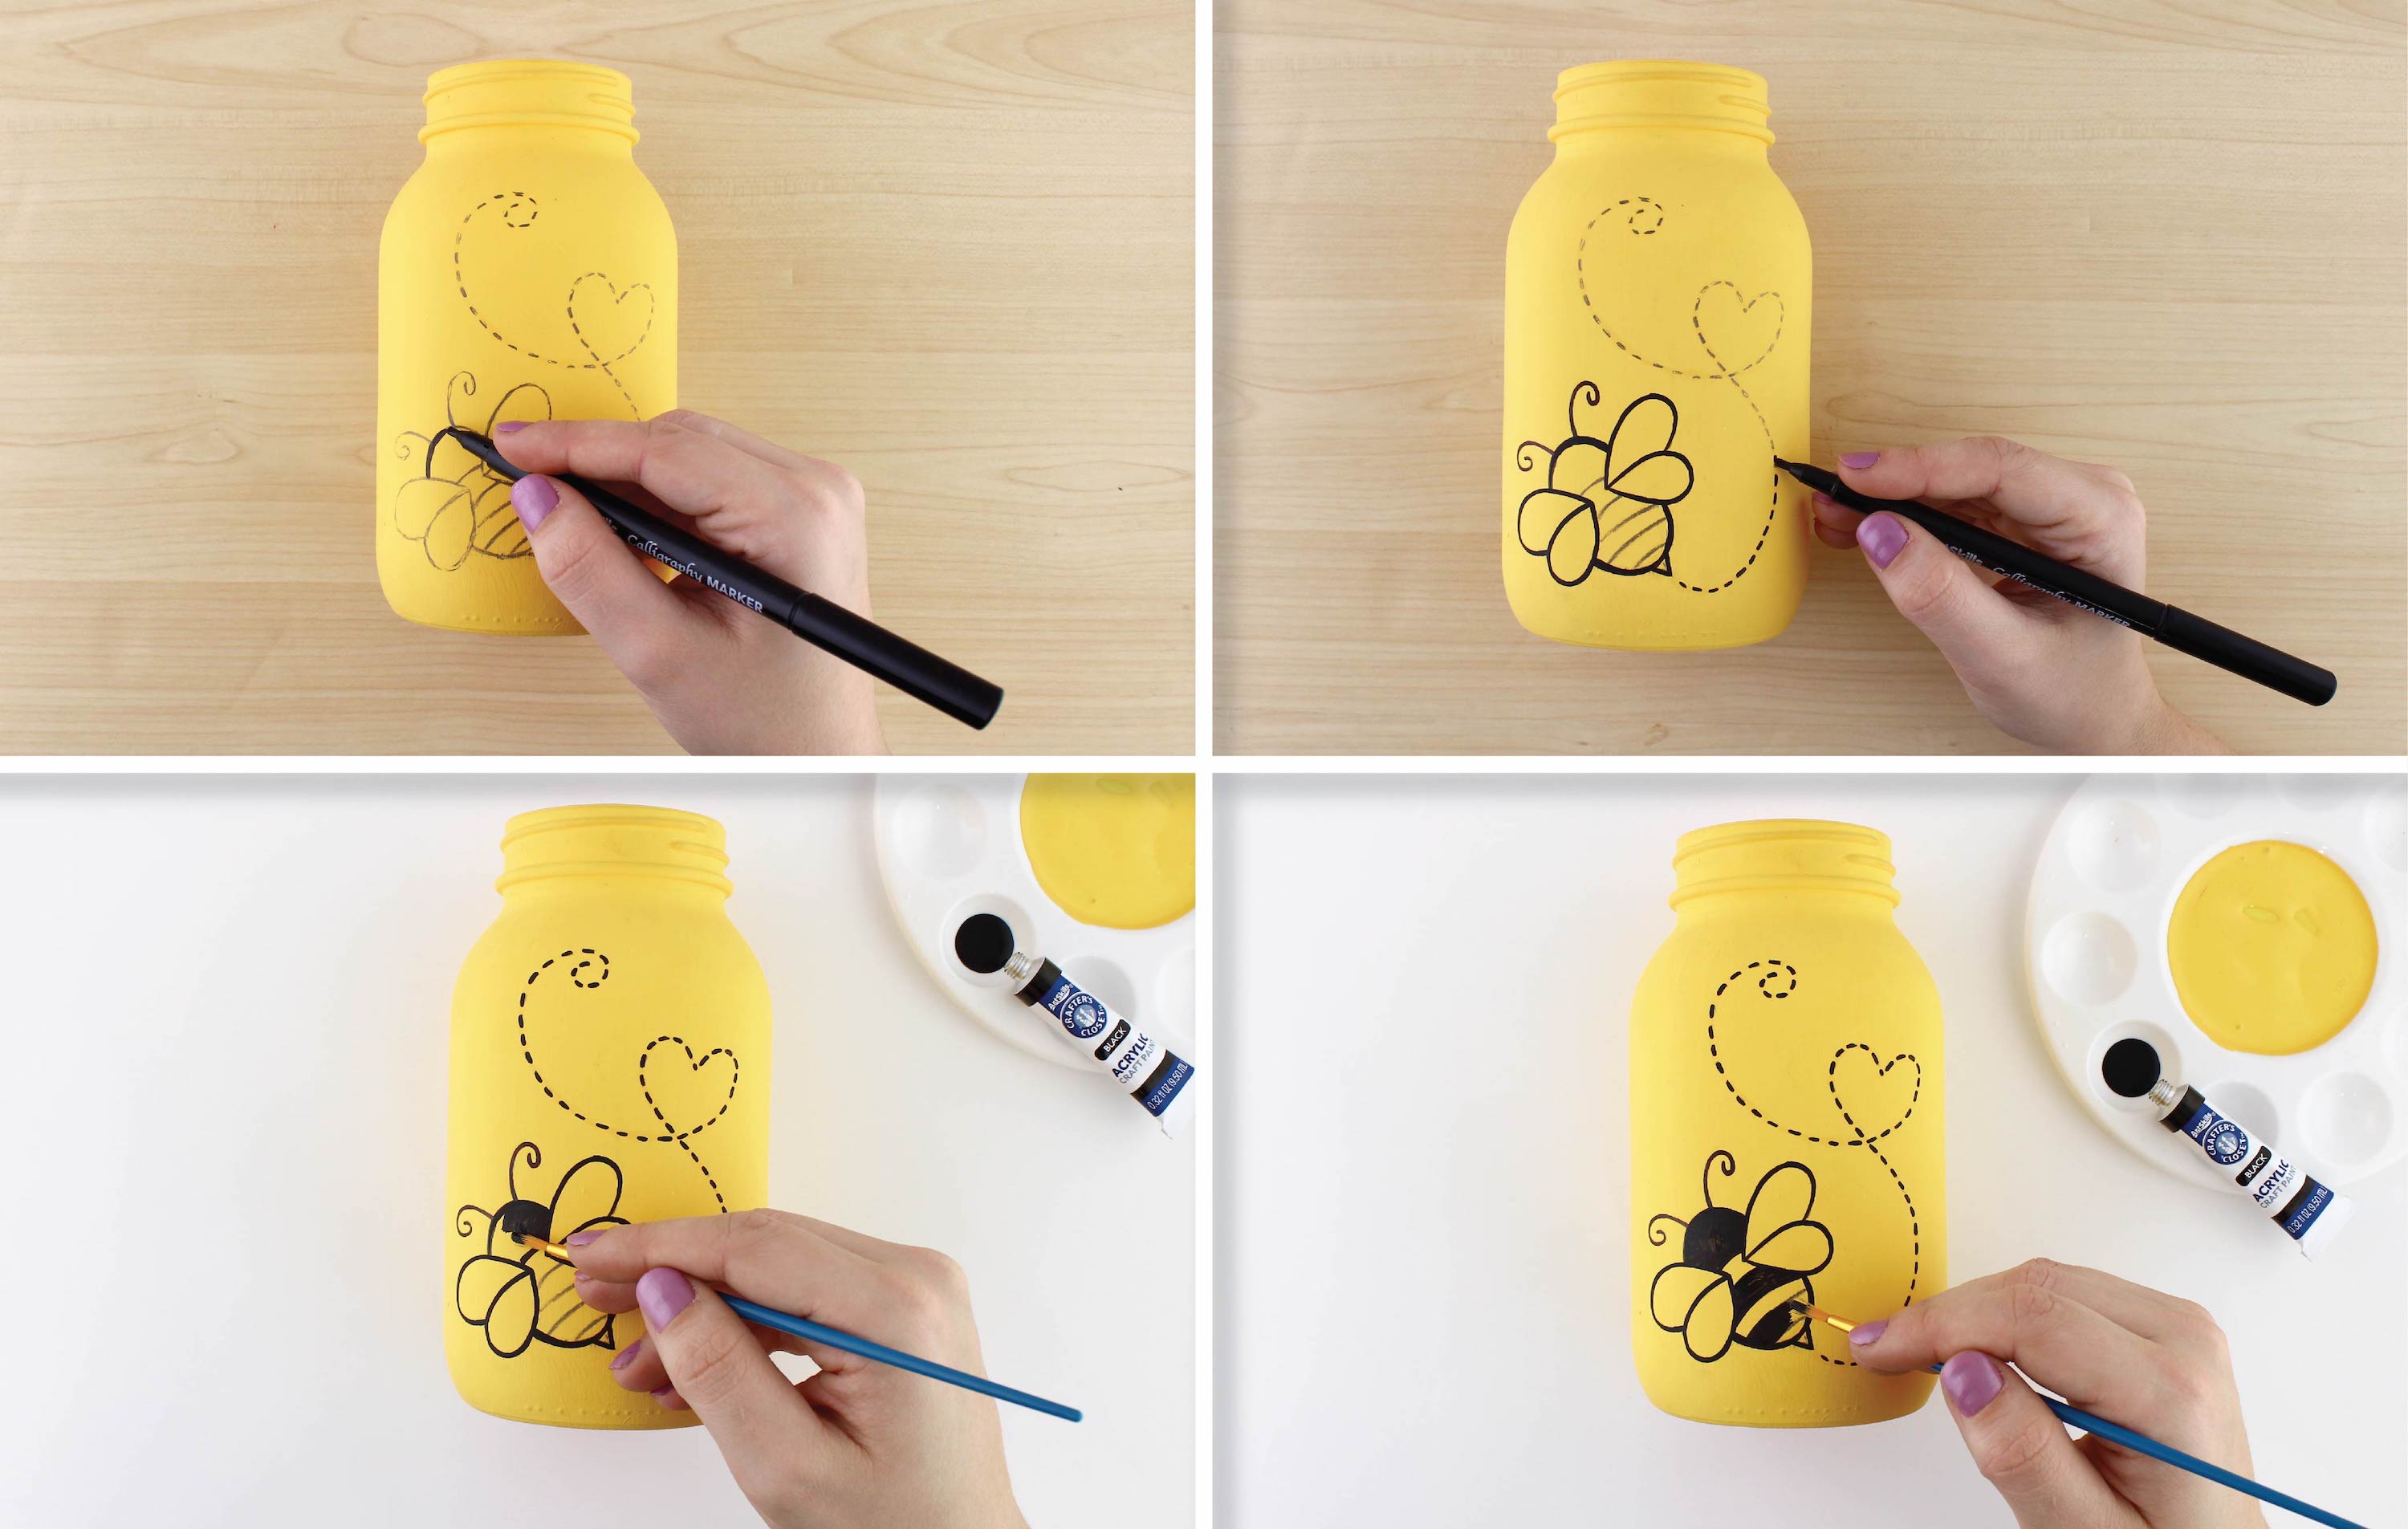
A) Using the Calligraphy Marker, trace the lines of the bumble bee.
B) Follow the dotted line with the Calligraphy Marker, as well.
C) Take the black paint and a small brush. Fill in the appropriate areas of the bee, applying multiple coats as needed.
D) Continue until every other area is filled.
Step 4:
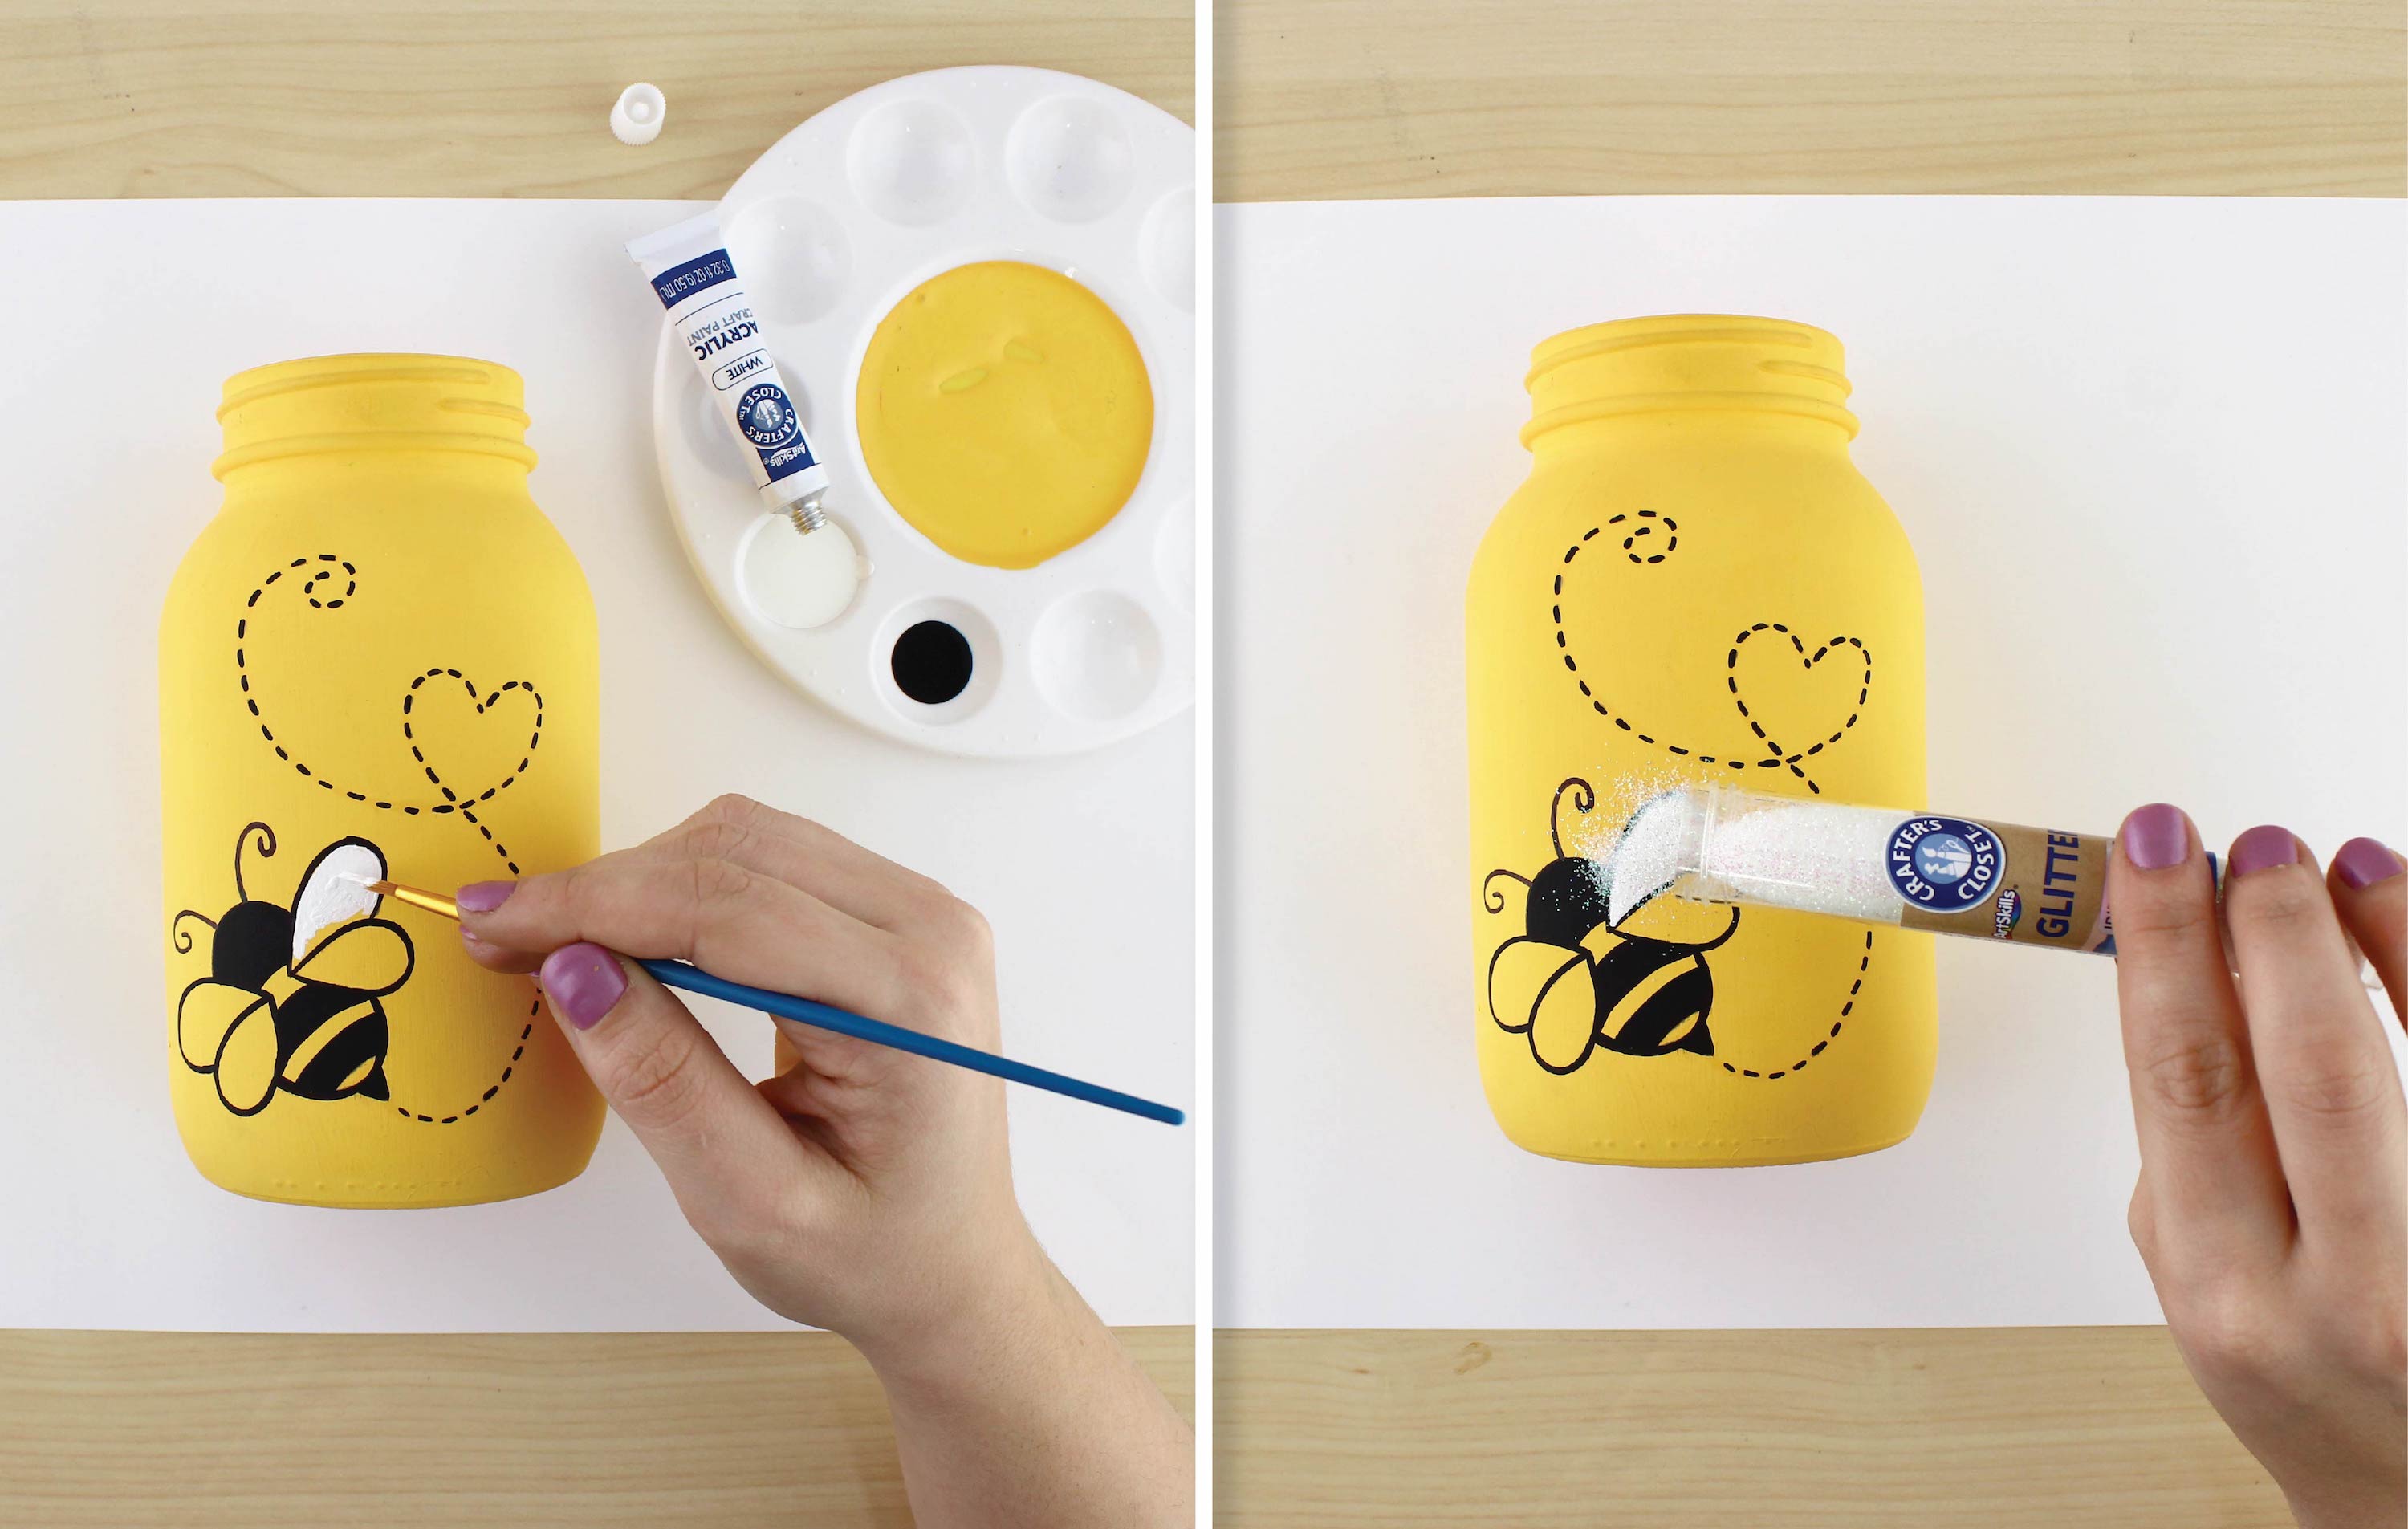
A) Take the white paint and fill in each wing.
B) While the paint is still wet, top with Iridescent glitter.
