Stay sharp! Show your students some A+ love when they come back to school this year!
Step 1:
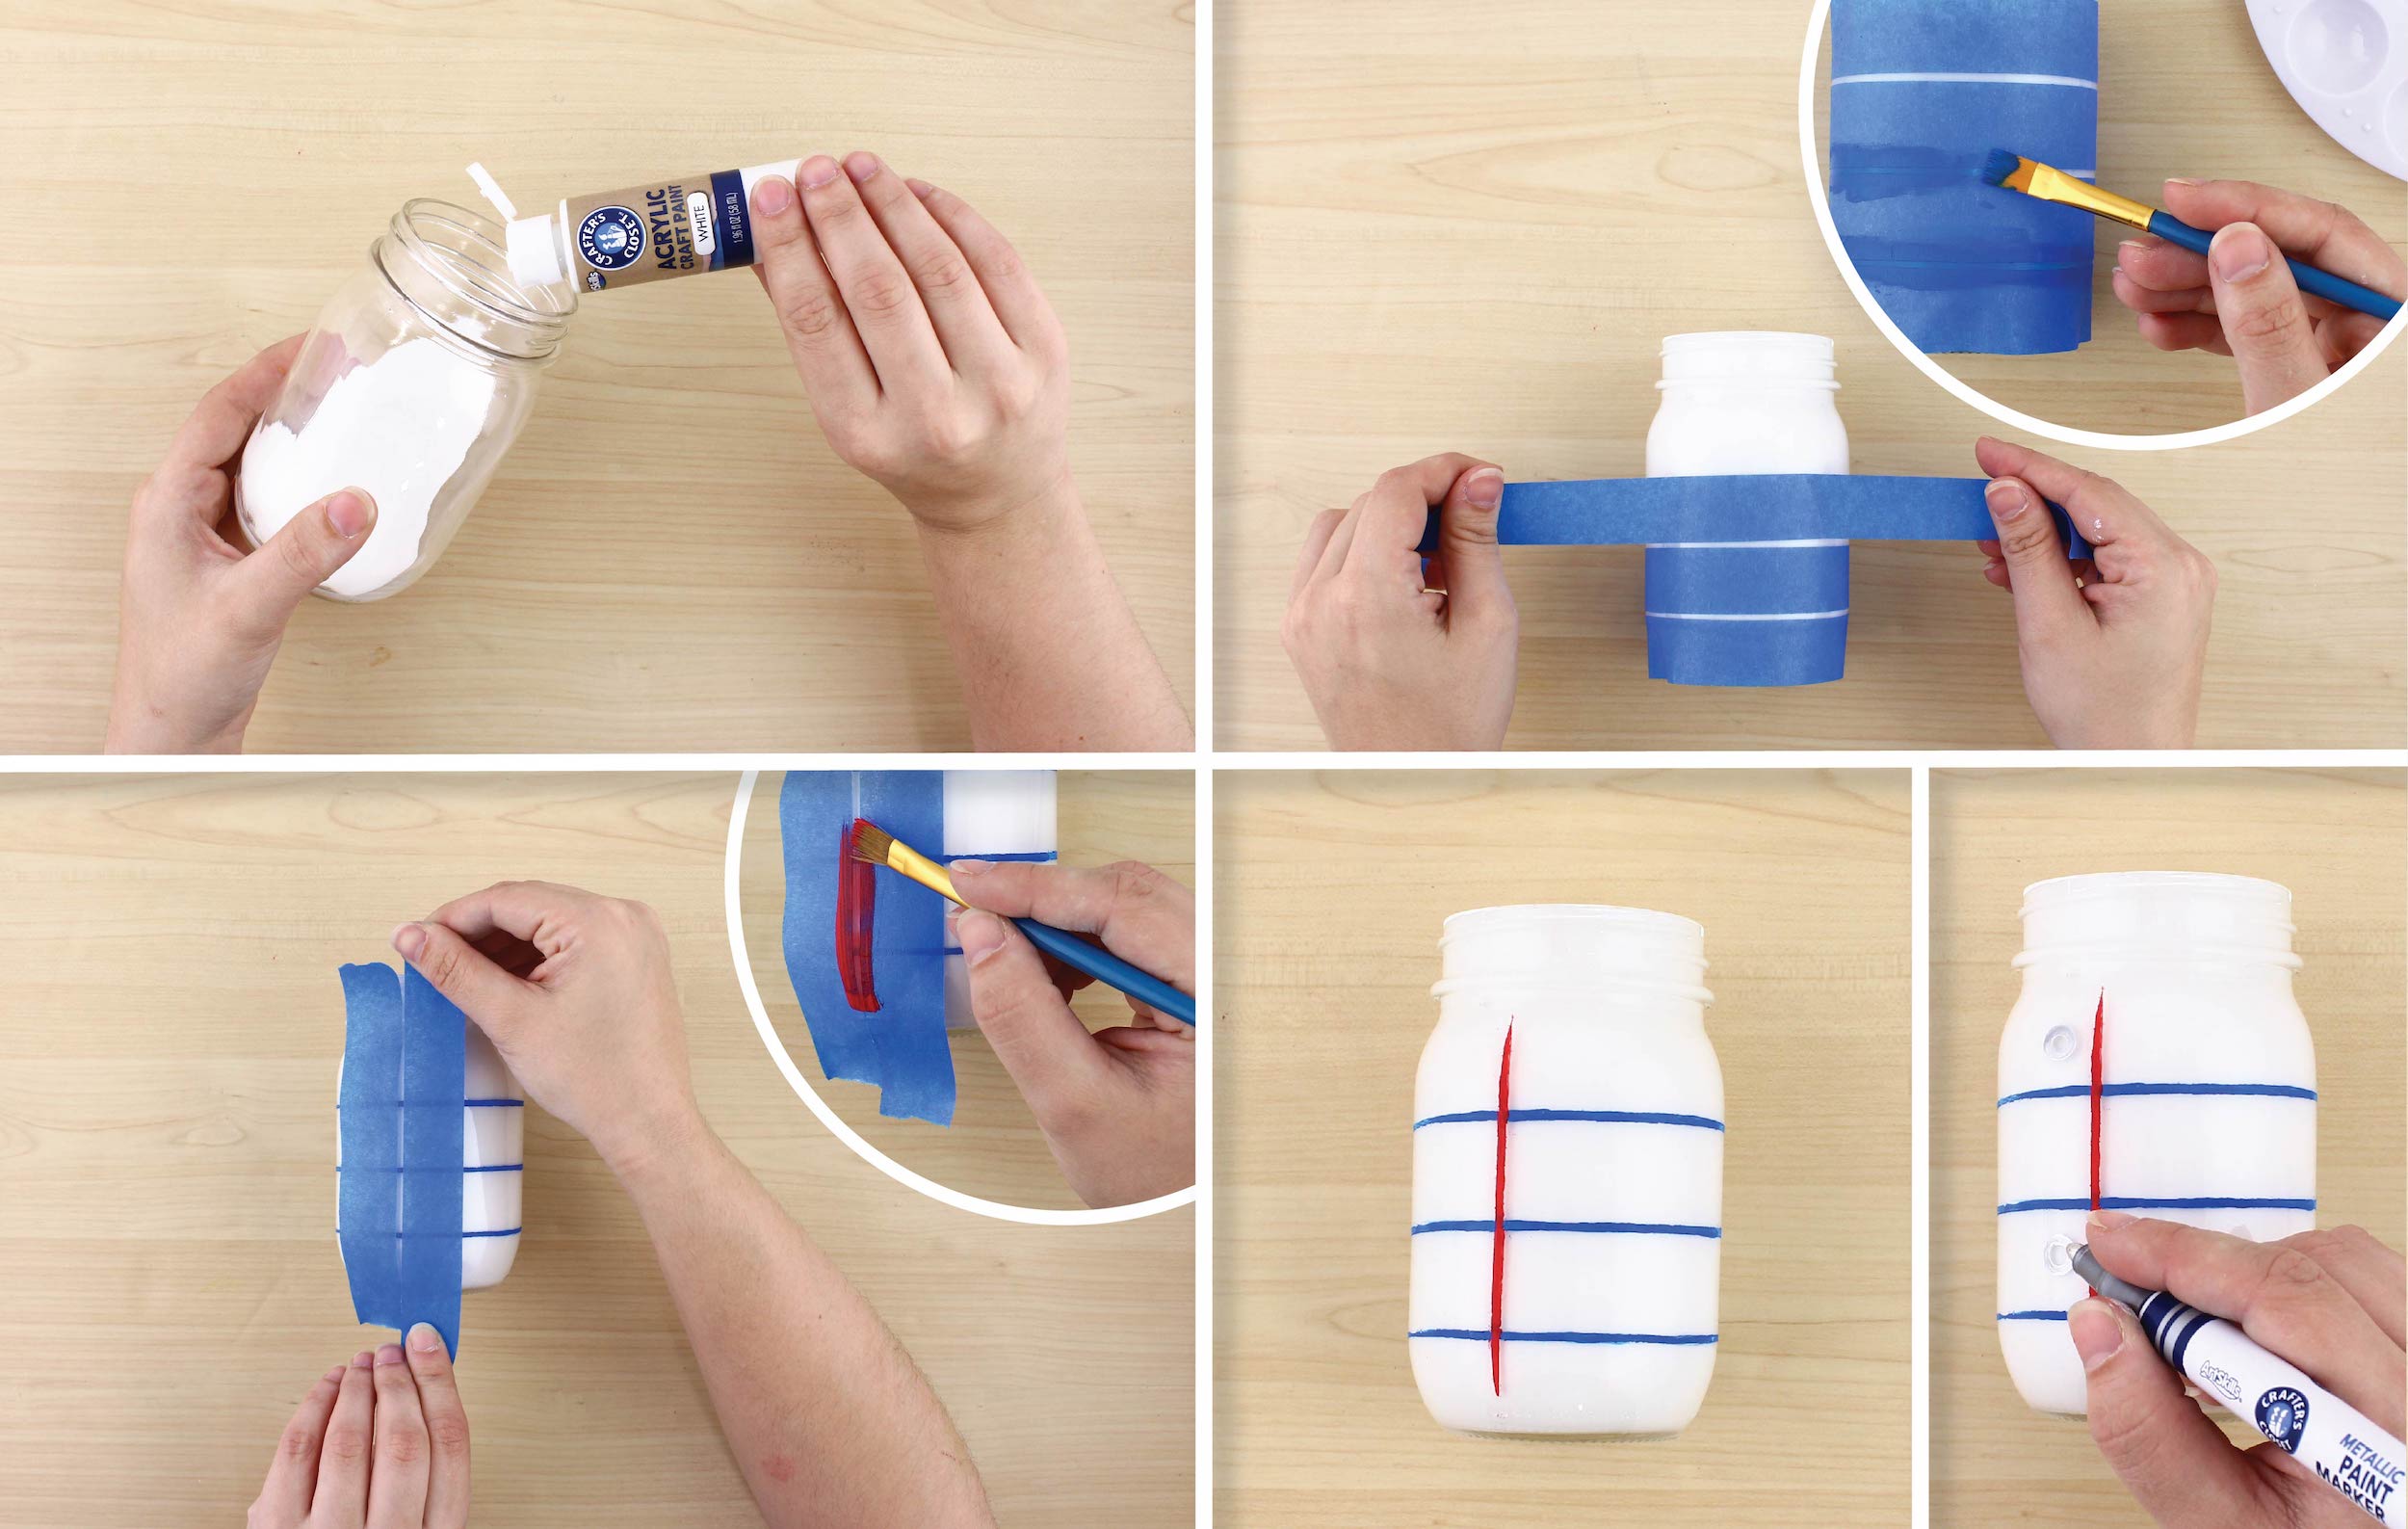
A) Add White Craft Paint to the inside of the jar and swirl around. You want to add enough to coat the entire inside. Let dry upside down to remove an excess paint.
B) Once dry, apply painter’s tape horizontally, starting at the bottom. The next piece of tape should sit just above the last, leaving less then a ¼” of jar showing through. Continue until you reach the base of the neck of the jar. Paint the open spaces blue. Let dry. Remove tape.
C) Apply two strips of tape, vertically, on the left side of the jar. Be sure to leave a similar amount of space in between the strips of tape. Paint this part with red paint. Let dry. Remove tape.
D) Using the Silver Paint Marker, add circles to the first and the third space, to the left of the red line.
Step 2:
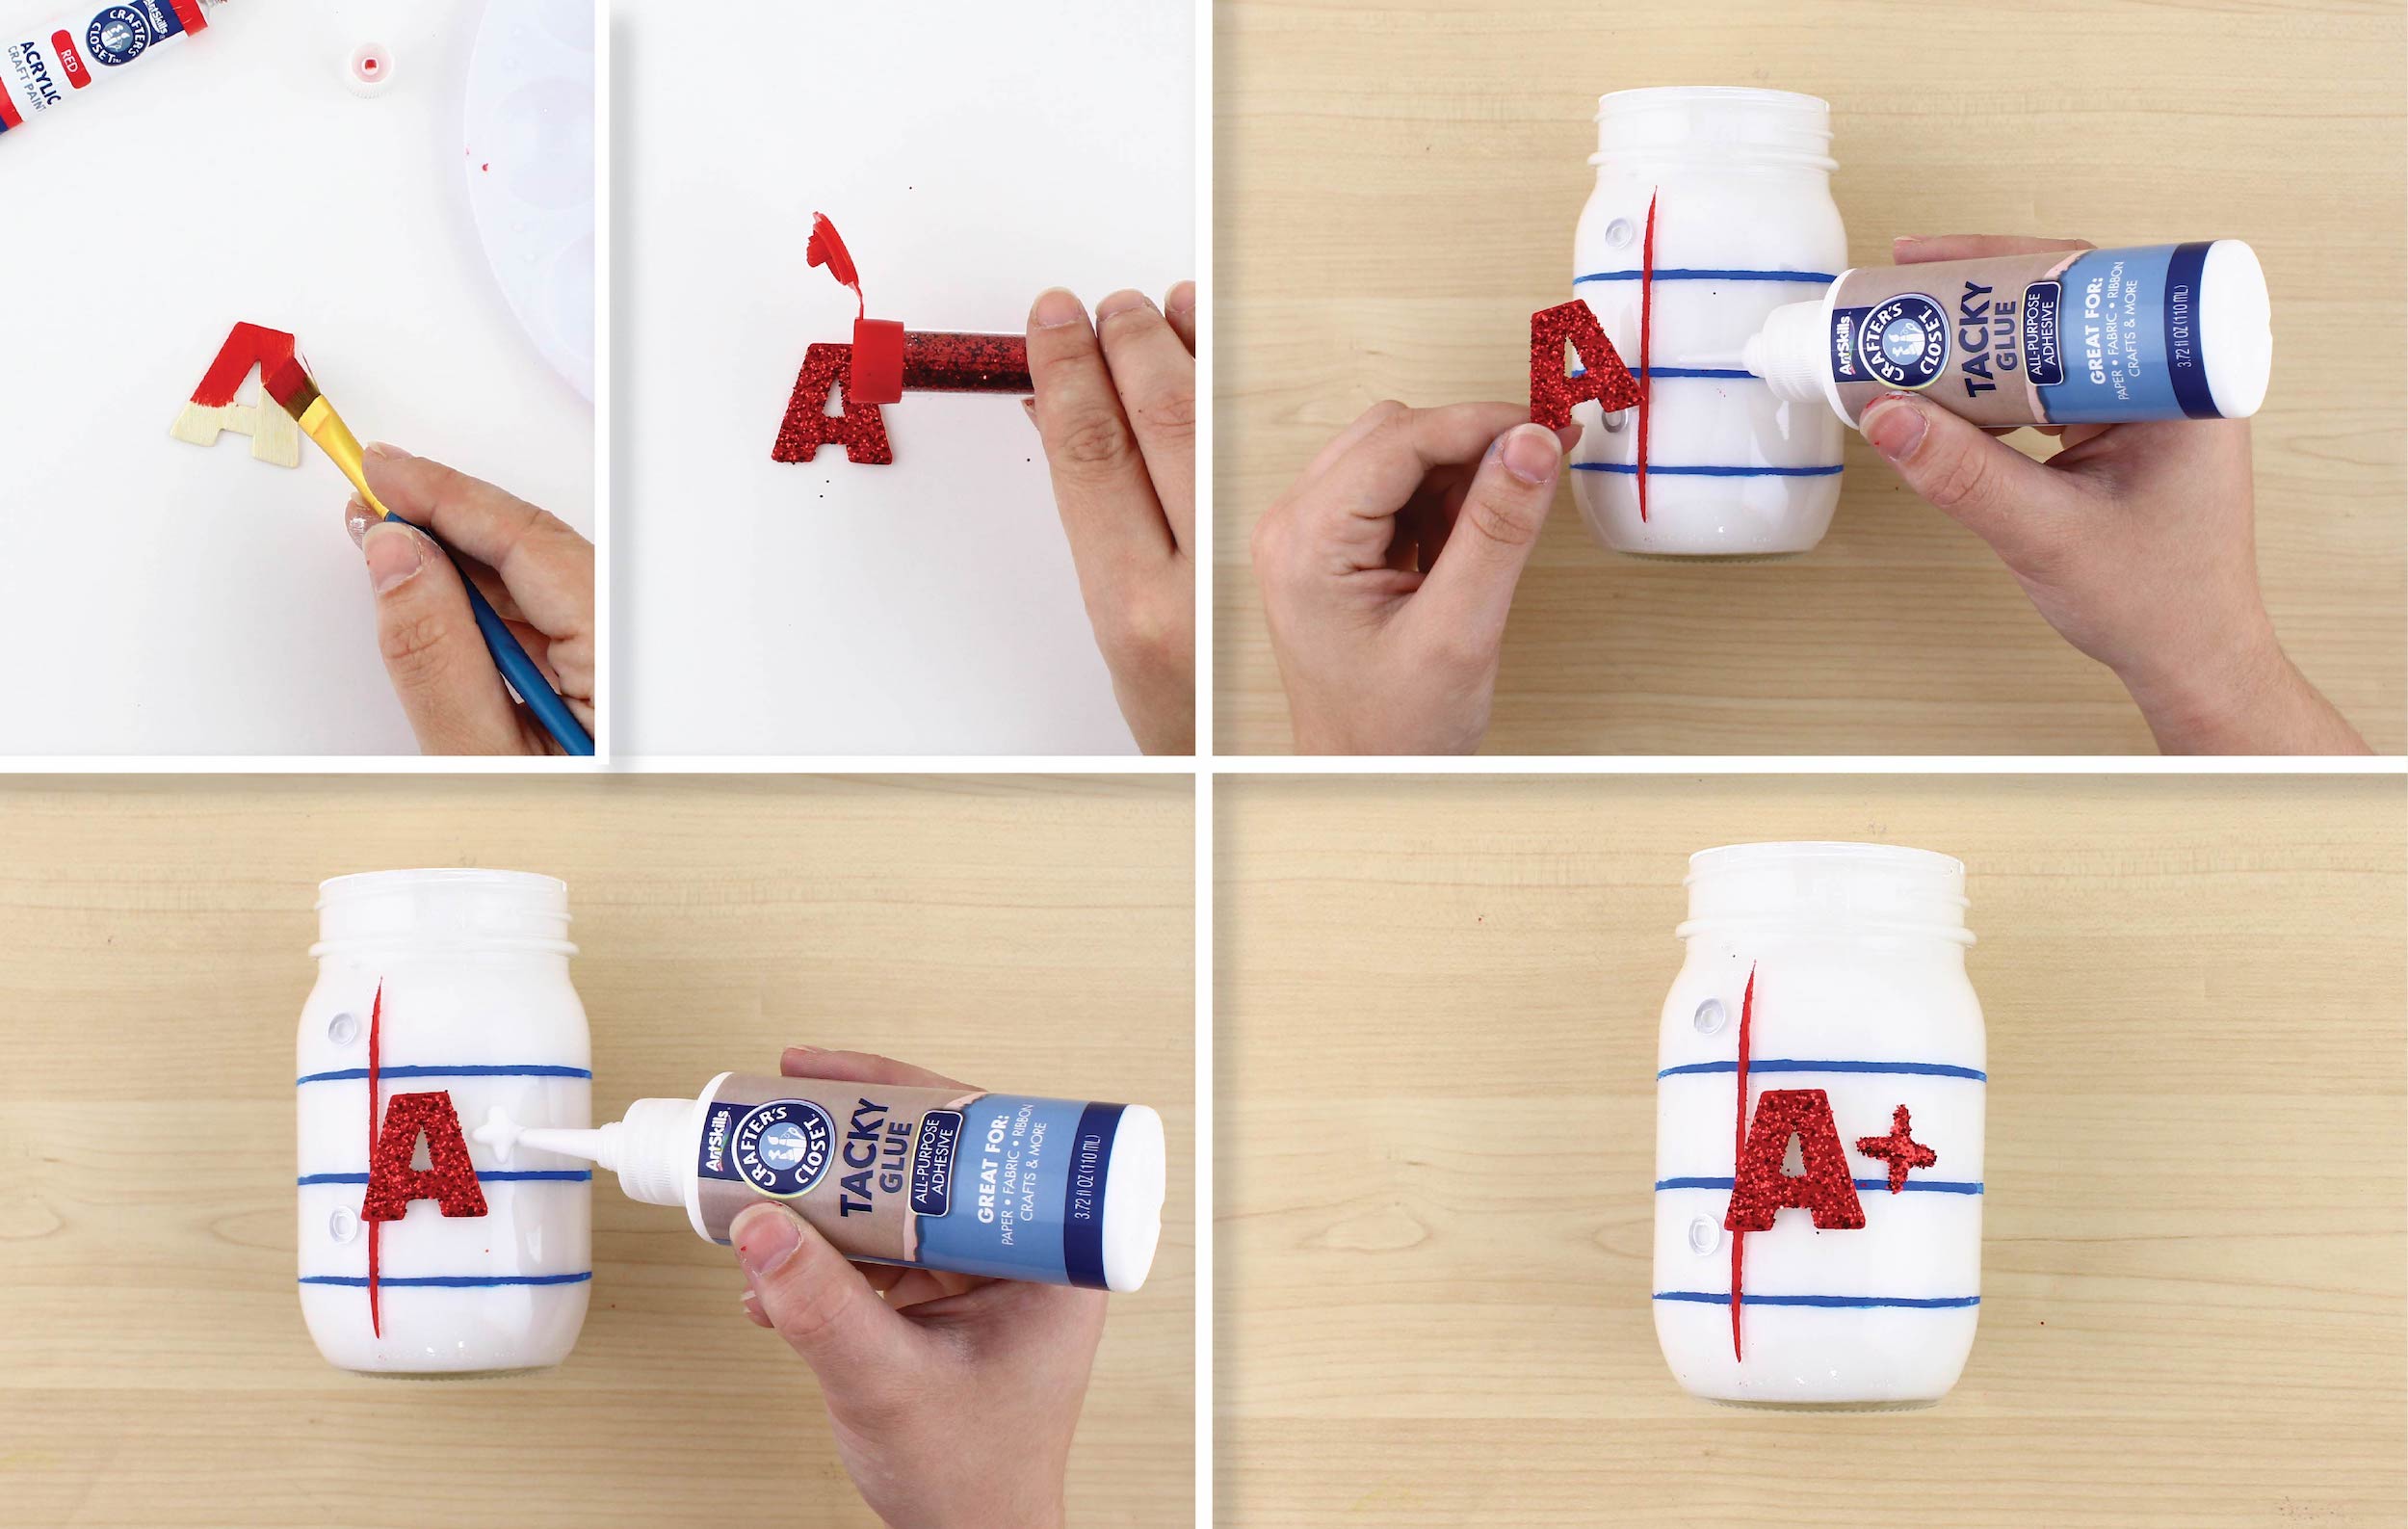
A) Paint the Wooden Letter “A” with red paint. While the paint is still wet, top with red glitter.
B) Using the Tacky Glue, adhere the letter to the jar.
C) To the right of the glittered letter, draw a plus sign with the Tacky Glue. Top with Red Glitter. Let dry.
Step 3:
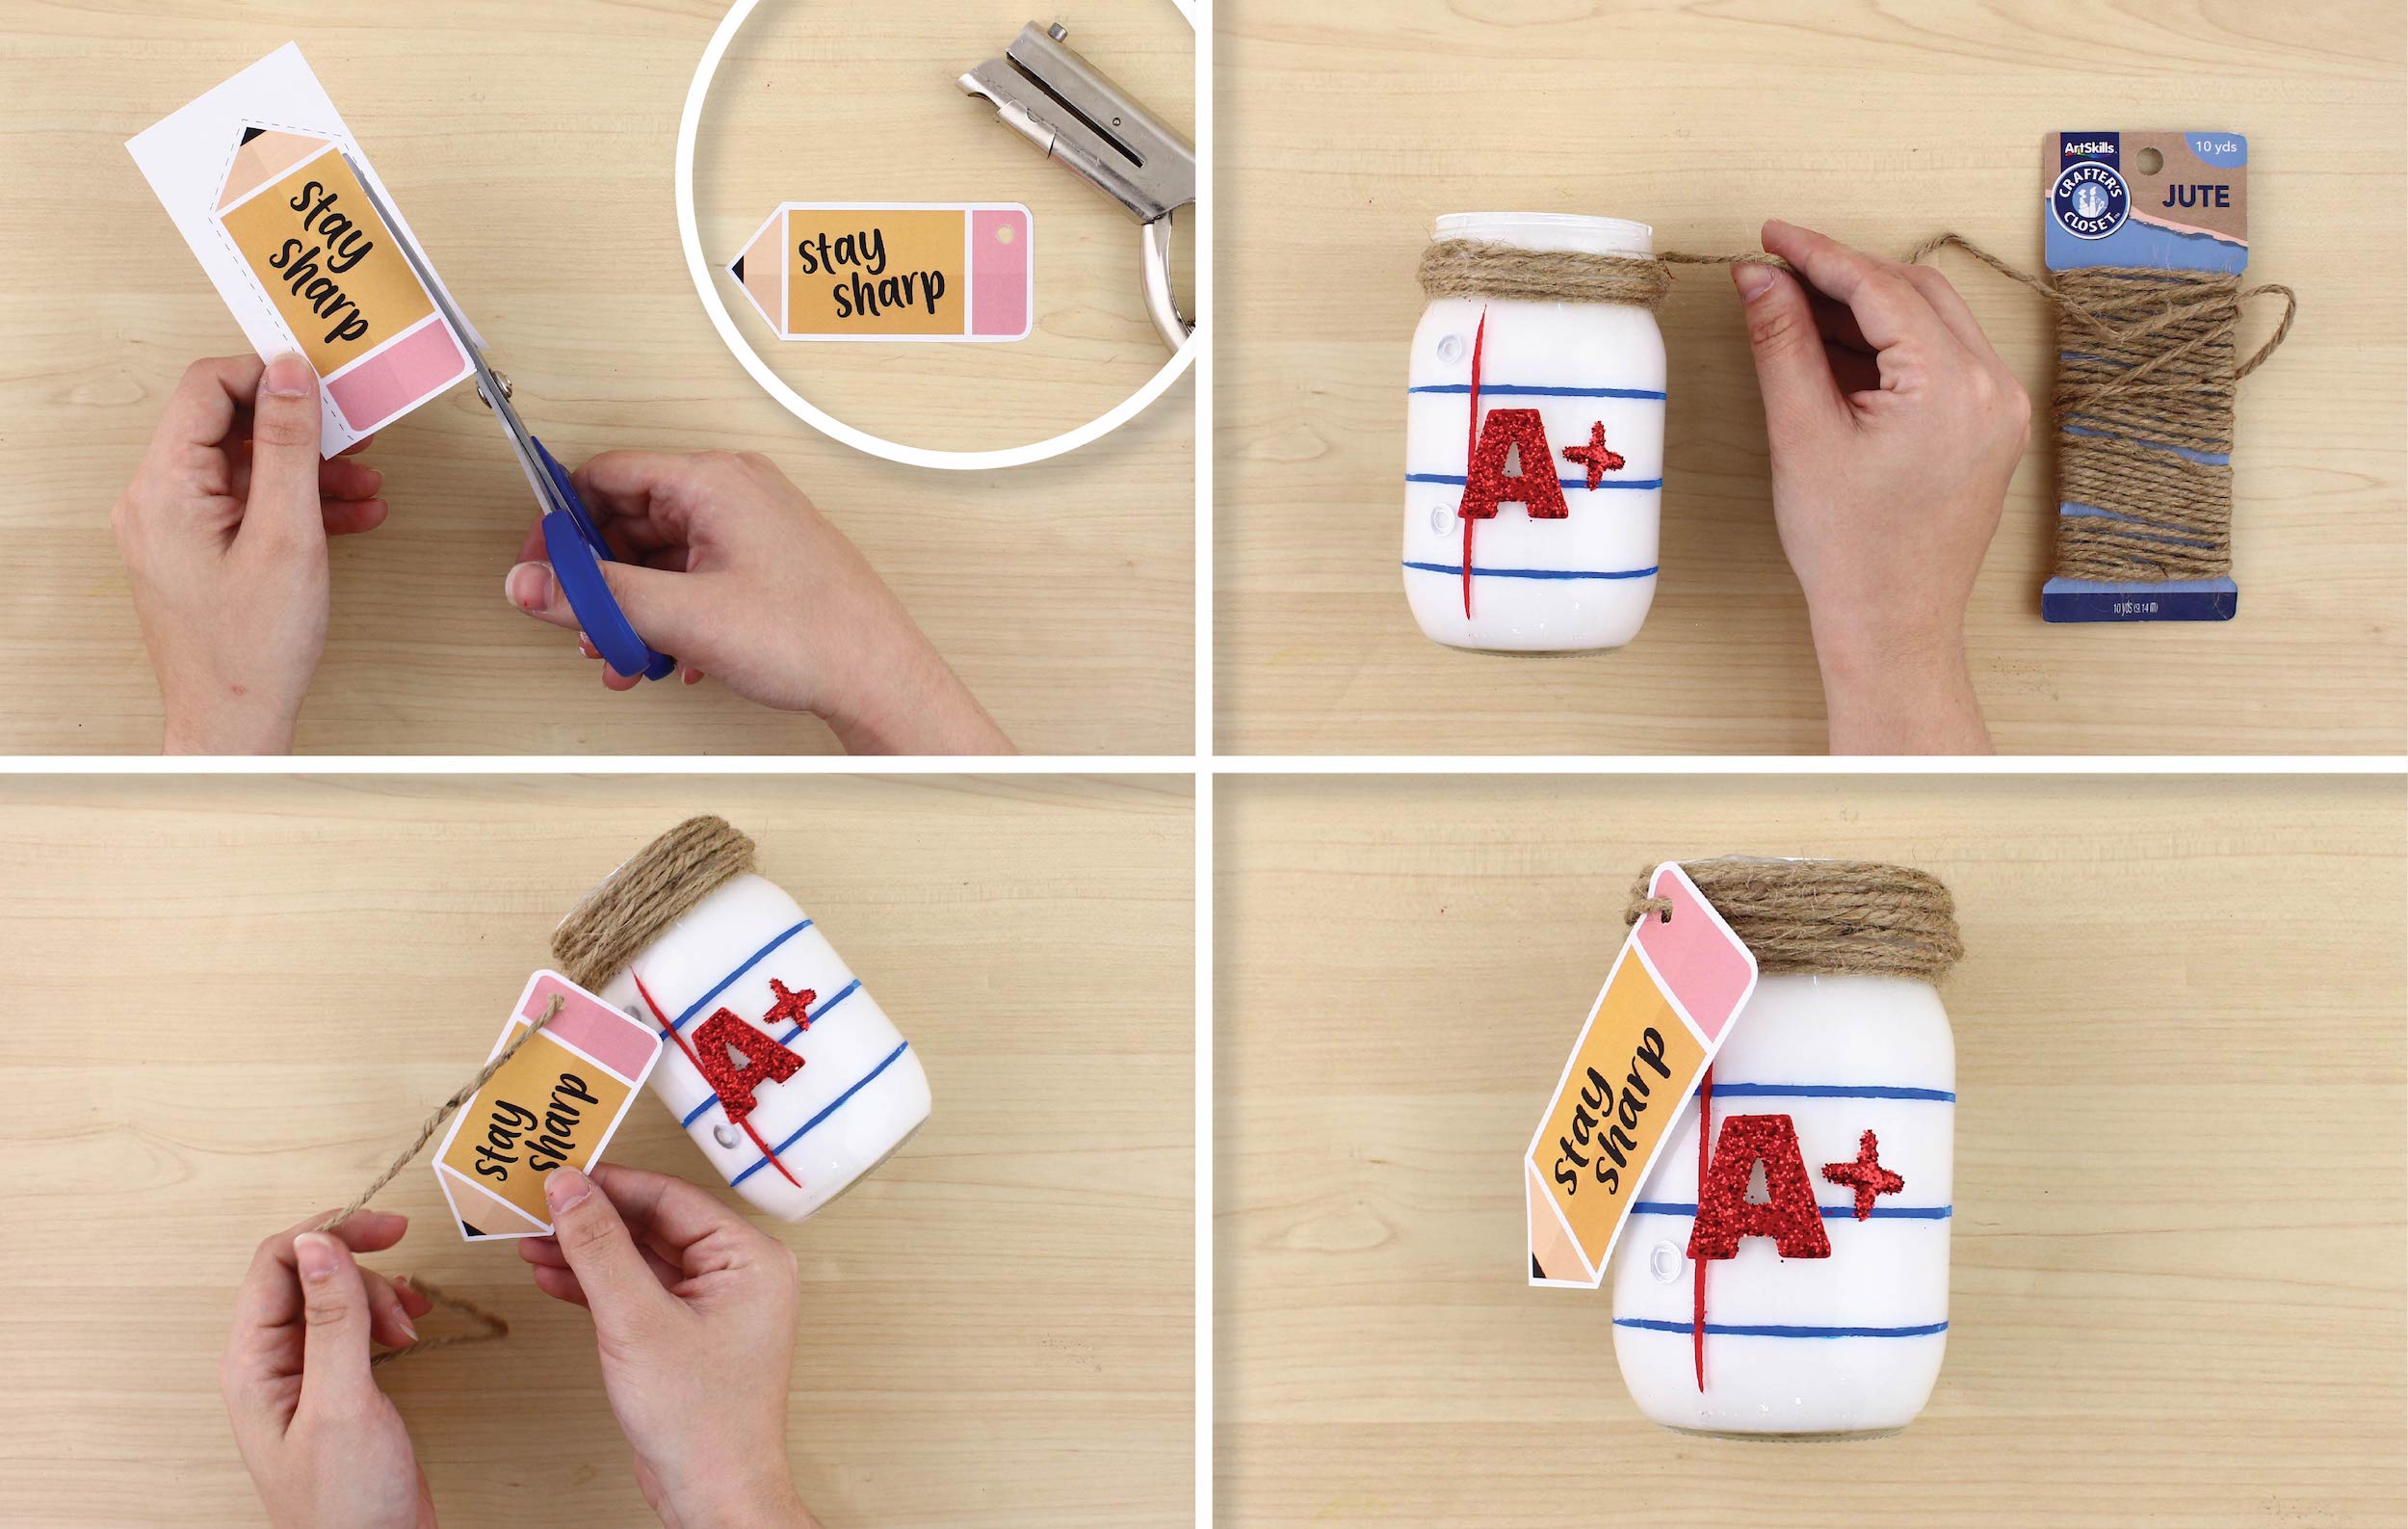
A) Download, cut, and punch a hole in the Downloadable Pencil Tags.
B) Wrap Jute around the neck of the jar to cover. Glue the beginning to secure.
C) String the tag onto the end of the Jute and tie or glue to secure.