The gifts are handmade. Celebrate a teacher with this cookie pencil box gift! Thank them for making your child a smart cookie!
Step 1:
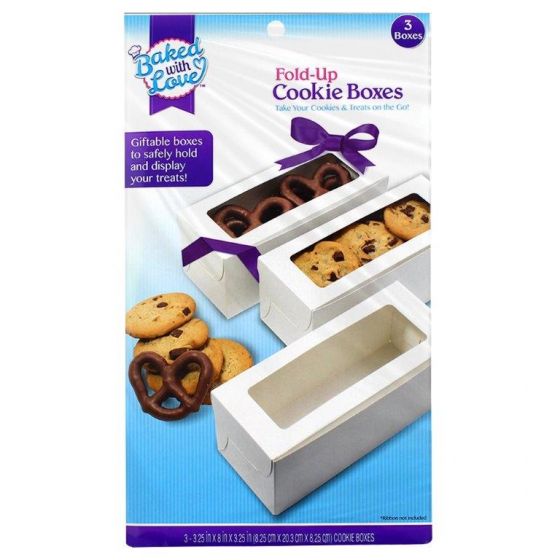
A) Assemble cookie box and pull aside 2 pieces of yellow cardstock. On one of the cardstock pieces, measure and cut a 1½" strip.
B) Adhere strip to the flap located at the top of the box. For perfect placement, line up the edge of the cardstock with the window on the box. Use small dabs of hot glue or a tape runner to adhere.
C) Adhere the other piece of the cut cardstock to the front of the box. Start at the edge of the front, fold, and run the cardstock to the bottom of the box. The seam will be at the bottom of the box.
D) Adhere the second piece of 6" x 6" cardstock to the top edge of the back of the box, keeping this seam on the bottom as well.
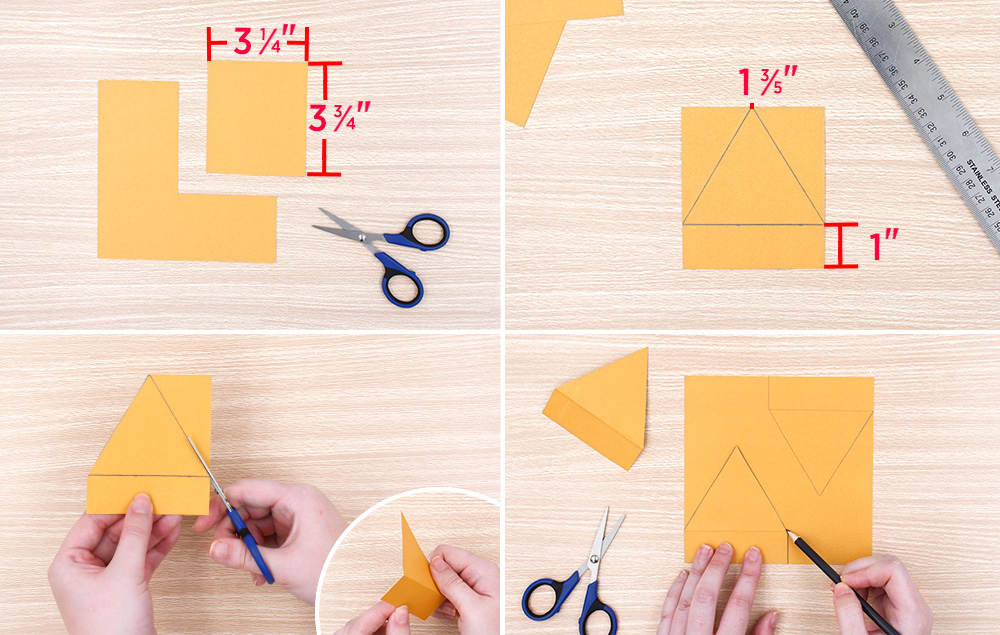
Step 2:
A) Measure and cut 3¼" x 3¾" rectangle piece of brown cardstock.
B) Hold the rectangle at portrait orientation. Estimate and mark the center of the rectangle, approximately 1 3/5". Measure and mark 1" up on the cardstock. Draw lines connecting triangle points.
C) Cut out triangle tip shape. Fold tab at the 1" drawn line.
D) Use this cutout shape as a pattern. Trace and cut out this shape three more times.
Step 3:
A) Cut 1" x 1½" strip from brown cardstock scraps.
B) Trace box lid lip onto this strip of cardstock. Cut off unneeded cardstock corner to mimic the lid shape.
C) Trace brown triangle piece onto black cardstock. Allow 1¼" in height. Trace and cut 3 of these small triangles. This is the tip of the pencil.
Trace brown triangle piece onto black cardstock, but this time add ¼" to each side, creating a rectangle around a triangle. This extra will work as tabs. Fold them along the triangle’s lines.
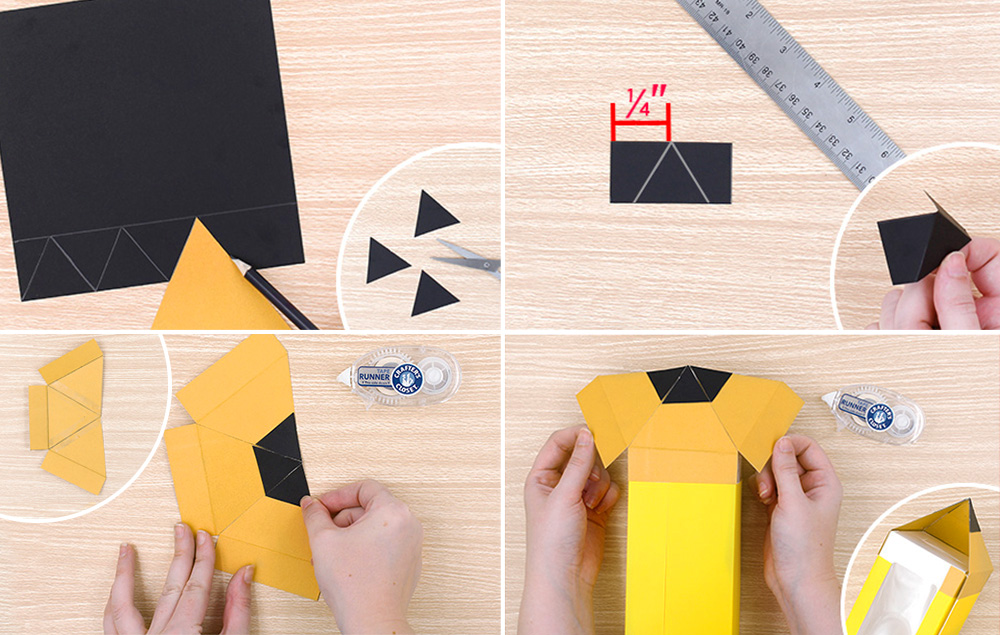
Step 4:
A) Flip triangle over, marked side facing up. Tape 3 triangle pieces together, points facing inward.
B) Flip back over and adhere 3 of the black triangle tip pieces, one to each triangle side. Adhere with dots of hot glue or tape runner.
C) Adhere 1" x 1½" lid cardstock piece to the box’s lid flap.
D) Adhere the connected 3 triangle pieces to the box, lining the bottom of the tabs up with the cookie window. Leave the lid on the box empty for now, adhering these to the bottom and sides of the box.
Step 5:
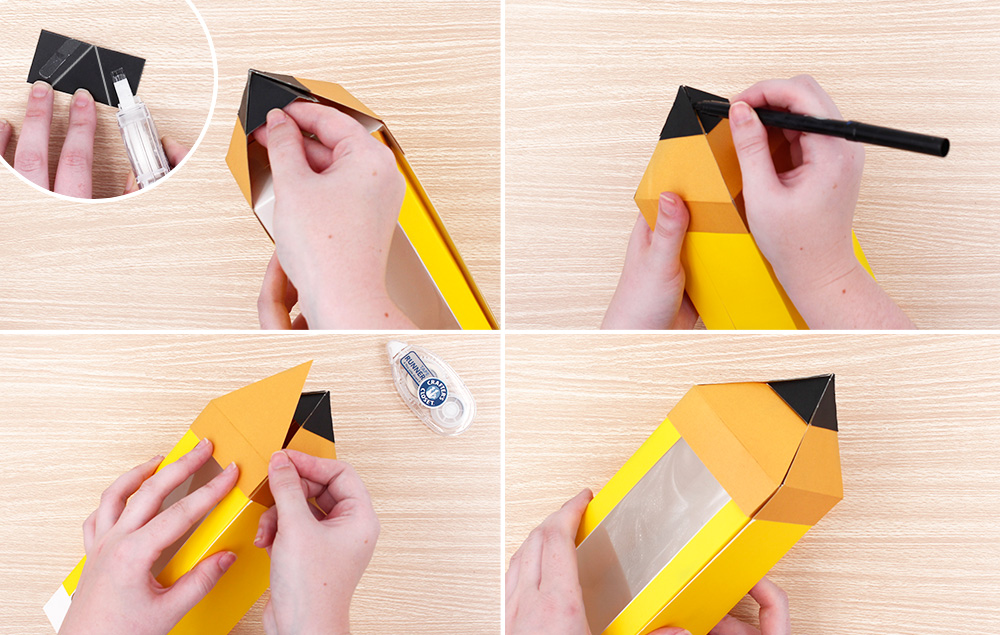
A) Adhere remaining black tip piece with tabs to the inside of the pyramid shaped tip. Apply adhesive with tape runner to the top of the tabs and adhere them to the inside of the pyramid shape.
B) Adhere remaining triangle piece to the box lid.
C) This lid triangle piece will be tucked under the black tip when box is closed.
Step 6:
A) Let’s use pink cardstock to make the eraser on the pencil! Measure and cut one 5 ¼" x 3¼" rectangle, one 4¾ " x 3½" rectangle, and one 4" x 1" rectangle.
B) Using 5 ¼" x 3¼" rectangle, measure 1" on each side. Fold to make tabs.
C) Place rectangle horizontally. Measure and mark 1¾" from the bottom. Measure and mark ¼" from each side. Draw a line connecting the marks. Cut a slit on this line using a project knife.
D) Using 4¾ " x 3½" rectangle, trace the side of the box lid. Leave a small 1" tab on the left side. Cut out this shape.
Step 7:
A) Let’s attach all of the pink cardstock pieces. Adhere the 1" x 4" strip to the bottom of the box. Fold over extra cardstock on each side for more support.
B) Adhere the piece with the slit cut to the side of the box. Fold the tabs to each side for support.
C) Adhere the lid shaped piece to the lid flap.
D) Test to see if flap slides easily into slit. Make any slight cutting adjustments if needed.
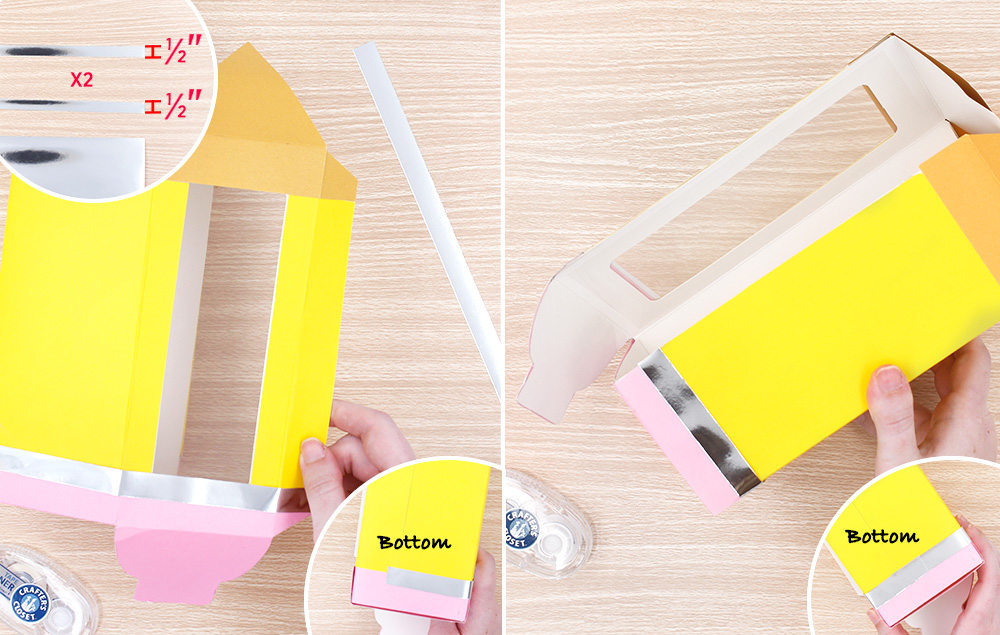
Step 8:
A) Measure and cut two ½" strips from a sheet of silver foil paper. Cut these strips from the longer edge of the sheet of foil.
B) Adhere first foil strip to the lid flap, overlapping on top of the pink cardstock. For perfect placement, line up the edge of the foil strip with the cookie box window. Run this strip to the bottom of the box and adhere the strip in place. This will keep the seam at the bottom of the box. Cut off any extra material.
C) Adhere the second foil strip to the top of the front of the box. Fold and run this strip to the bottom of the box as well. Adhere the strip in place so the seam is at the bottom of the box, cutting off any extra foil not needed to cover.
Step 1:
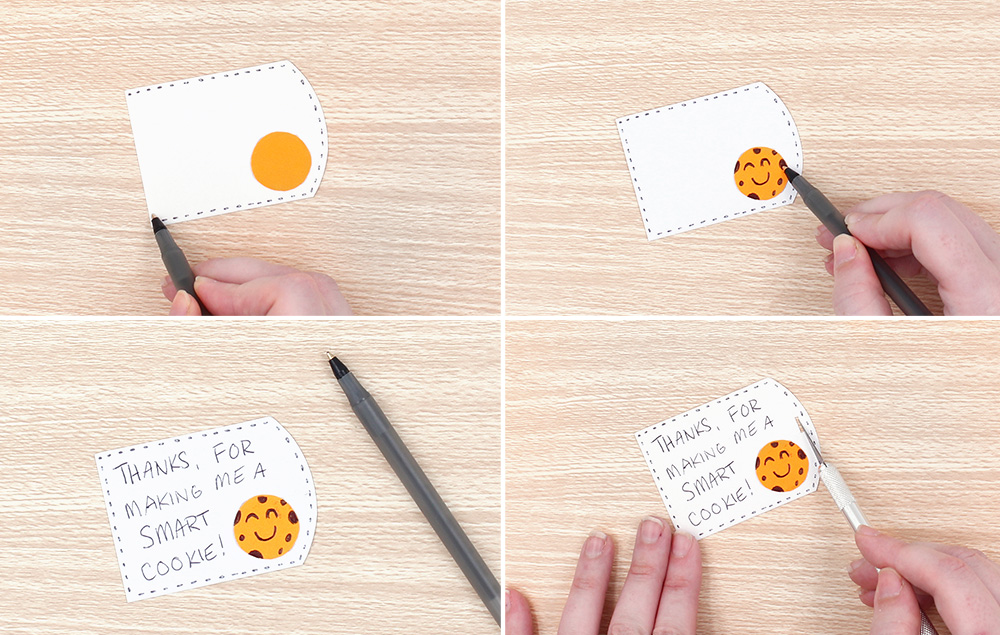
A) Measure and cut 2" x 2¾" rectangle of white cardstock. Trace a nickel onto orange or light brown cardstock. Cut out circle.
B) Trace the edge of a cup onto the edge of the rectangle.
C) Cut traced end to create a curved edge.
D) Adhere nickel sized circle to the bottom right corner of the white tag, close to the curved edge, but leaving some room.
Step 10:
A) Decorate the edges of the tag with a pen! Add dots, equally spaced, in a line encompassing the edges of the tag.
B) Draw a happy face and chocolate chip dots onto the circle.
C) Write out your message.
D) Cut a small slit into curved side of tag. Make it big enough to slide ribbon through.
Step 11:
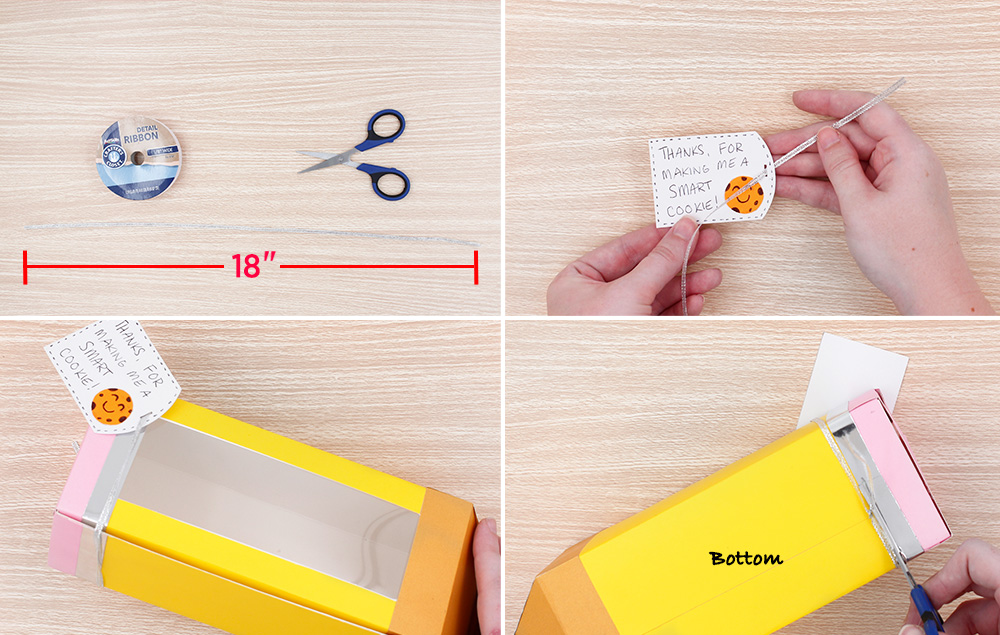
A) Cut approximately 18" of silver ribbon.
B) Slide ribbon through the tag slit.
C) Tie tag and ribbon around the lower end of the box. For perfect placement, have silver ribbon sit on top of silver foil paper, keeping the tag on the top left corner of the lid.
D) Once knot is tied, cut off extra ribbon.