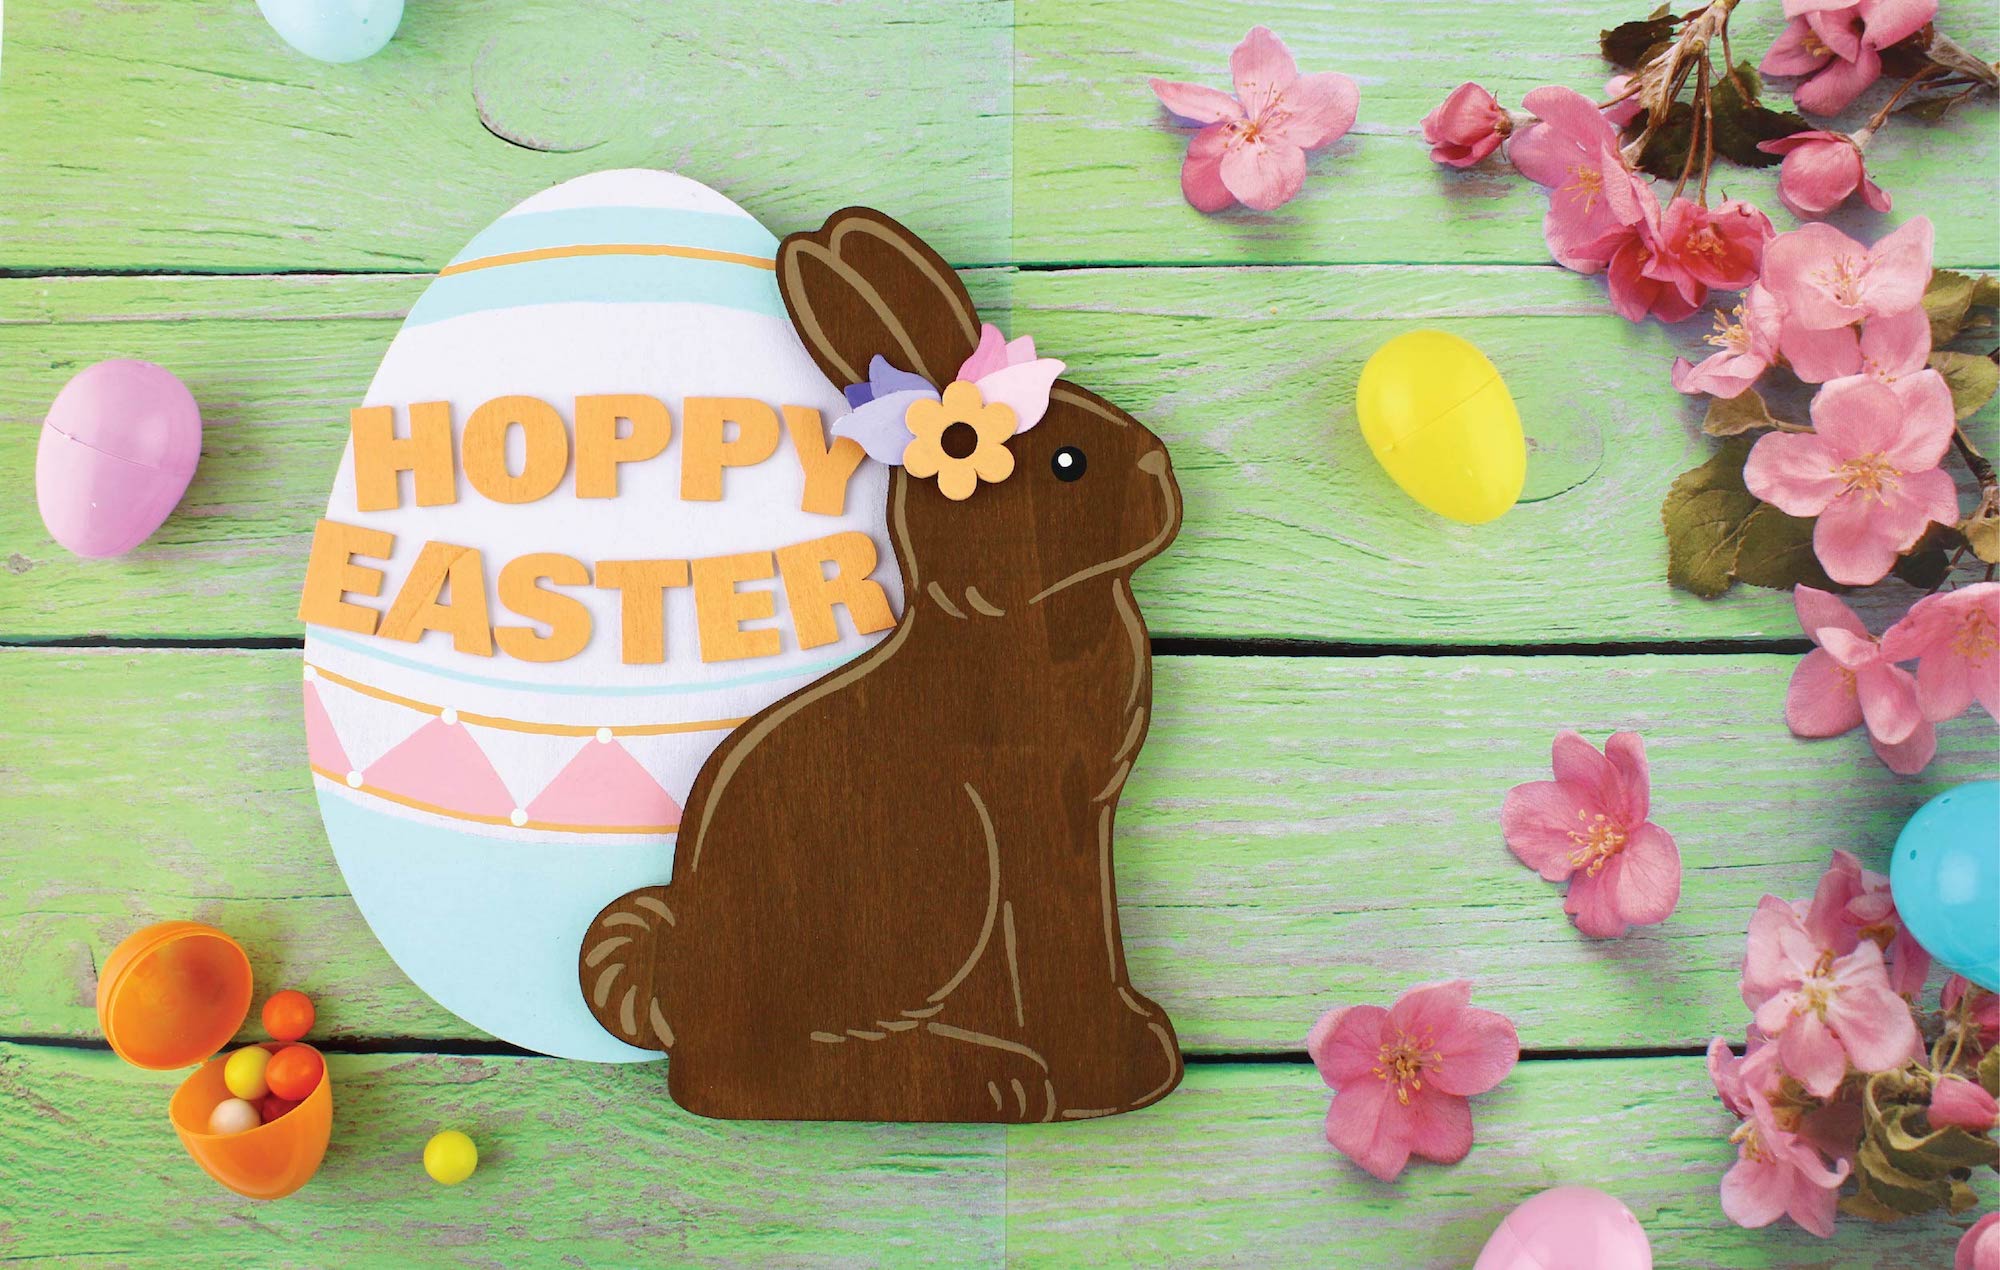
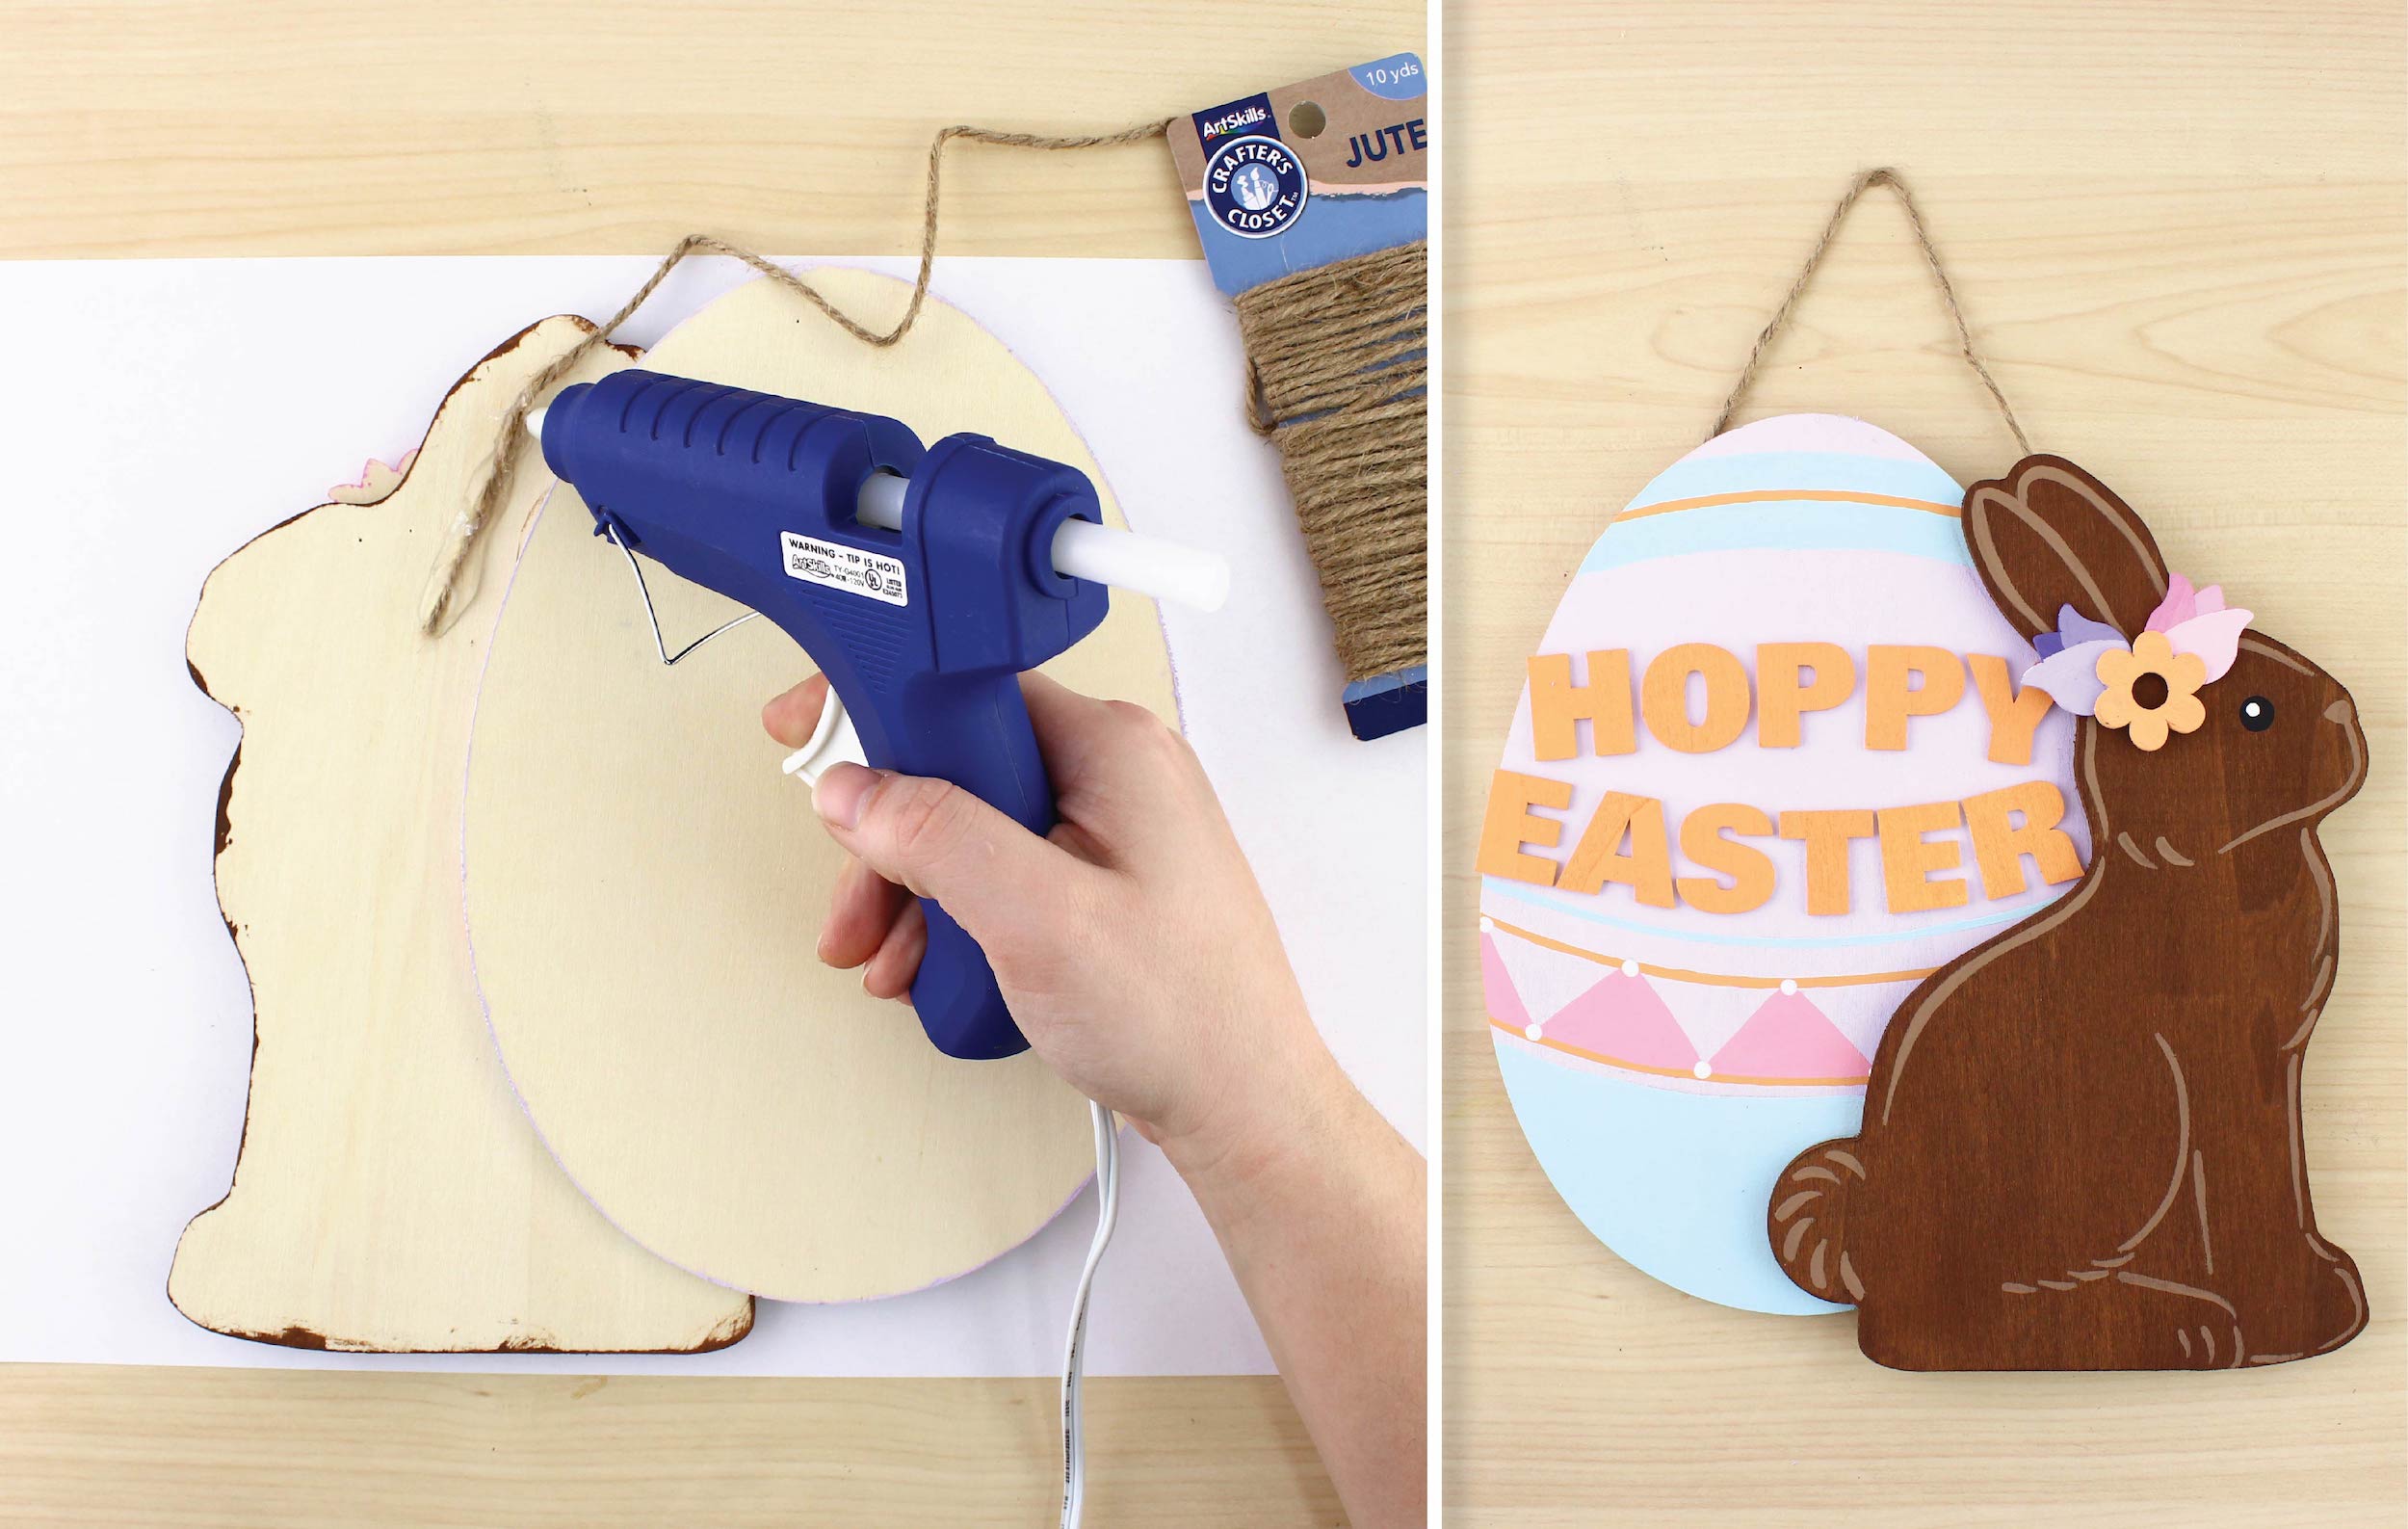
Bring some spring pastels into your Easter celebration with this bunny cute craft!
Step 1:
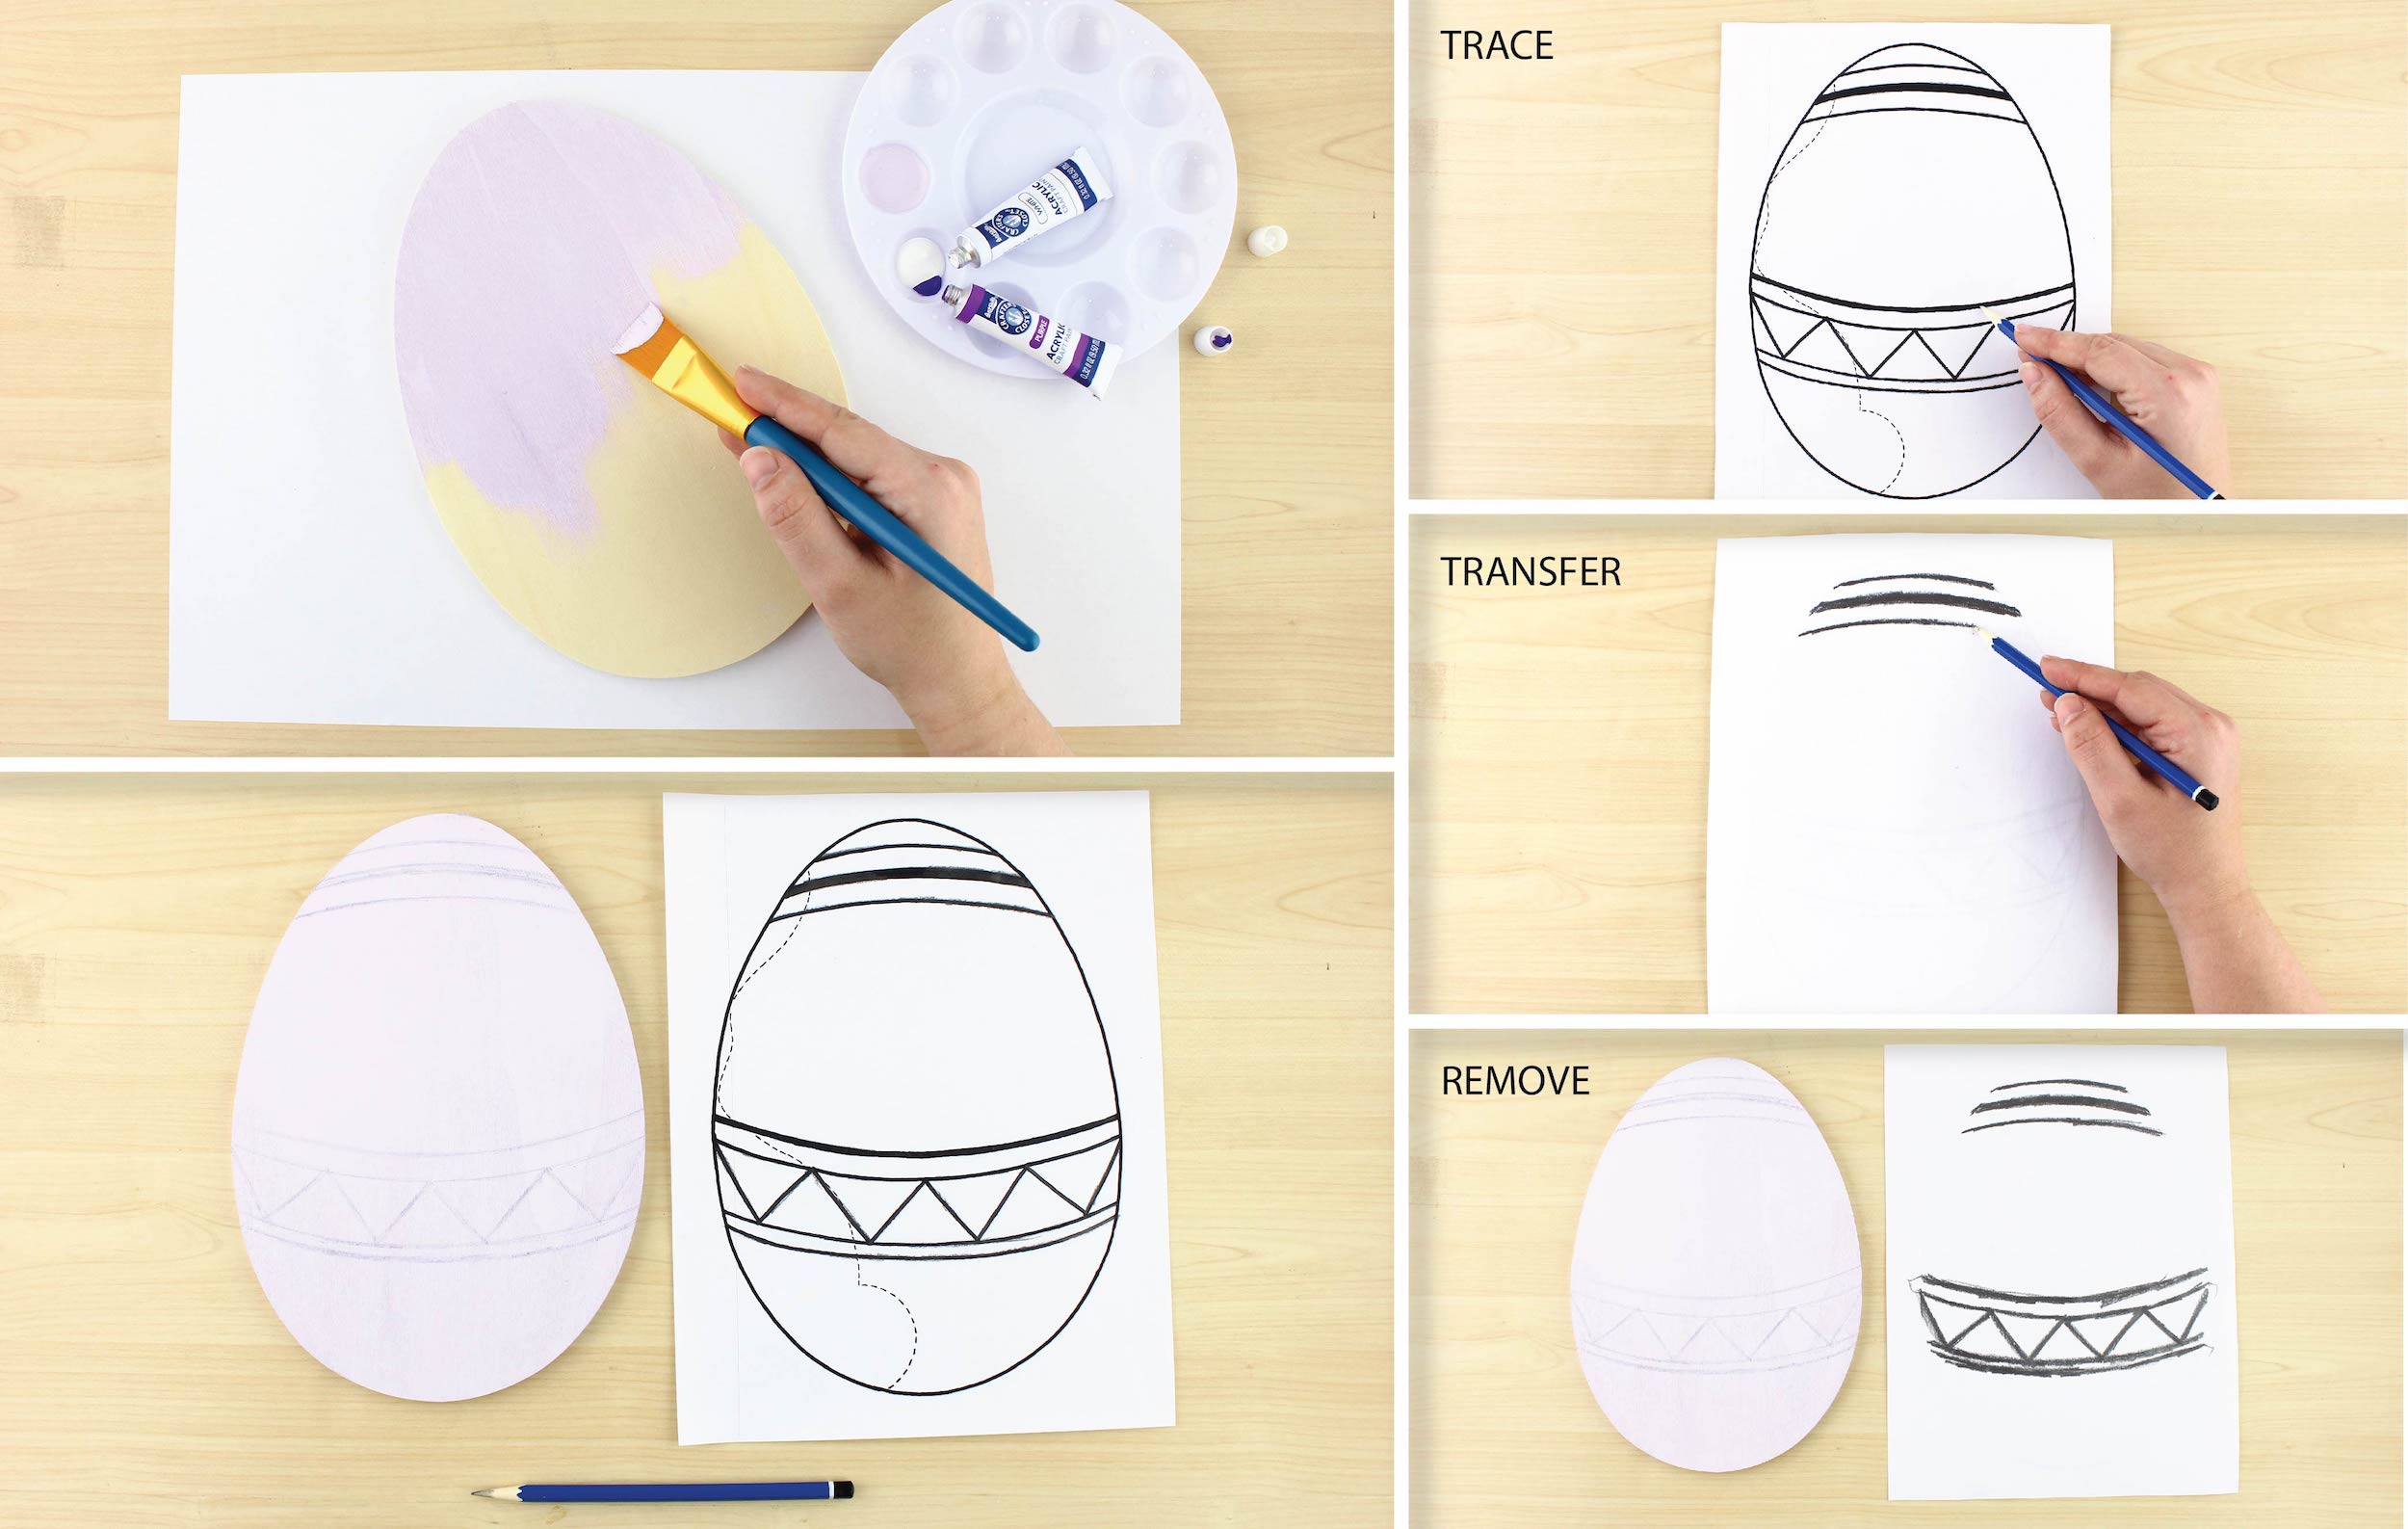
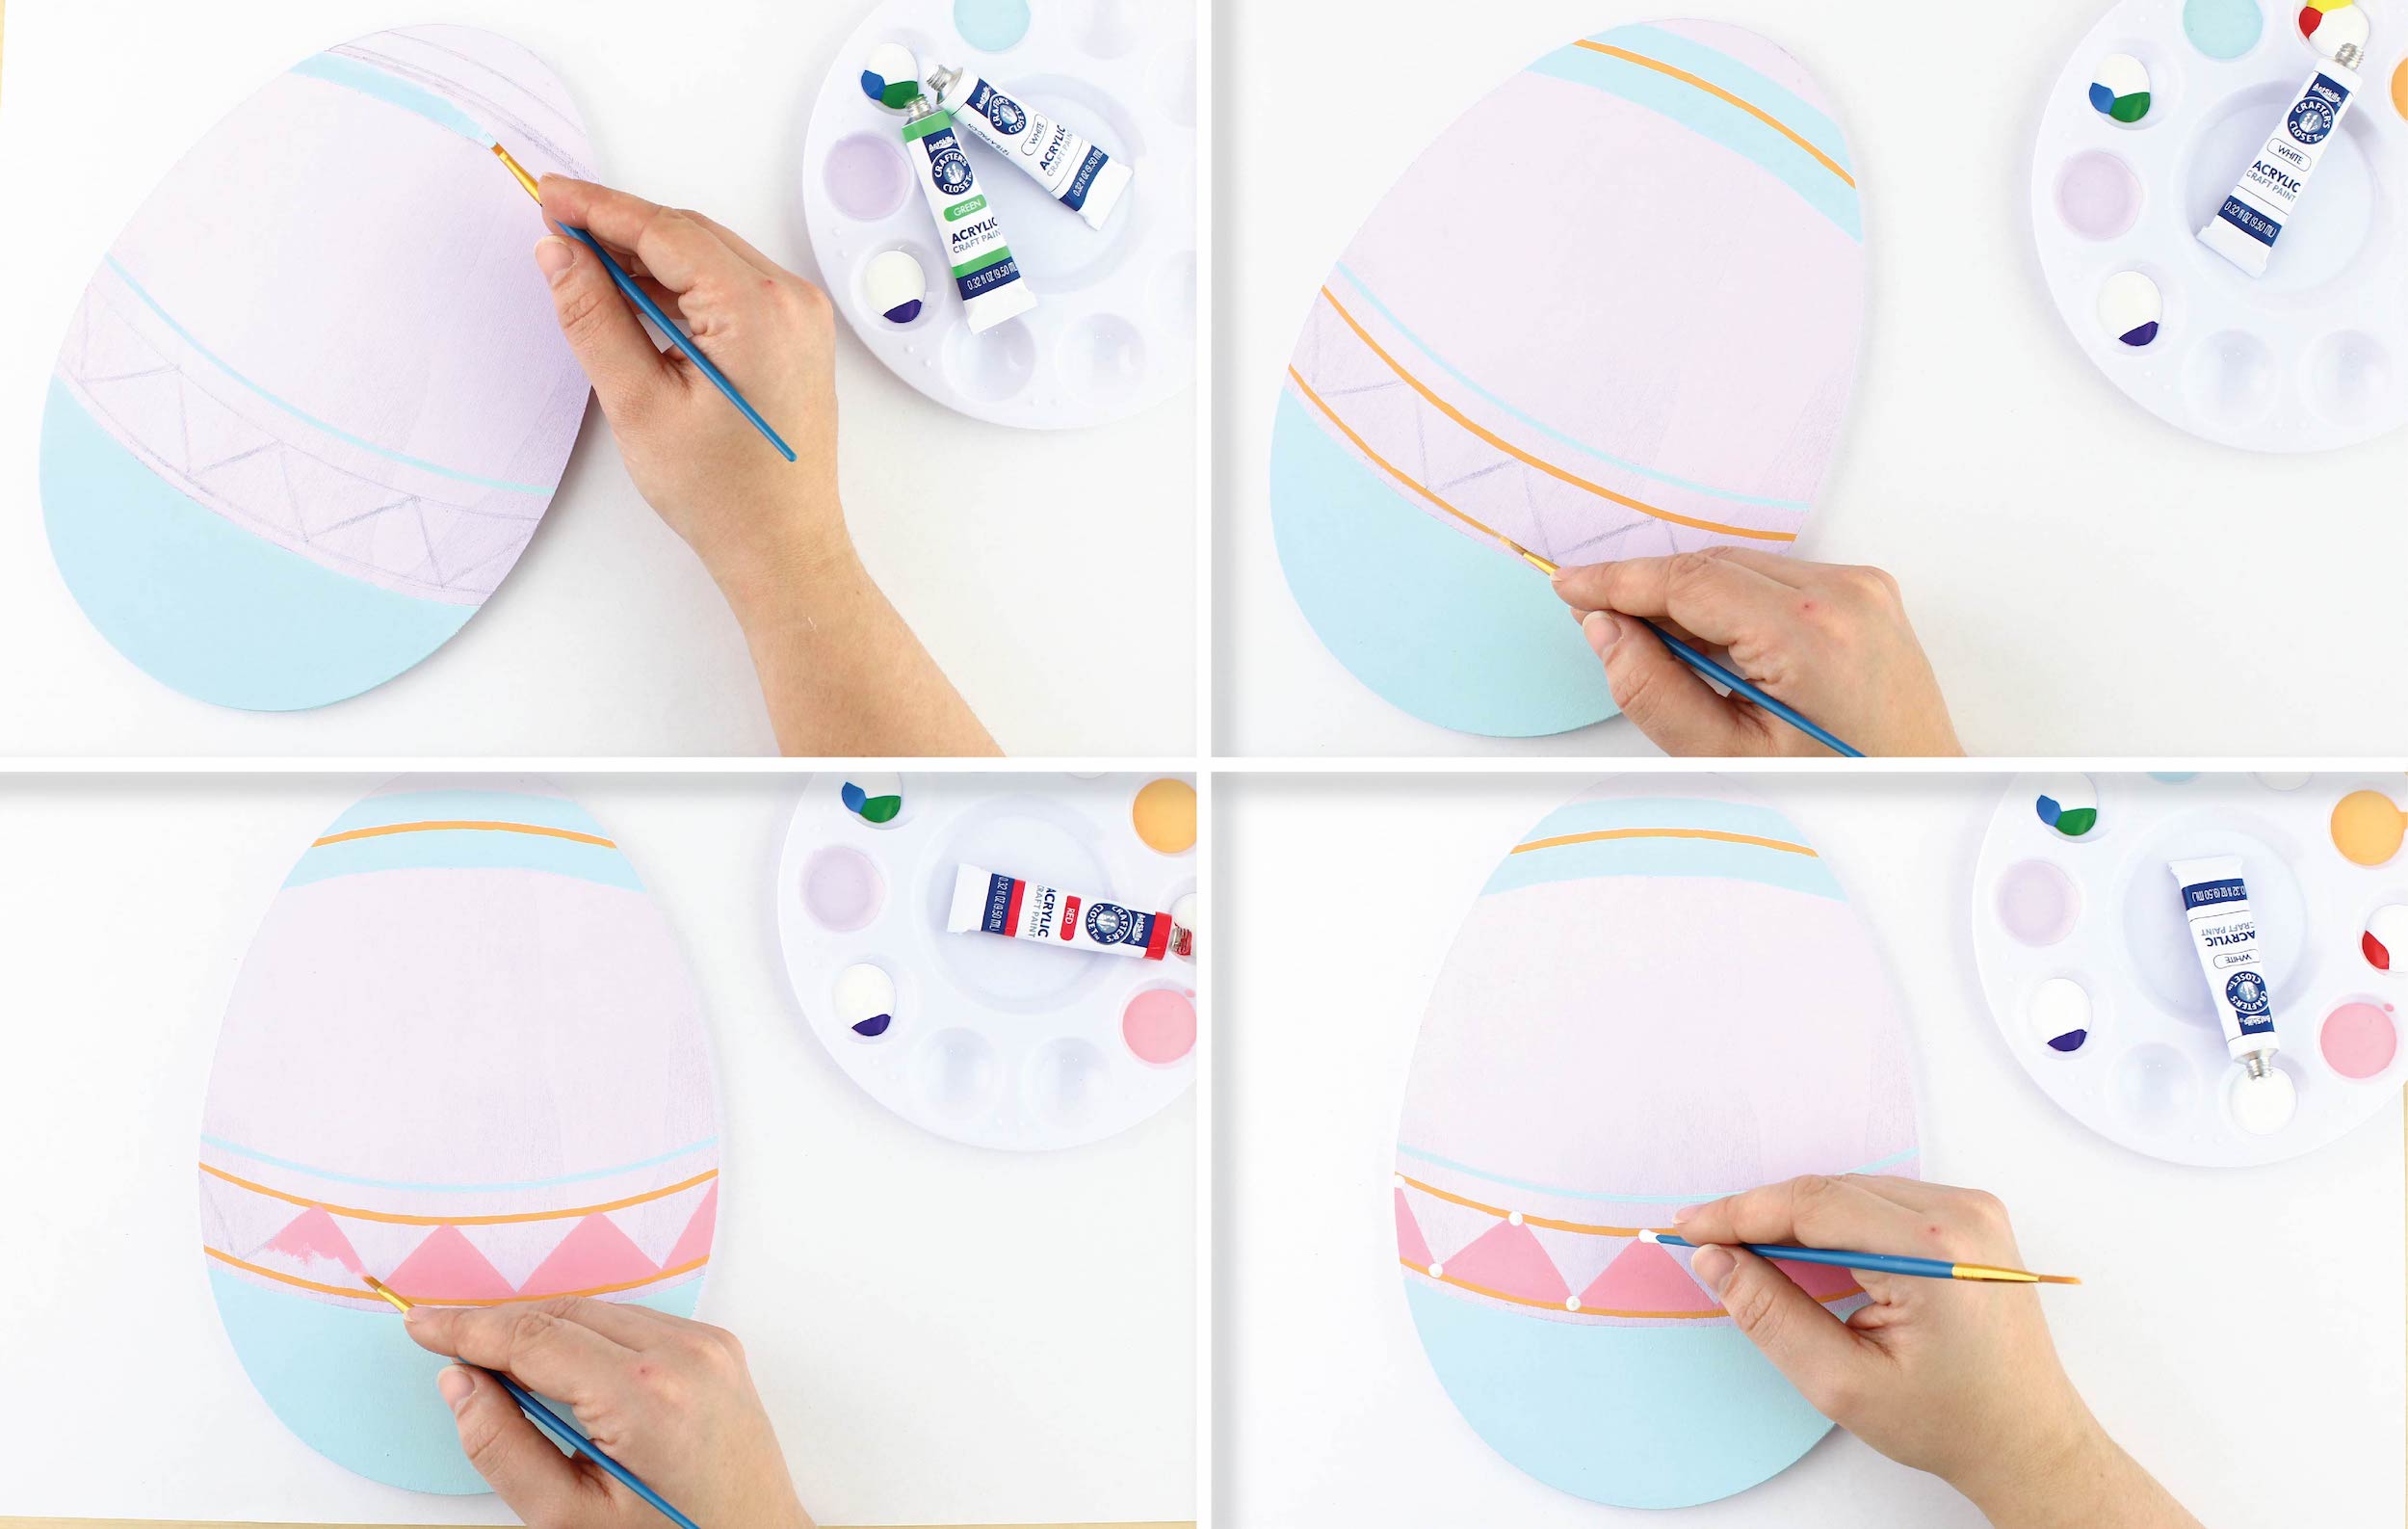
A) Mix together purple and white paint to get a pastel purple. Paint entire egg shape. Let dry.
B) Using the downloadable template, trace over the designs on the front of the paper. Leave the dotted line, representing the bunny, for a future step. Carefully position the egg template over the Wooden Easter Egg Plaque and go back over the lines to transfer the original image. If you decide to make up your own egg design, skip this step!
C) Remove your paper to reveal the image!
Step 2:
A) Mix green, blue, and white paint together to get a light aqua. Apply paint to the design.
B) Mix together red, yellow, and white for a pastel orange. Add paint for details.
C) Combine red and white paint for a pink and paint in the bottom half of the triangle shapes.
D) Using the end of your paint brush, add white dots to the tops and bottoms of the triangles.
Step 3:
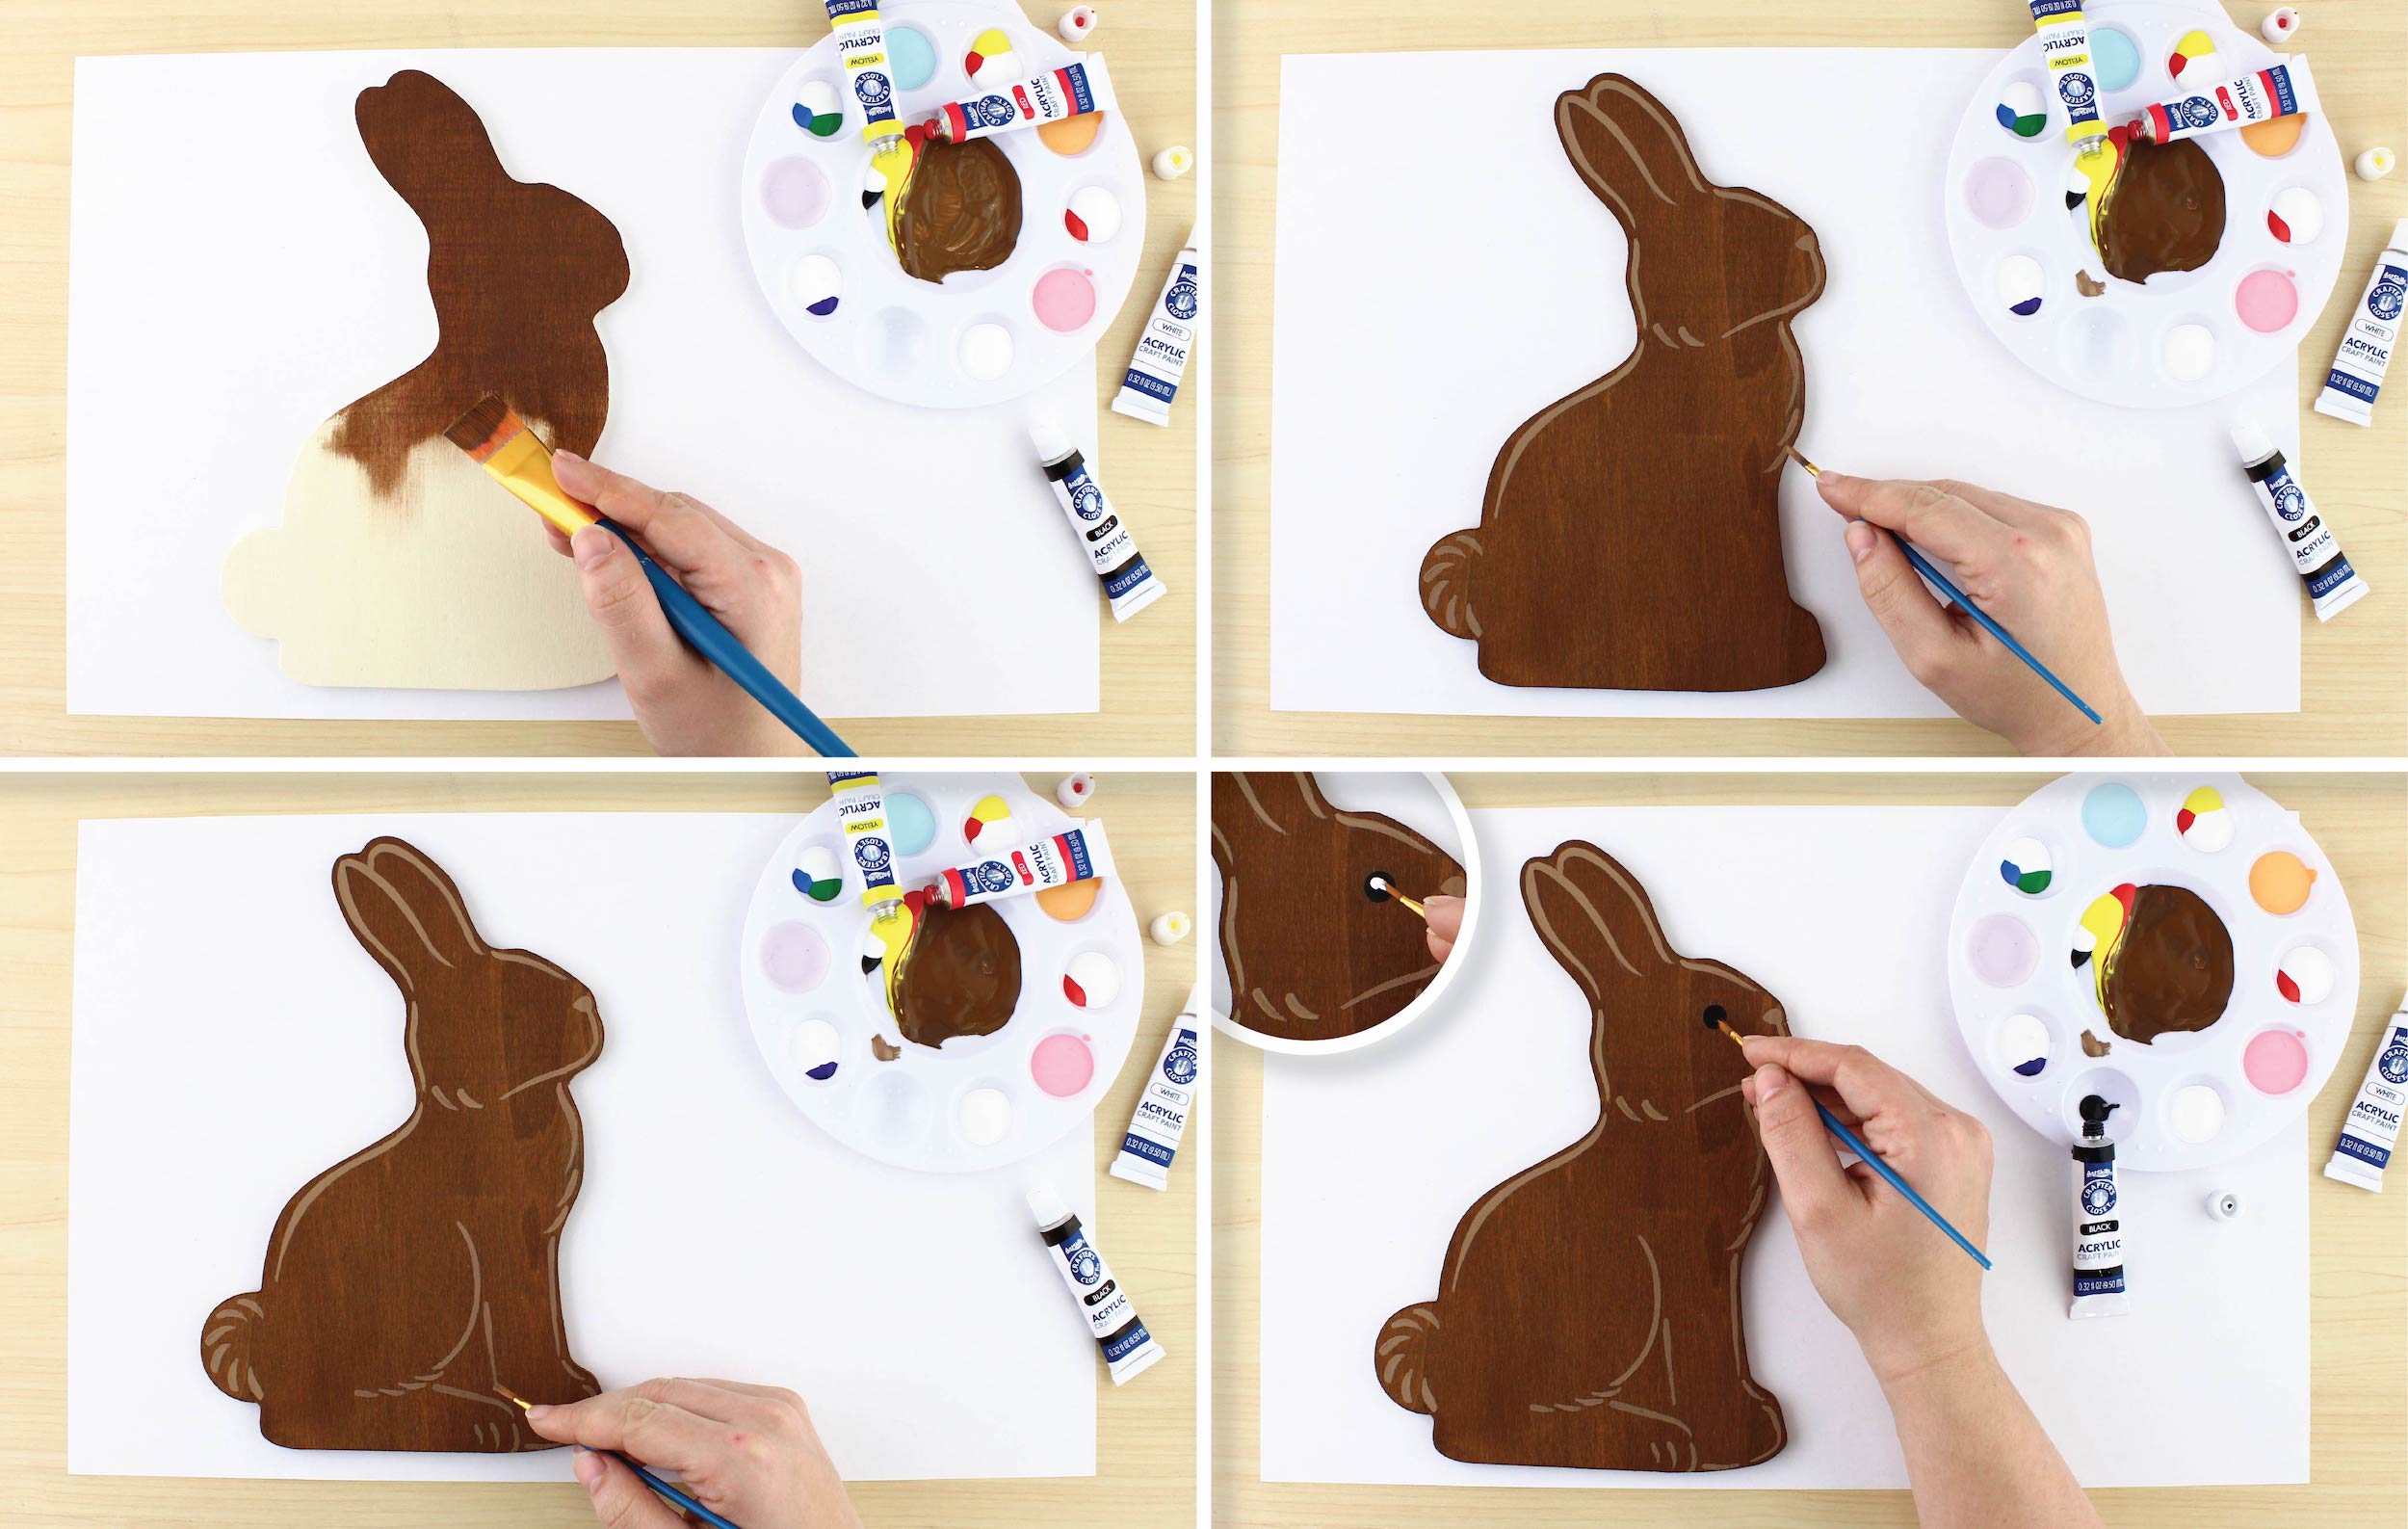
A) Paint the entire Wooden Bunny Plaque brown. Mix together red, yellow, black and a little white. Let dry.
B) Adding a little more white paint to your brown, lighten it enough to show up on top of the original brown color. Add some thin lines surrounding the shape to create a ‘chocolate bunny’ look.
C) Continue with the light brown.
D) Paint a small circle with black paint for the eye. Add a small dot of white for a highlight.
Step 4:
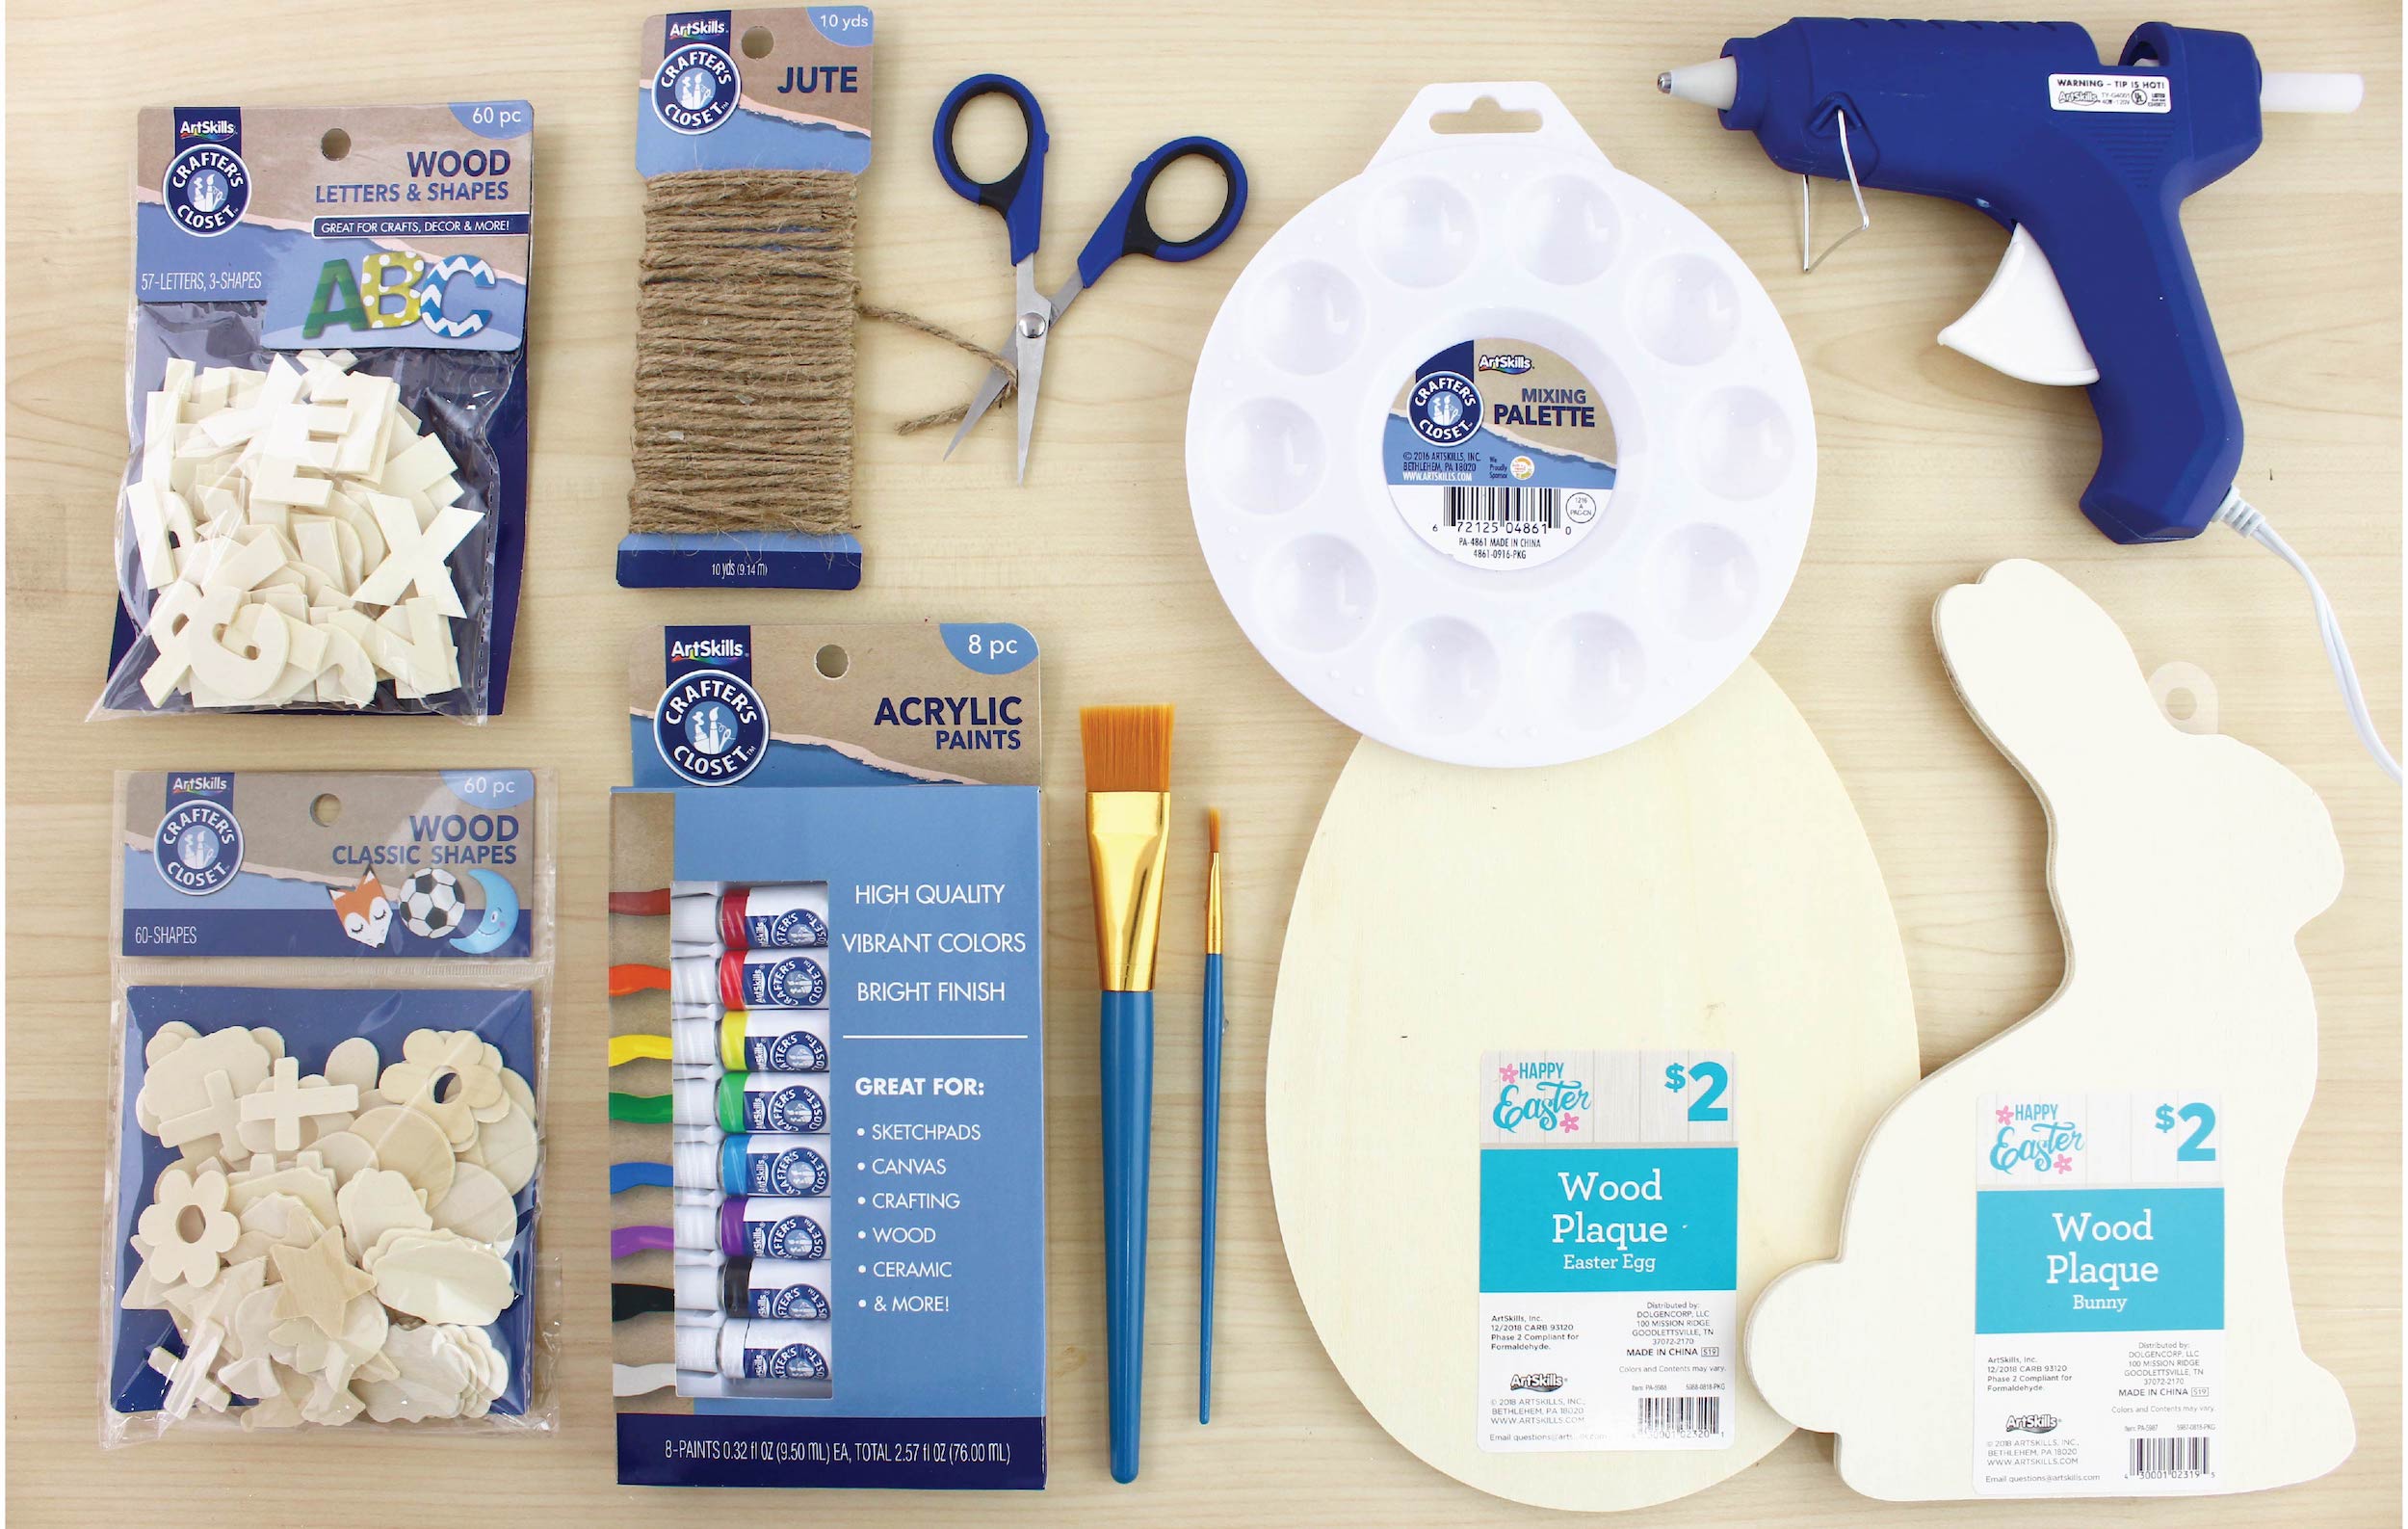
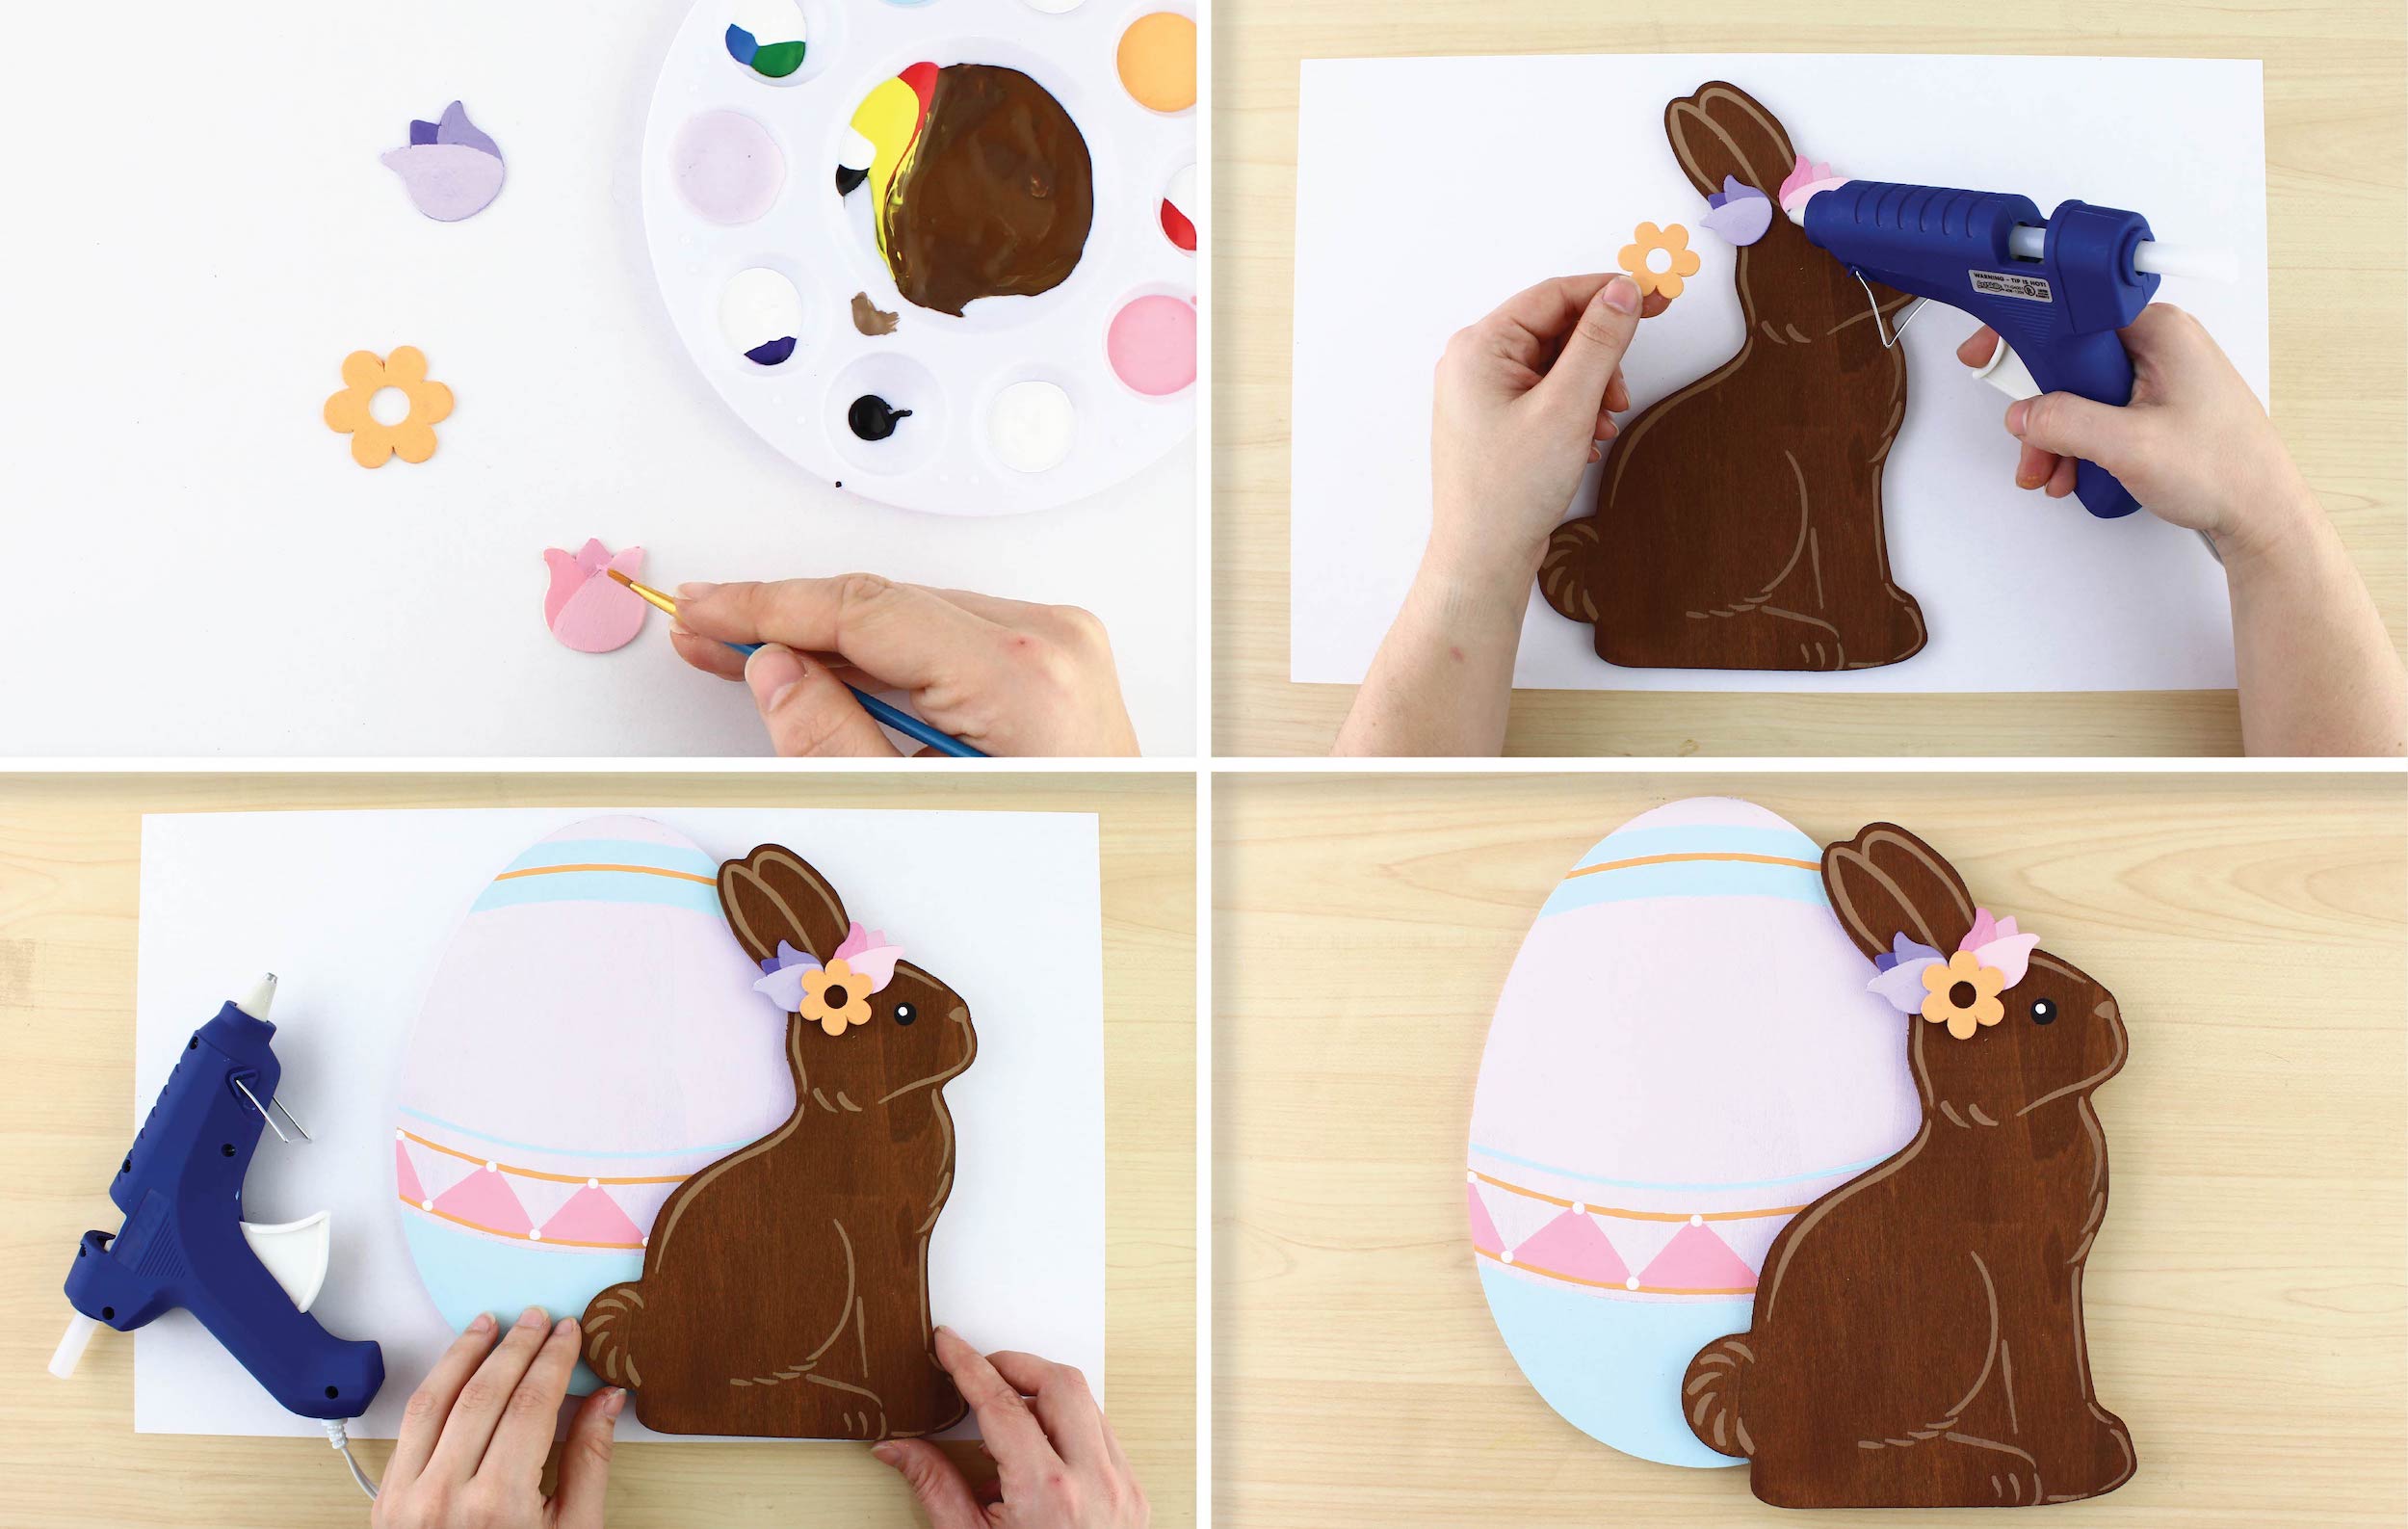
A) Using the pastels colors mixed in Step 2, paint three flowers from the Wood Shapes assortment pack. You can mix together different tones of your colors to create a three-way tulip, as shown.
B) Hot Glue your flowers to the Wooden Bunny Plaque at the base of the ears.
C) Hot Glue the Wooden Bunny Plaque to the Wooden Easter Egg Plaque. Use the Downloadable Template for proper positioning.
Step 5:
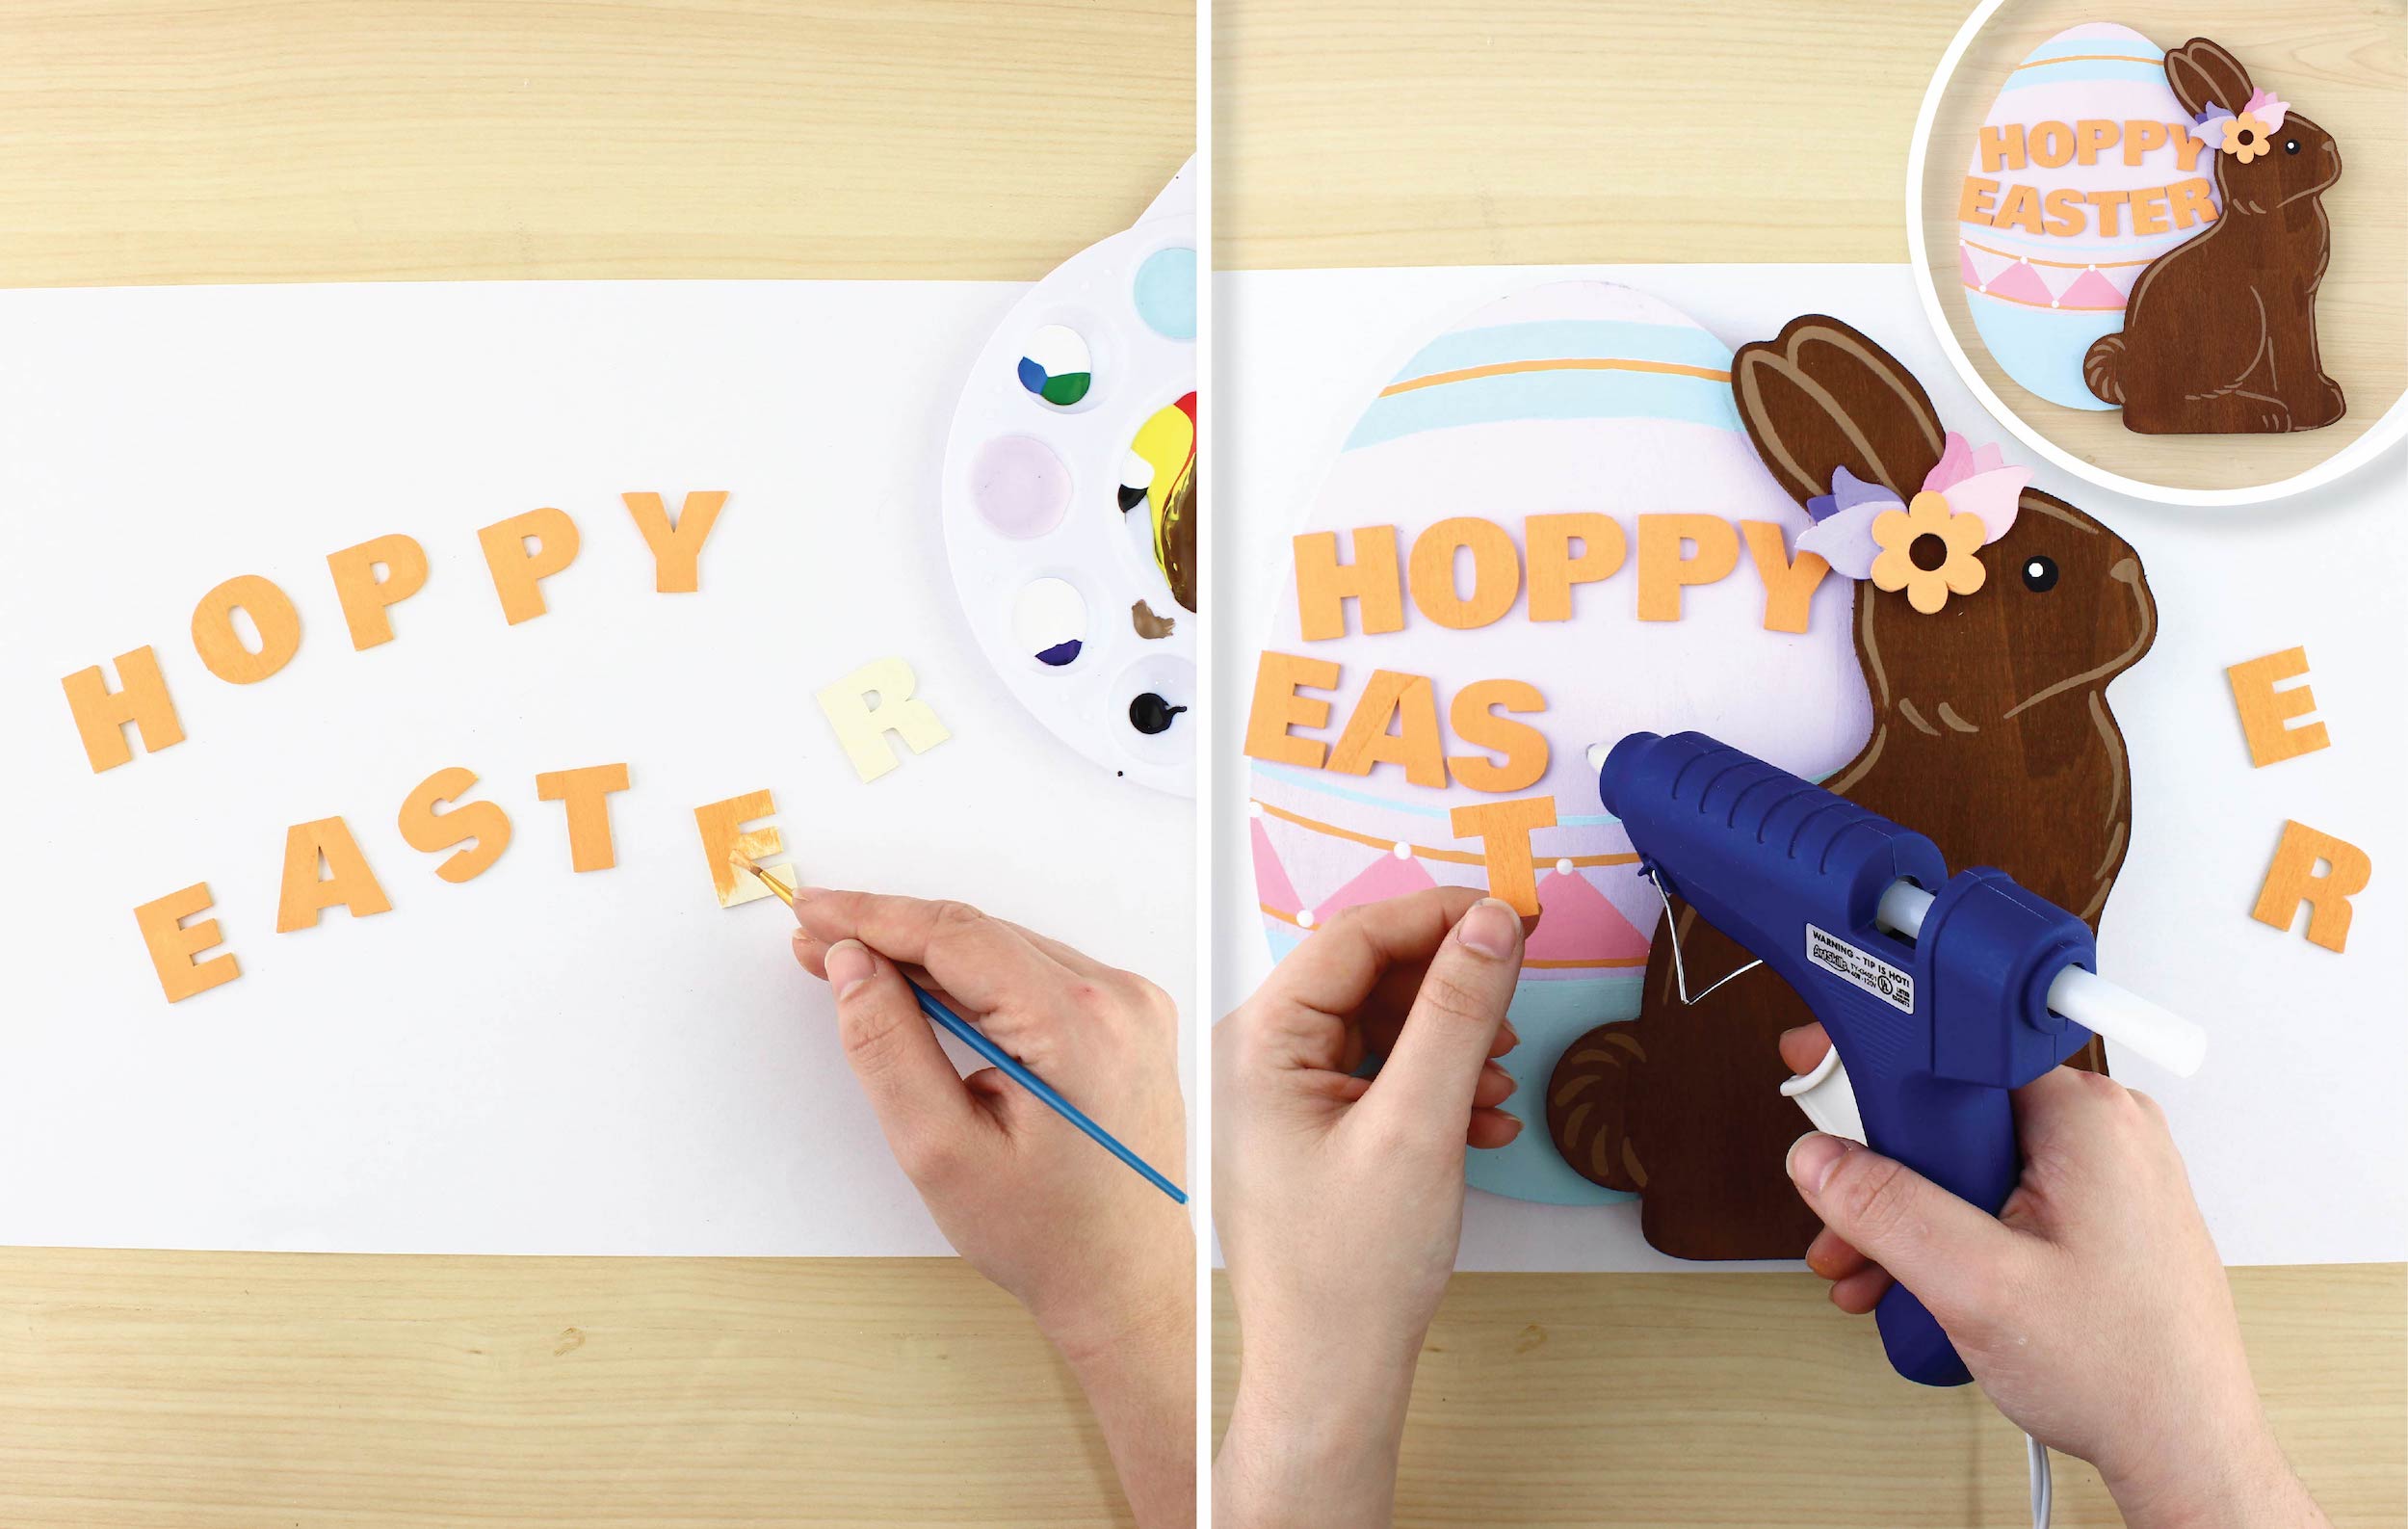
A) Using the mixed orange paint, paint the letters needed to spell ‘Hoppy Easter.’ Let dry.
B) Carefully Hot Glue the letter to the Wooden Easter Egg Plaque.
TIP:
A) To hang this on your door or wall, just Hot Glue a piece of Jute to the back!
