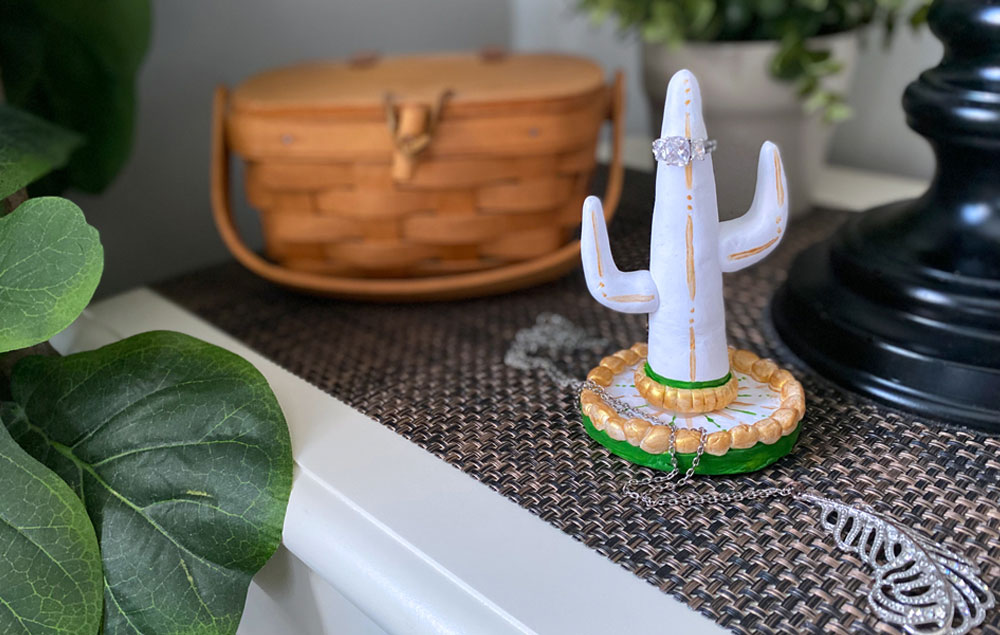
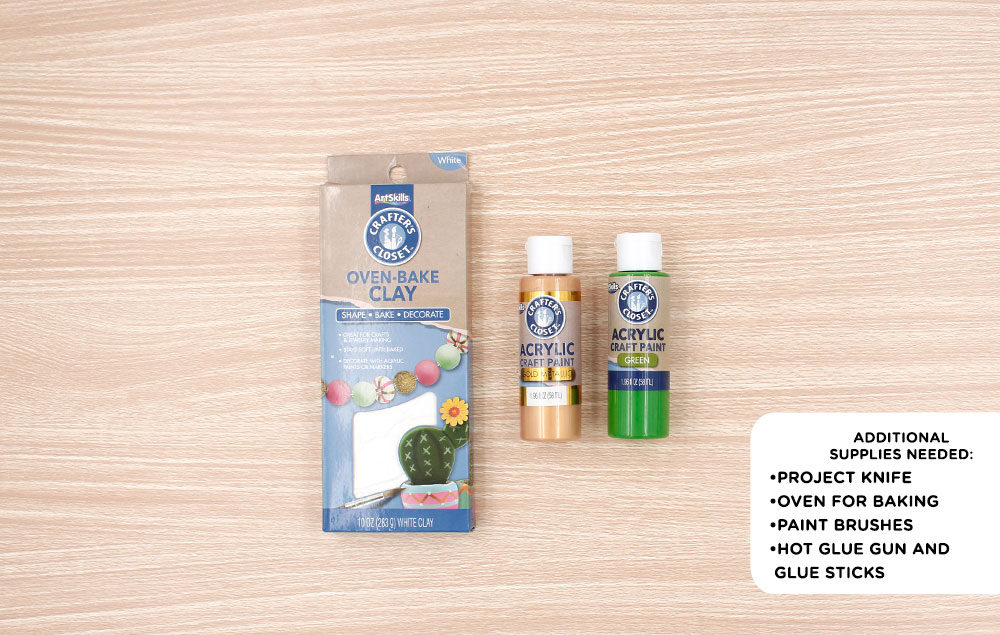
This is a perfect project to help keep your rings organized in a stylish way. Created with oven baked clay, this cool cactus is a nice addition to any décor.
Step 1:
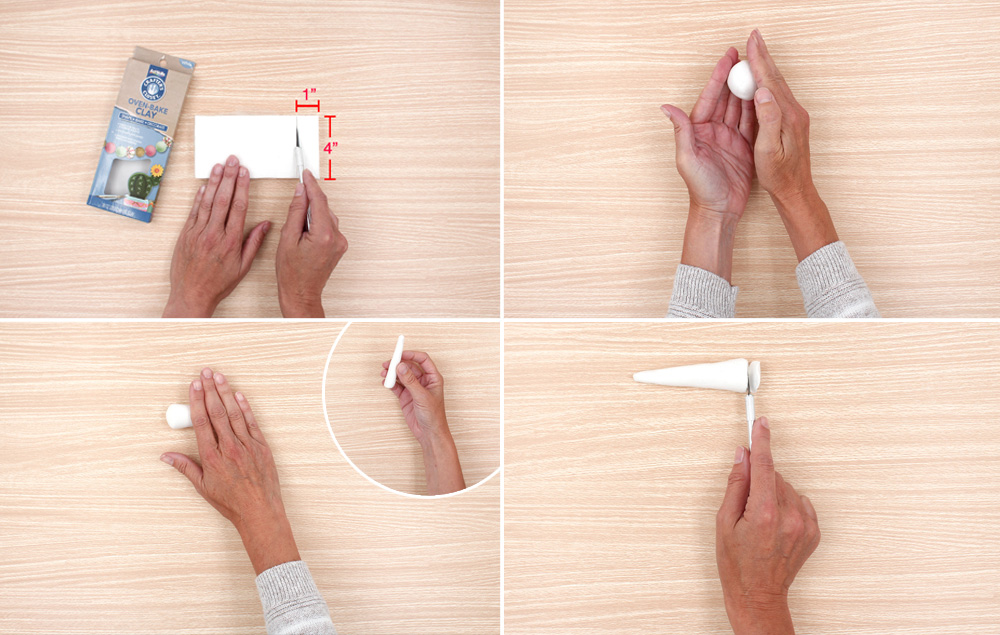
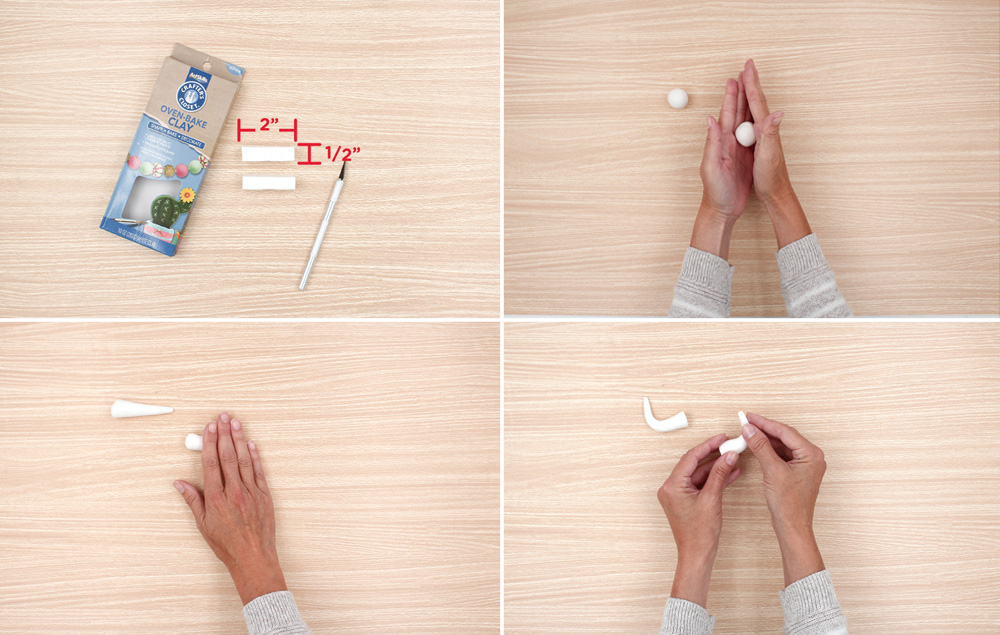
Cut a 4" x 1" x ½" rectangular piece of clay.
Roll the clay into a ball.
On a flat surface, roll the ball with your hand, using more pressure towards one end to taper the clay. Roll until one end is thinner than the other. Tip: Check thickness with a ring to make sure it fits.
Cut off extra clay to desired height, making sure the bottom is even so the cactus can stand.
Step 2:
Cut two 2" x ½" rectangular pieces of clay.
Roll into balls.
Roll the balls on a flat surface (like the cactus body) tapering at one end.
Bend arms at 90-degree angles.
Step 3:
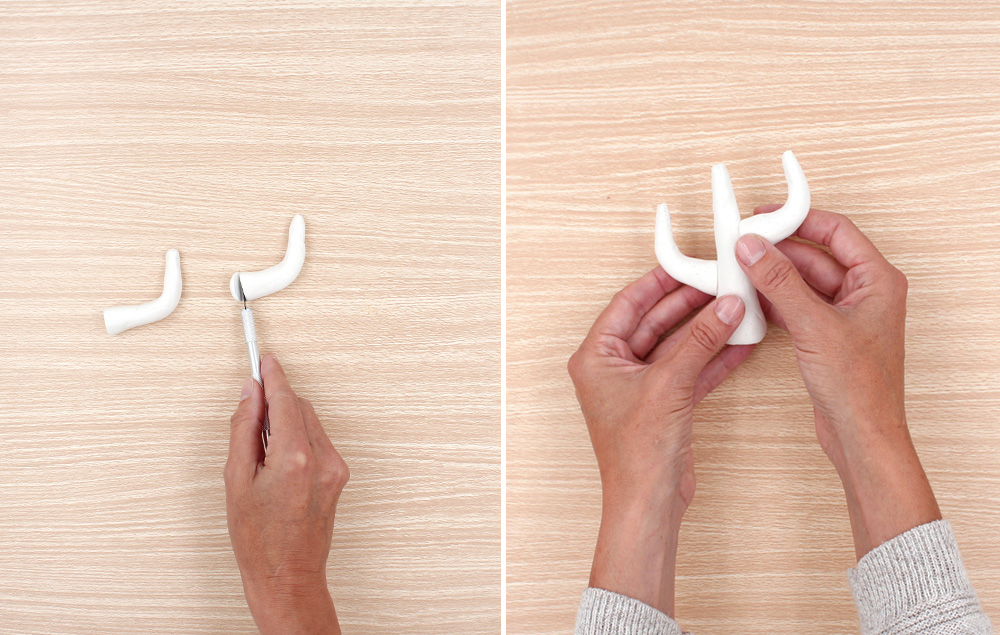
Cut off any extra clay for desired length. The clean-cut edge will help them stick to the body of the cactus.
Attach arms with light pressure, staggering the arms on opposite sides of the cactus body.
Step 4:
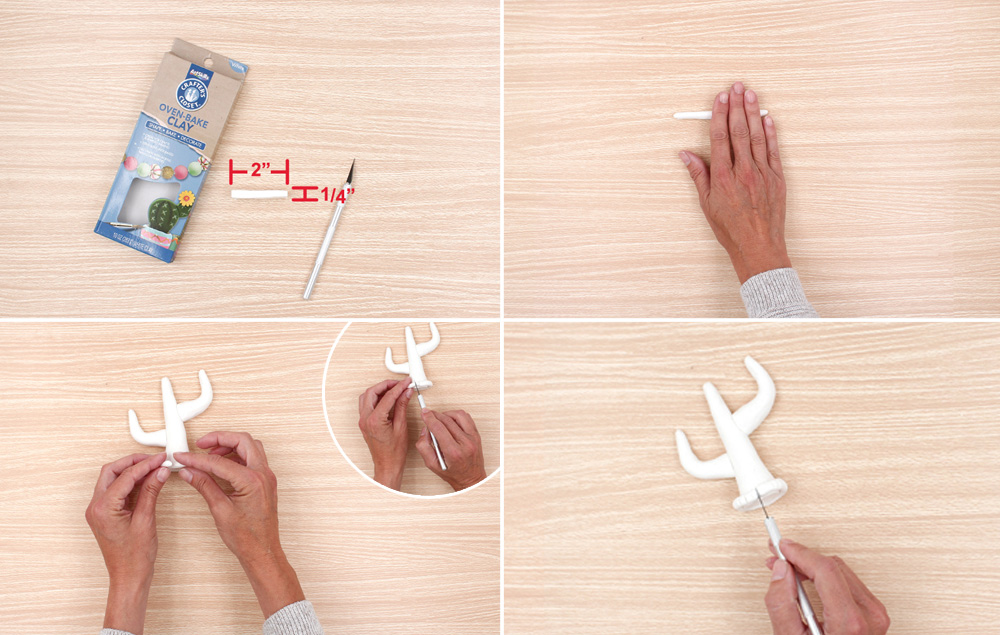
Cut ¼" x 2" rectangular piece of clay.
Roll out into a thin snake shape.
Wrap around bottom of cactus body. Cut off any extra clay.
Using a project knife, make indentations around the ring.
Step 5:
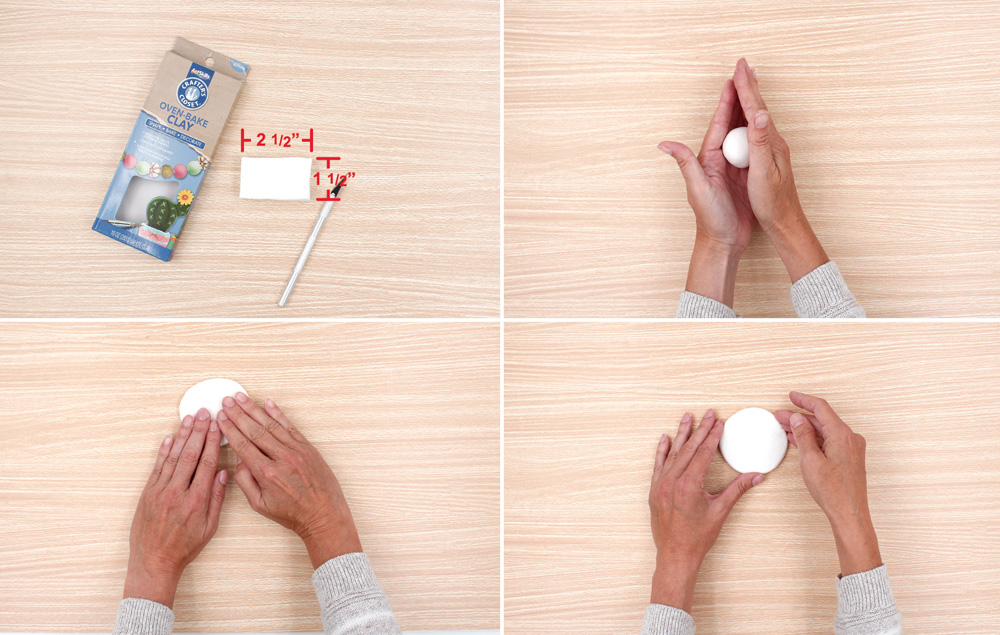
Cut 1½" x 2 ½" rectangular piece of clay.
Roll clay into a ball.
Press ball flat on an even surface. Press until ½" thick.
Push edges inward to round base into a circular shape.
Step 6:
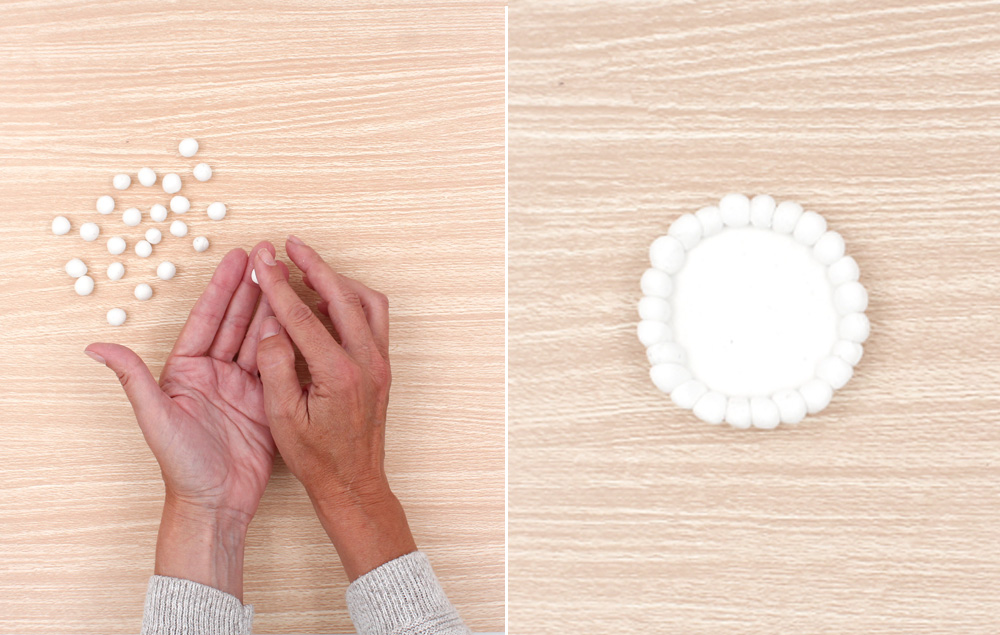
Roll approximately 25 small balls ¼" in size.
Place the balls around the edge of the base.
Step 7:
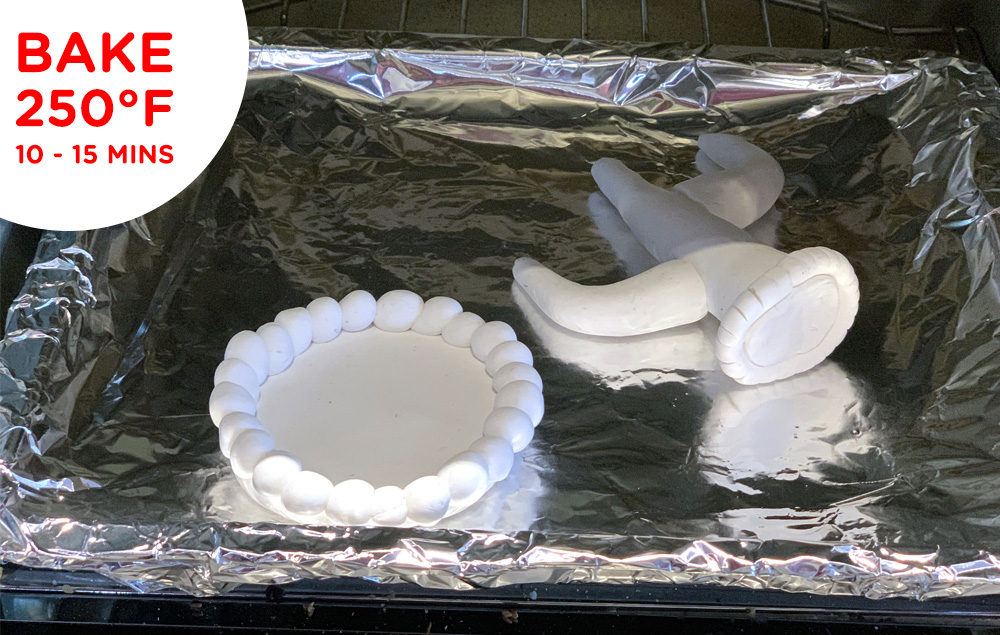
Bake the cactus body and base at 250 degrees for 10-15 minutes.
Step 8:
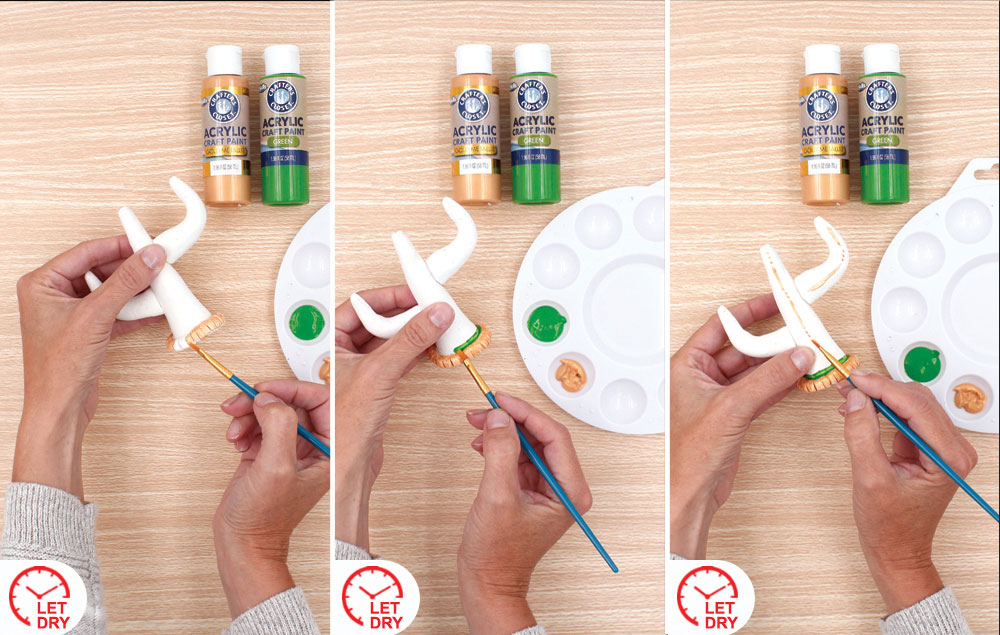
Paint the bottom band around the cactus base gold. Let dry.
Paint a green accent line above the gold band. Let dry.
Accent cactus body with gold stripes and dots down the center of the main trunk and arms. Let Dry.
Step 9:
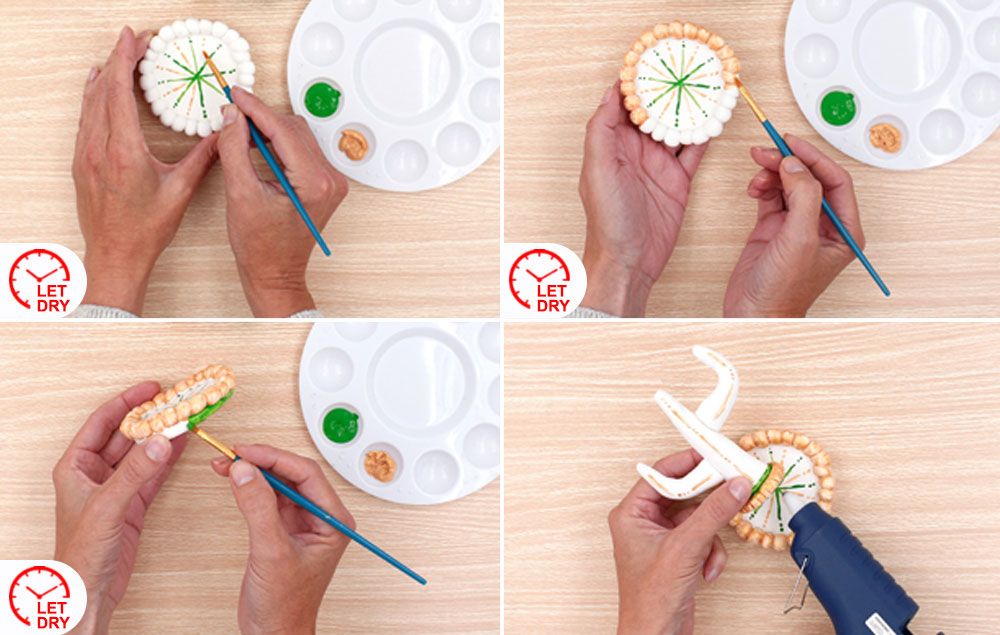
Paint thin lines and dots in a starburst on top of the base. This pattern can be similar to the one on the cactus body. Alternate between gold and green. Let dry.
Paint small balls gold. Let dry.
Paint side of base green. Let dry.
Hot glue cactus body to the base.
