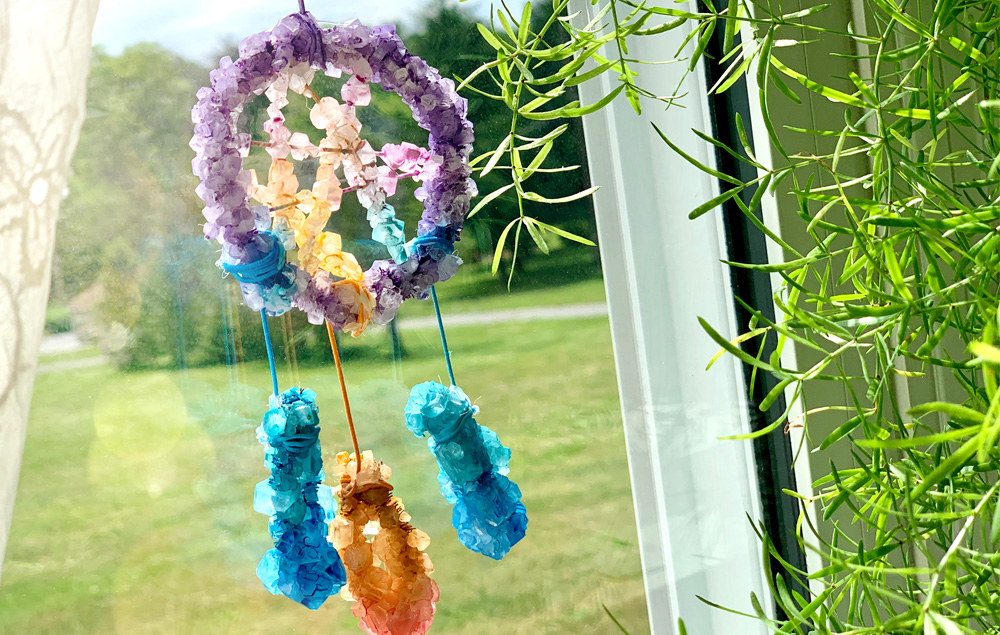
Grow your own crystals and watch them sparkle on this DIY dreamcatcher! This dreamcatcher is eye catching!
Step 1:
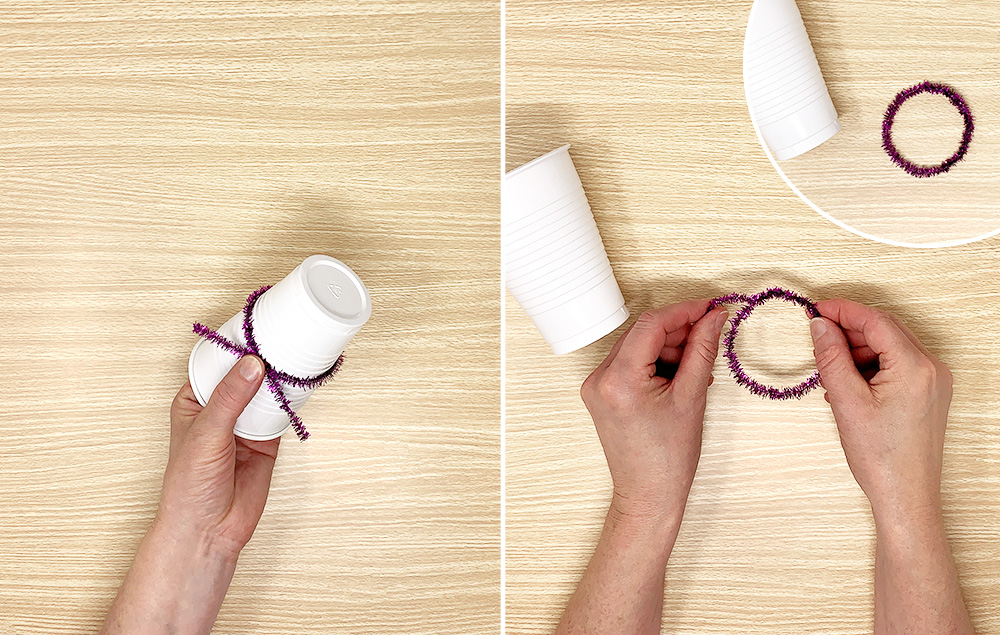
A) Make the base of the dreamcatcher with pipe cleaners. Shape a pipe cleaner around a drinking glass to make a circle. Tip: Some of the pipe cleaner might poke through the crystals and be visible, so be sure to pick pipe cleaner colors that you would like your dreamcatcher to be later.
B) Remove the circle shape from the glass and twist the extra pipe cleaner around the shape to finish it off. Tip: Make sure this circle can fit into your heat safe glass bowl and be fully submerged in water without touching the bottom of the container.
Step 2:
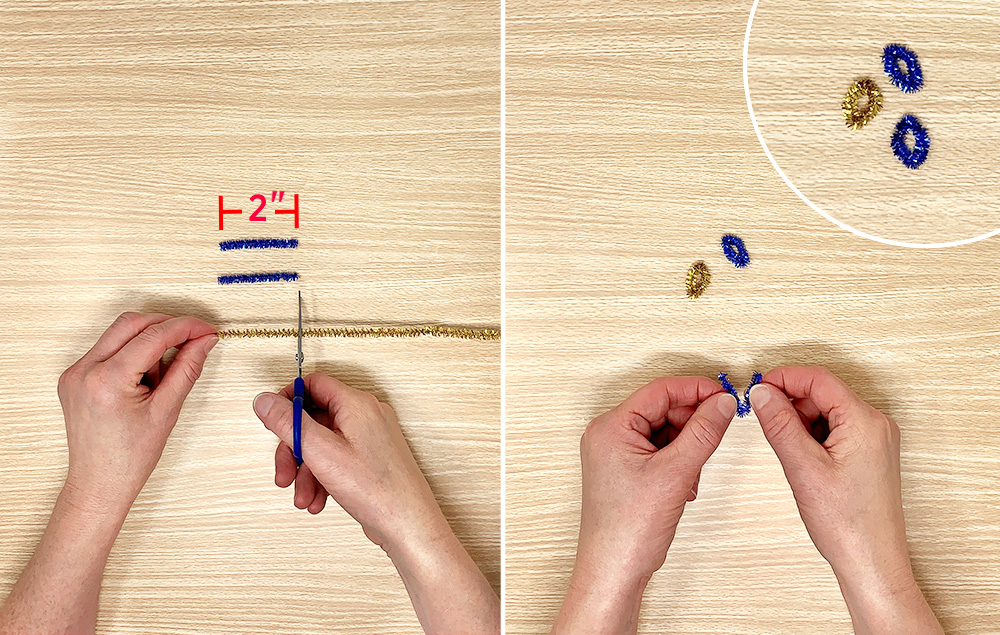
A) Cut three 2" pieces of pipe cleaner.
B) Fold pieces in half and twist at the top to close the teardrop shape.
Step 3:
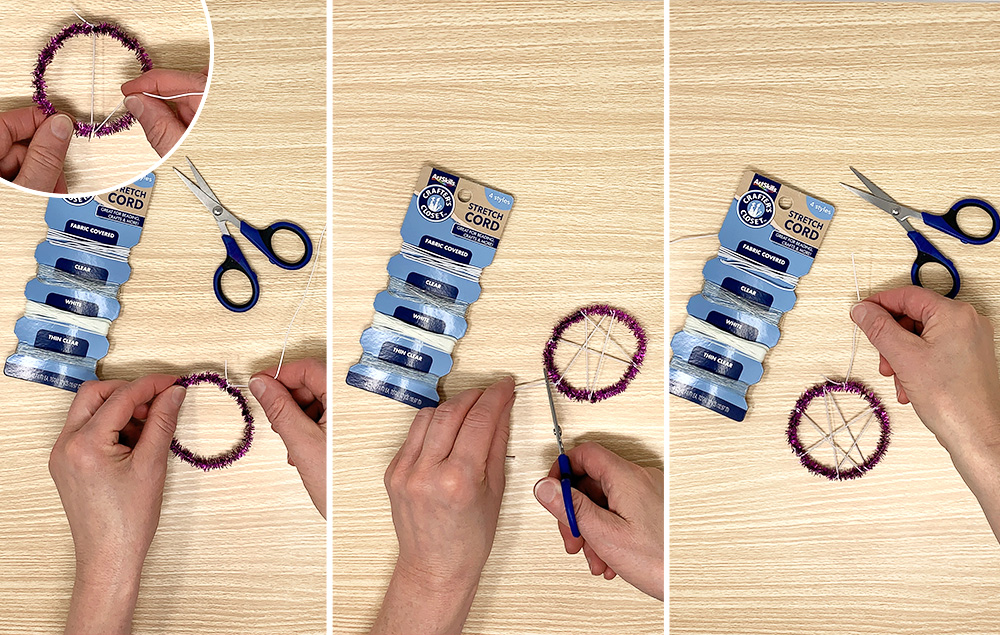
A) Using the white fabric cord, wrap and loop around the circular pipe cleaner. We used approximately 12" of cord to create a 3.5"x3.5" circle. This amount will vary with circle size. Tie a knot when finished.
B) Tie a string to the top of the circle, approximately 4" in length. This string size may vary depending on the depth of the glass container being used. Tip: Hang the dreamcatcher pieces close to the bottom of the glass container, without touching, to get better crystal growth.
Step 4:
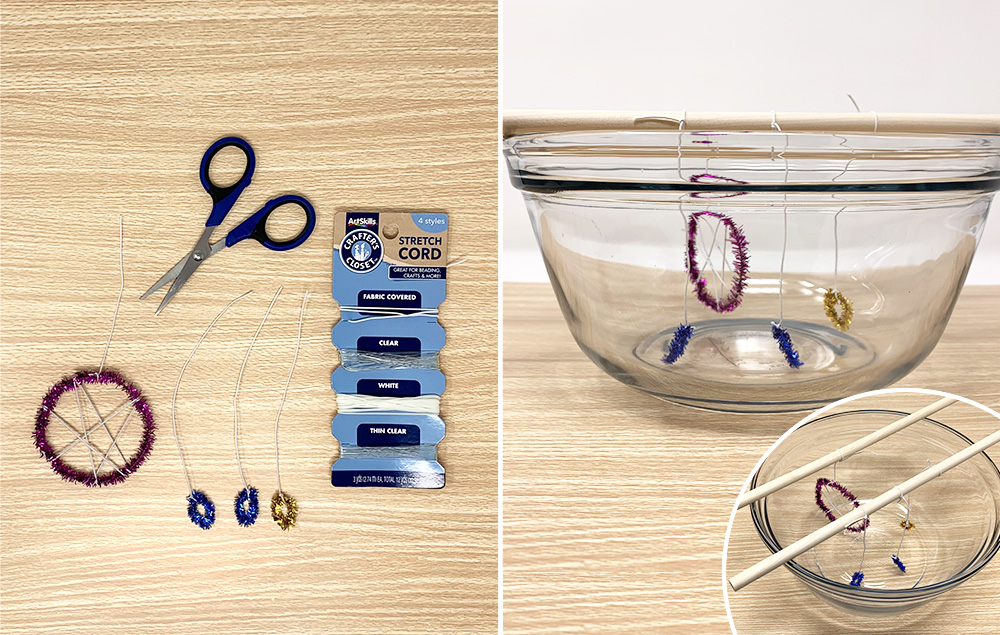
A) Make a cord to tie the smaller teardrop pieces with approximately 4" of white fabric cord, similar to the previous step.
B) Attach all the pieces to a wooden dowel or pencil. The dowel or pencil needs to be long enough to extend across the rim of the heat safe glass container. Give the pieces room between tying them to the dowel so they do not touch. Tip: Test placing these on top of the glass container to make sure they hang correctly.
Step 5:
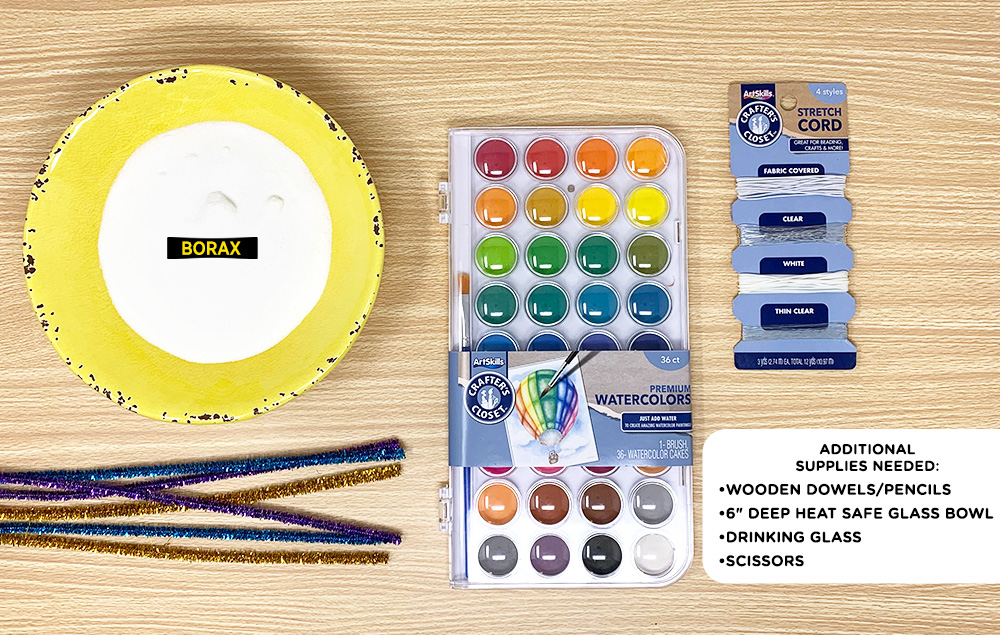
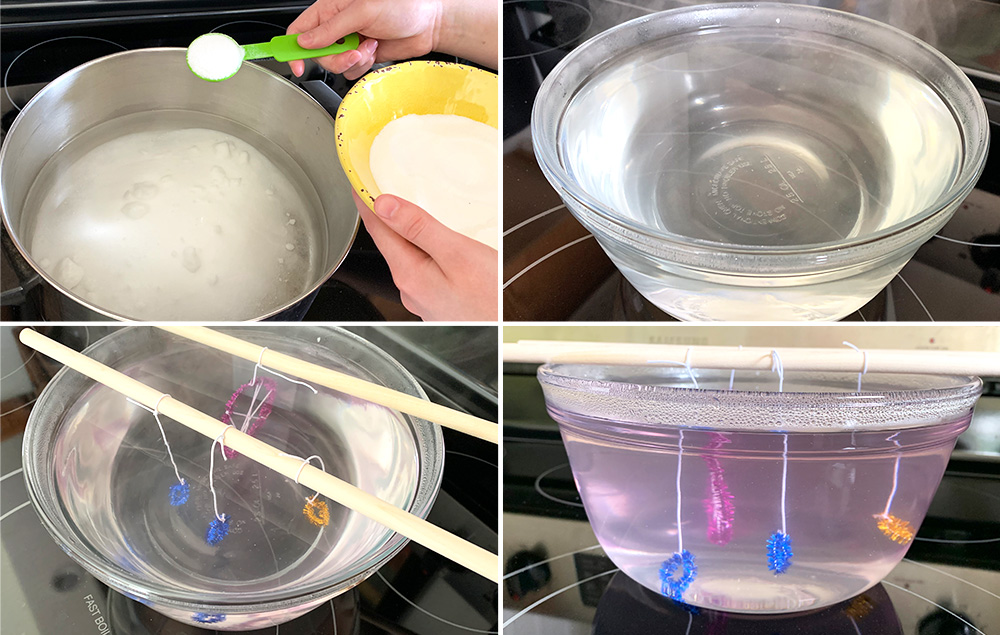
A) With the help of a parent, let’s make the Borax solution. Bring enough water to fill the heat safe glass container to a boil in a pot on stovetop.
B) Add 4-5 tbsp. of Borax for each cup of water used in the previous step. Stir the Borax into the water until it is fully dissolved. Tip: Enough Borax has been added when it does not dissolve any longer. This will leave the water slightly cloudy.
C) Pour the hot Borax solution into the heat safe glass container.
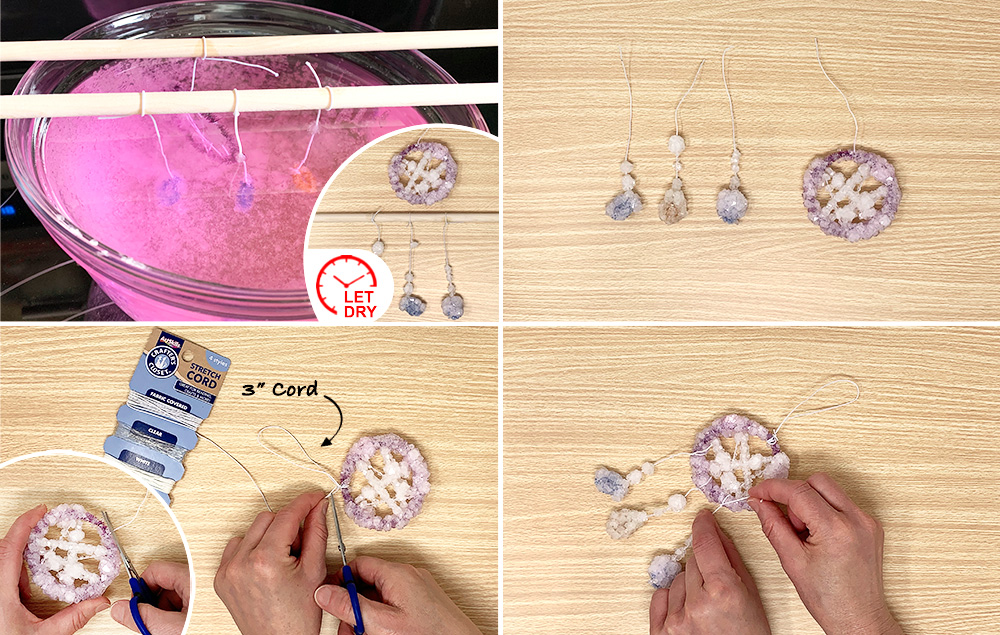
D) Place the strung pieces of the dreamcatcher into the water, letting the dowel or pencil rest on the rim of the container. Let sit for 24 hours. Tip: Cover container with a magazine for faster results.
Step 6:
A) Remove dreamcatcher pieces once desired crystal coverage is reached. Place crystal pieces on a napkin and let dry and harden. Tip: If excess crystals cover the bottom of the glass container, remove them by adding hot water and breaking them up with a spoon.
B) Cut crystal pieces from wood dowel. Tip: Cut close to the dowel to keep the cord long.
C) Cut off cord that was used to hang the circular crystal piece previously. Tie a loop at the top center of the circular piece with the 6" cord.
D) Tie the dangling crystal pieces to the circular piece. Tip: Keep the single-color piece in the middle and the two same color pieces on each side.
Step 7:
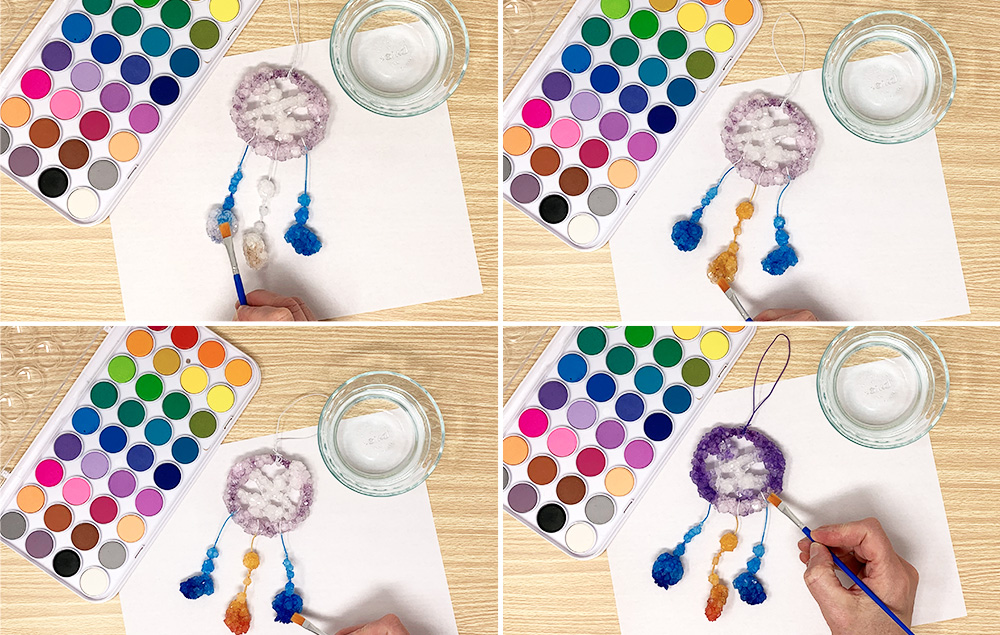
A) Let’s add color! Paint the string and crystals with watercolor paints. Paint the two outside hanging pieces a color of your choice.
B) Paint the middle piece a different color from the two outer ones. Tip: Choose contracting color pairs to make the colors pop!
C) Paint the bottom of the hanging pieces with similar but darker colors to create a gradient. For example: Blue and dark blue, orange and dark red.
D) Paint the circle hoop edge and the cord loop a different color than the rest.
Step 8:
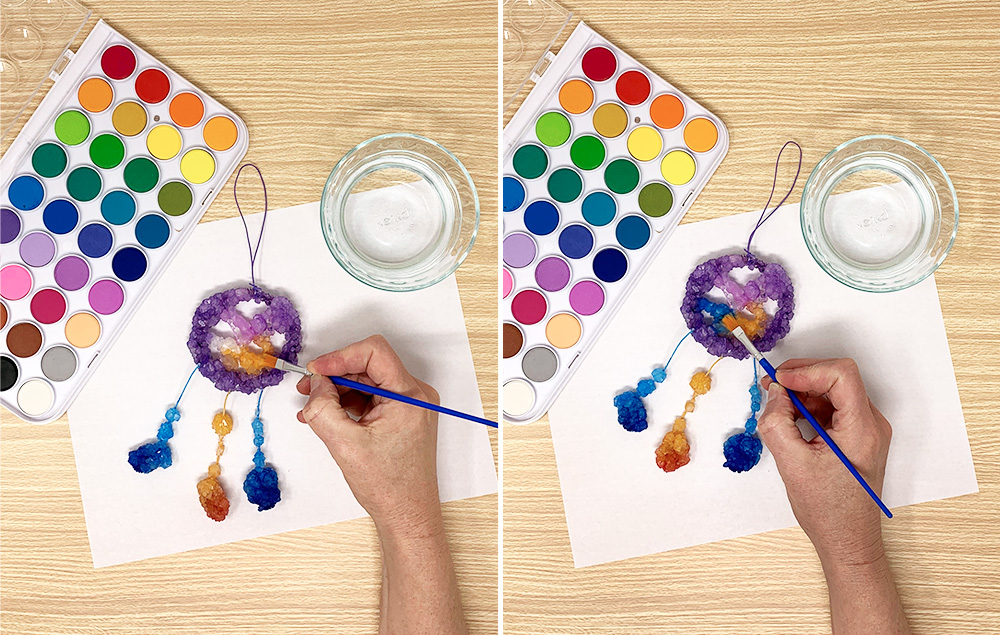
A) Let’s add paint to the white cord and crystals in the center of the dreamcatcher! Bring color used on the hanging center crystal piece into the lower strings in the circle. Cover upper cord strings with a lighter version of the color used on the hoop.
B) Bring color used on the two side hanging pieces into the lower strings in the circle. Let dry.
